
BigBucks000100
-
Posts
12 -
Joined
-
Last visited
Content Type
Profiles
Forums
Store
Gallery
Events
News
Tutorials
Posts posted by BigBucks000100
-
-

CUSTOM MAPS (FOR XBOX)
=================================================================================================================================
WHAT I'LL SHOW YOU:
How to install custom maps made with SWRC's PC map editor and make them selectable in the ingame menus, ready to play over split-screen, System Link/XLink Kai and Insignia (Xbox Live)
WHAT I WON'T SHOW YOU:
How to make maps and mods for SWRC. There are many tutorials and resources online that will teach you how to use the Unreal editor and SWRC-specific assets. This thread assumes that you already have a map prepared to install to the Xbox version.
How to mod your Xbox or connect to it via FTP. There are loads of videos on YouTube that'll show you how to do this (if you're on this site, you should already know this stuff anyway).
=================================================================================================================================
Unlike most other Unreal Engine games on Xbox, SWRC uses a similar file format to it's PC counterpart for maps (.ctm). This makes it very straightforward to port maps made for the PC version to Xbox.
WHAT YOU NEED:
A modded Xbox console (softmodded or hardmodded)
A copy of Star Wars Republic Commando installed to the HDD/SSD/CompactFlash card/magnetic tape reel/whatever
A modded dashboard capable of FTP (I recommend UnleashX or XBMC4Gamers)
An FTP client on your PC (I recommend FileZilla)
A text editor (Notepad is sufficient)
NOTE:
Make sure you backup your vanilla copy of SWRC so that if you screw something up, you may revert any changes you make!
=================================================================================================================================
For this tutorial, we'll be using my port of DM-1on1-Idoma from Unreal Tournament 2004 as an example. It is available for download here:
https://www.xbox-scene.info/files/file/306-star-wars-republic-commando-custom-map-idoma/
=================================================================================================================================
Typically, to install maps for SWRC on PC, one would simply copy the main map file (.ctm) to the Maps folder and copy any custom assets not included in the map file itself to their respective folders (StaticMeshes, Textures, etc.).
The map would then be playable by typing open <mapname>.ctm into the developer console.
But since we're playing the Xbox version, we don't have access to the developer console. Instead, we must edit a few configuration files to get the map to appear in the maplist.
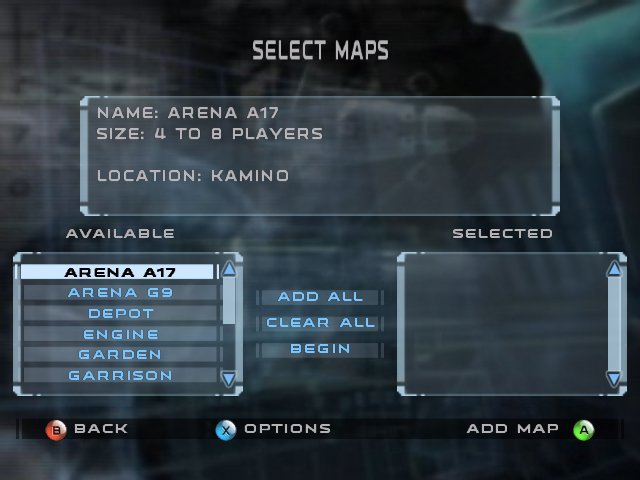
Pictured: The ingame maplist (note the absence of our custom map in the list)
=================================================================================================================================
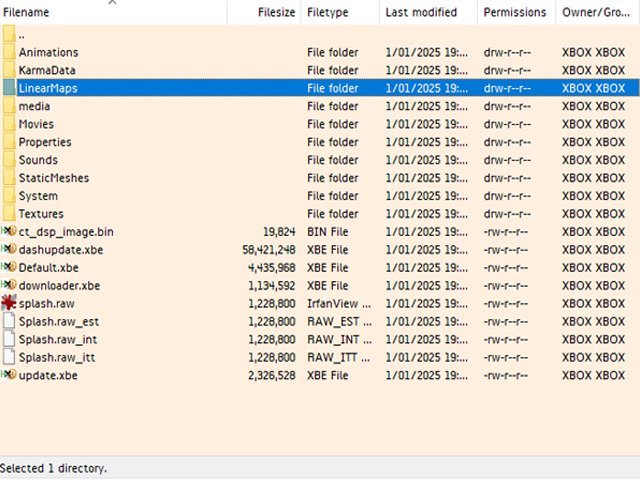
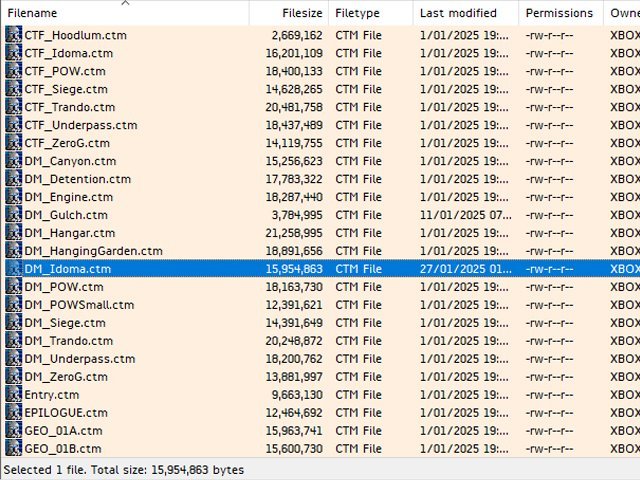
Let's start by installing the map itself. If your map only uses assets included with SWRC or otherwise doesn't require additional packages, all you'll need to do is connect to your console via FTP and navigate to the root directory of your SWRC copy. Once you have done this, simply copy the .ctm file to the LinearMaps folder. If your map has additional packages such as static meshes or textures, these must be installed to their respective folders too. Idoma has all of it's custom assets saved to the MyLevel package so we don't need to add any additional packages in this case.
=================================================================================================================================
Our map is now installed. Now, we need to get the game to display it in the maplist so that we can select and play it. This is done by modifying three plaintext files in the System folder.
The files we need to modify are as follows:
LevelLoadingInfo.int - defines what is displayed on the loading screen for each level in the game
XMapList.int - defines entries in the map selection screen, as well as other information such as supported gamemodes and whether the map should appear in the split-screen maplist
XMaps.int - defines map descriptions
We will need to add entries in each of these files that correspond to our map to get it to appear.
Note that there are more files with the same name as the ones listed above but with different extensions such as .itt and .est. These are alternate language versions of the files that are used if your console language is set to the corresponding language (Italian and Spanish, respectively). .int is the extension used for the international versions of these files and will be used by the game when the console is set to any other language, including English.
Copy the three files listed above from the System folder to your PC and open them in your preferred text editor.
=================================================================================================================================
LevelLoadingInfo.int
Navigate to the bottom of the file and create a new entry for DM_Idoma as follows:
QuoteMapName[77]="DM_Idoma"
LoadingMenuClass[77]="XInterfaceCTMenus.CTLoading"
LoadingTitle[77]="IDOMA"
LoadingShowHints[77]=0MapName defines the filename to be called when the map is selected. Our map file is DM_Idoma.ctm so we put DM_Idoma in this field.
LoadingMenuClass defines which loading screen actor class our map should call when selected. All stock multiplayer maps use XInterfaceCTMenus.CTLoading so we will also use this to maintain consistency.
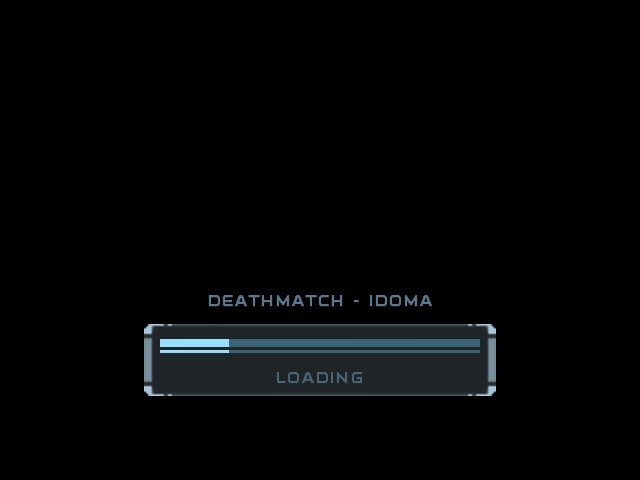
LoadingTitle defines the map name that is displayed above the loading bar next to the gamemode
LoadingShowHints determines whether we should show hints on the loading screen like the campaign level loading screens do. Since we're using a different actor class from the campaign maps, we'll leave this disabled. This is also consistent with the stock maps.
Each field is numbered 77 since there are 76 other maps before ours in the file (CTF_Hangar should be number 76, for example). If you install additional maps, they will need to be numbered accordingly.
Pictured: How our loading screen will look when the map is selected. Note the name of the map being displayed after the gamemode, thanks to what we put in the LoadingTitle field
=================================================================================================================================
XMapList.int
Add a new entry for our map at the bottom of the list as follows:
QuoteMap+=(FileName="DM_Idoma",LongName="Idoma",Screenshot="MapThumbnails.CST_Idoma",Text="Xmaps.CST_Idoma",IdealPlayerCountMin=4,IdealPlayerCountMax=8,GoalScore=30,TimeLimit=10,FragLimit=10,SupportedGames="DM,TD",bSplitScreenOK=1,bNetworkOK=1)
FileName as in the previous file, refers to the map's filename.
LongName determines what the map's name will appear as in the maplist.
Screenshot goes unused in SWRC but we can fill it out anyway to stay consistent with the stock maps. This would've been used to display an image that would appear when the map is highlighted in the menu. Check out Unreal Championship if you want to see what this would've looked like since the maplist screen in that game functions very similarly to SWRC and vice versa.
Text searches for the map's description outlined in XMaps and displays it in the description box at the top of the screen.
IdealPlayerCountMin, IdealPlayerCountMax, GoalScore, TimeLimit and FragLimit don't appear to do anything, as all of these settings can be changed when starting a lobby ingame.
SupportedGames defines which gamemodes the map should appear under. Valid options for this field are as follows:
DM - Deathmatch
TD - Team Deathmatch
CTF - Capture the Flag
AS - Assault
Any Deathmatch map will be automatically compatible with Team Deathmatch so make sure to include both modes in this field. The same goes for CTF and Assault.
bSplitScreenOK determines whether the map is playable in split-screen. If this is set to 0, the map will not appear in the list when split-screen is selected. Leave this set to 1 unless your map is so poorly optimized that it breaks when played in split-screen.
bNetworkOK presumably determines whether the map appears in the list when System Link or Xbox Live is selected. No idea why this should ever be set to 0
=================================================================================================================================
XMaps.int
Add a new entry for our map at the bottom of the list as follows:
QuoteCST_Idoma="LOCATION: Unknown Planet||Small atmospheric map set in a building constructed out of lots of wood and metal.||"
This file simply determines the flavour text that will appear in the description box at the top of the maplist screen when our map is highlighted. I use the three-letter identifier, CST to differentiate the map from the stock maps. Ensure that you include this identifier when filling out the Text field in XMapList.int.
You can put any text you want in this file but I include the location in which the map is set to maintain consistency with the stock maps.
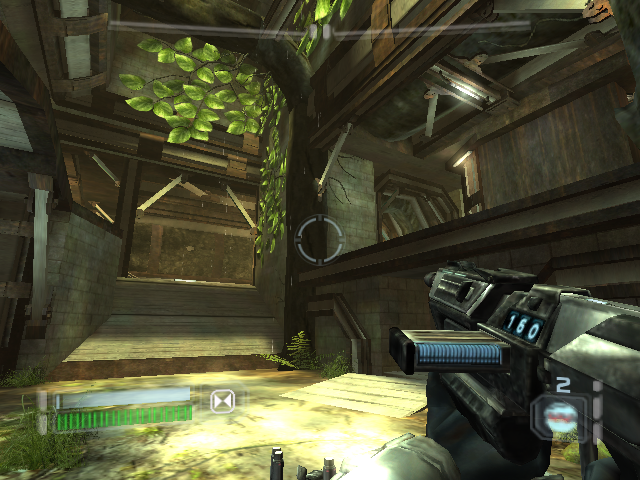
Pictured: Our map now appears in the maplist and can be selected and played
=================================================================================================================================
Copy LevelLoadingInfo.int, XMapList.int and XMaps.int back into the System folder in your SWRC directory and overwrite all files when prompted. If you followed all of these instructions correctly, your map will now be playable ingame. Well done!
=================================================================================================================================
CREDITS:
Me, I figured out and documented all of this

=================================================================================================================================
-
 1
1
-
-
On 8/13/2023 at 12:20 PM, LM666 said:
Still setting my consoles up (damn aussie connection taking ages!)
Do you run NTSC or PAL? Just wanna make sure my games are setup correctly in future.Sorry for the late reply (I don't check here often) but in most cases, it won't matter what region you use but in cases where PAL and NTSC copies of particular games aren't compatible, we opt for NTSC
-
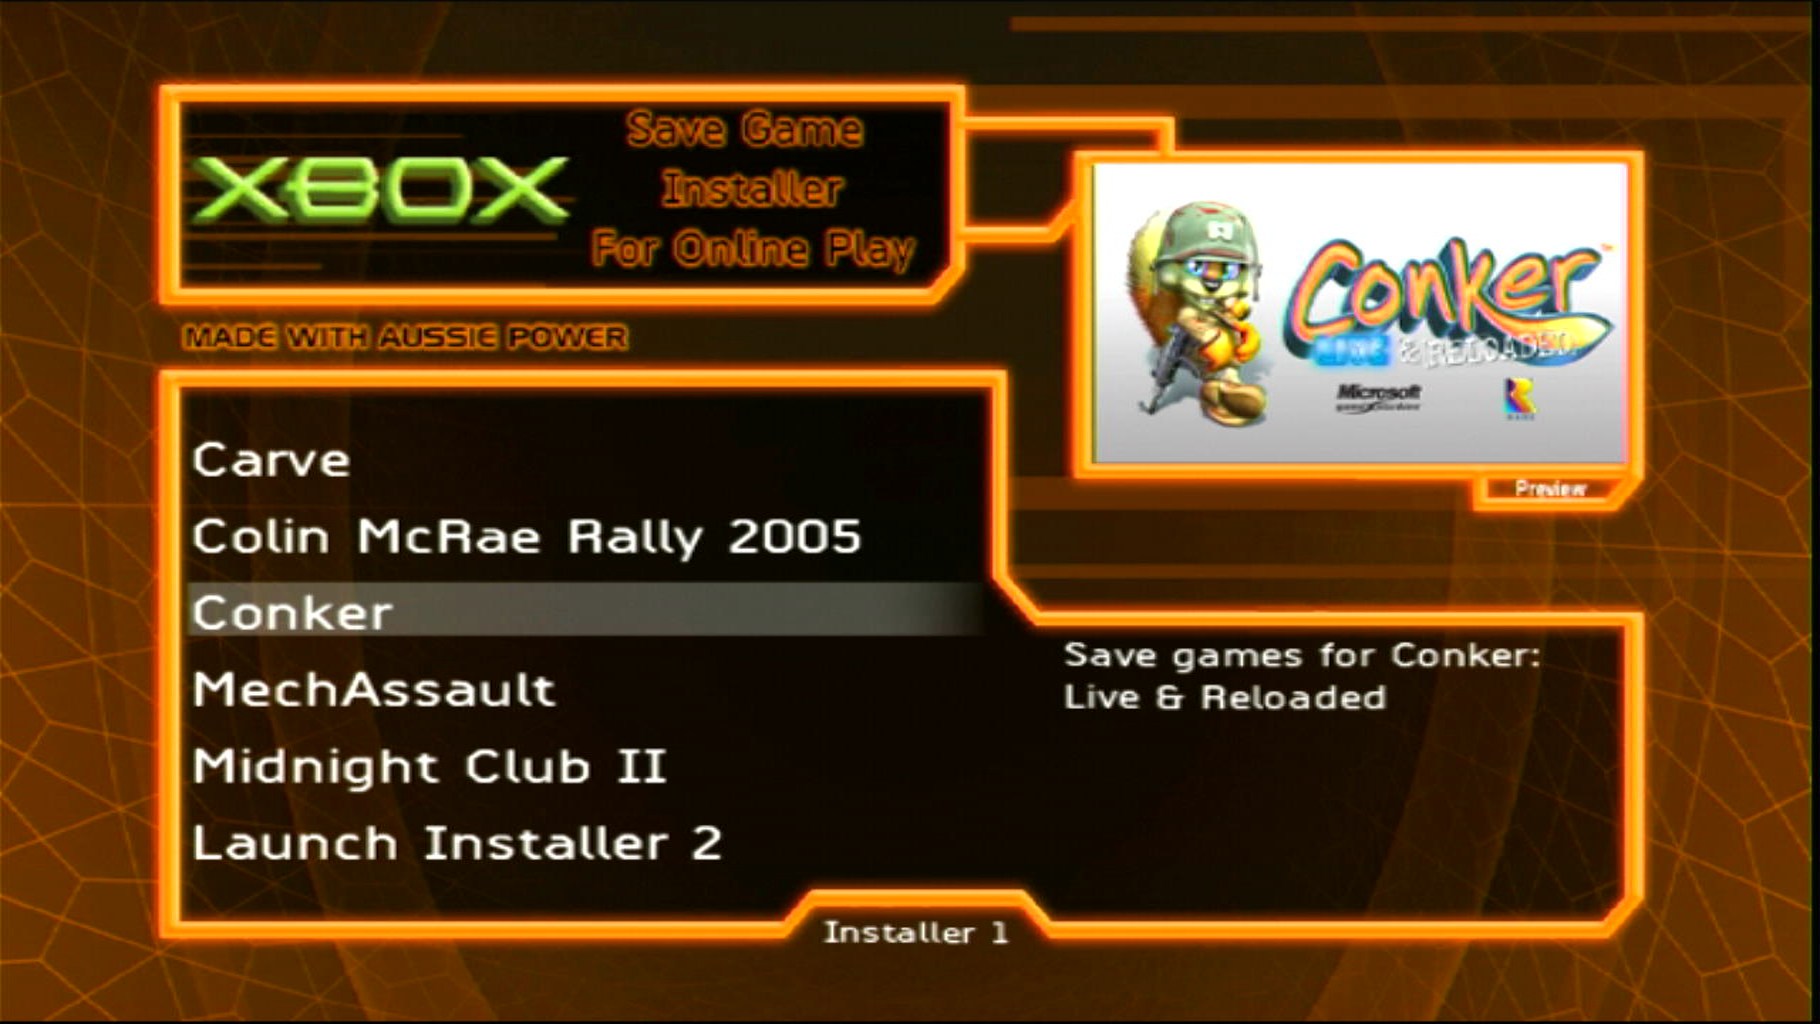
Xbox Save Game Installer For Online Play
This installer contains saves for Insignia-supported games that require certain pieces of content to be unlocked (vehicles, levels, characters, etc.) before they can be used online and/or in other multiplayer modes.
==============================================================================================================================
INSTALLATION:
To install, simply FTP the "Save Game Installer" folder to your Xbox console and run the "default.xbe" file contained within using your preferred dashboard.
You can run it directly through a file browser or you can run it from your dashboard's Apps/Applications menu, provided you FTP'ed it to your usual Applications folder.You can also convert the folder into an xISO using a tool such as Qwix or extract-xiso if you wish to run this installer on xemu.
USAGE:
Once inside the installer, simply select which saves you wish to install from the menu.
Please note that some saves cannot be installed if you already have a save of the same type on your HDD, these saves will include a notice in their description with further explanation. PLEASE READ THE DESCRIPTIONS.
==============================================================================================================================CREDITS:
Art & INX files - BigBucks000100
XBE files - Harcroft & HALO
Additional save edits - BigBucks000100
Additional support - Harcroft
Background music - OutSource - Plazma
UI SFX - Unreal Championship (Digital Extremes & Epic Games)SAVE FILES PROVIDED BY:
BigBucks000100
Charles Lee Ray
Jay 'FNG' Philbrook
the SEGA shop/bLiGhTy
ViolentKyo
YAbbA
...and one or more unknown contributors==============================================================================================================================
Special thanks to the Insignia team for all of their work so far.Disclaimer: None of the contributors to this installer are affiliated with Microsoft, the Xbox brand, or the Insignia service.
==============================================================================================================================
-
Submitter
-
Submitted07/19/23
-
Category
-
-
Got a playlist of over 300 metal tracks but heres a few I've been listening to lately
-
 1
1
-
-
Unreal Championship
Unreal Championship 2: The Liandri Conflict
Star Wars Republic Commando
Splinter Cell Chaos Theory
and I hadn't ever played America's Army: Rise of a Soldier until it came out on Insignia but its quickly become a favourite since then-
1
-
-
yeah i heard thats a really cool server


member upload: Star Wars Republic Commando Custom Map - Idoma
in Game Hacking
Posted
View File
Star Wars Republic Commando Custom Map - Idoma
DM-1on1-Idoma from Unreal Tournament 2004, ported to Star Wars Republic Commando.
================================================================================================================================================
IDOMA
================================================================================================================================================
[Description]
LOCATION: Unknown Planet
Small atmospheric map set in a building constructed out of lots of wood and metal.
[Ideal Player Count]
4-8
[Modes]
Deathmatch
Team Deathmatch
[Playable in Split-screen]
Yes
================================================================================================================================================
[Installation]
1. Make a backup of your stock Republic Commando game files.
2. Transfer the "LinearMaps" and "System" folders into the root directory of your Republic Commando copy (same directory as default.xbe) and overwrite all files when prompted. FTP is the easiest way to do this.
If done correctly, the map should appear in the map selection menu when creating a lobby.
The "!Screenshots" folder and this ReadMe file do not need to be transferred over.
================================================================================================================================================
[Credits]
Sjoerd "Hourences' De Jong - Original map and meshes (http://www.hourences.com/)
BigBucks000100 - Map port from UT2004 to SWRC and gameplay edits
Leon - Various fixes and custom UCC for the Republic Commando PC version and editor (https://github.com/SWRC-Modding/CT)
Metallicafan212 - Selection fix for UT2004's editor
Special thanks to various people from the SWRC Modding, XBOX-SCENE and OldUnreal Discord servers
SWRC Modding - https://discord.gg/AQNy2a5
XBOX-SCENE - https://discord.gg/VcdSfajQGK
OldUnreal - https://discord.gg/thURucxzs6
Extra special thanks to the Insignia team and Team XLink for helping keep the original Xbox online!
https://insignia.live/
https://www.teamxlink.co.uk/
This map has only been authorized to be shared on https://www.xbox-scene.info
If you obtained this map from anywhere else, it was uploaded without the creator's permission.
================================================================================================================================================