

HoRnEyDvL
-
Posts
90 -
Joined
-
Last visited
-
Days Won
2
Content Type
Profiles
Forums
Store
Gallery
Events
Downloads
News
Tutorials
Posts posted by HoRnEyDvL
-
-
-
-
Thank you for your contribution

-
 1
1
-
-
22 minutes ago, Harold_Bally said:
where is the mega upload link
I think it be only be 1fichier links from what i can see.
-

Its in the first post you need to like the post & it will unhide-
 1
1
-
-
1 minute ago, maximo_yin said:
感谢楼主的分享!!!
Hi English please
-
Looking forward to see what skins people come up with
https://github.com/Team-Resurgent/PrometheOS-Skins
-
1
-
-
Original Article by Markus Gaasedelen (https://blog.ret2.io/2023/08/09/jtag-hacking-the-original-xbox-2023/) Archive by X-S
Released in November 2001, the original Xbox was Microsoft’s first venture into the game console industry. With its hardware closely resembling a cheap but versatile PC of the early 2000s, the device came under the immediate scrutiny of technical hobbyists looking to run ‘homebrew’ code and alternative operating systems on it.Over the course of its lifetime, the Xbox was unilaterally hacked through a broad range of both hardware and software attacks. But at 20 years old, this Intel-based Pentium III system holds up as an amazing platform to learn or explore a plethora of security and computer systems engineering topics that are still relevant to this day.
As a fun departure from our usual content, this post exploits some nostalgia to tackle a challenge put forth by some of the earliest musings of the original Xbox researchers: “hacking” the original Xbox via Intel’s x86 CPU JTAG.
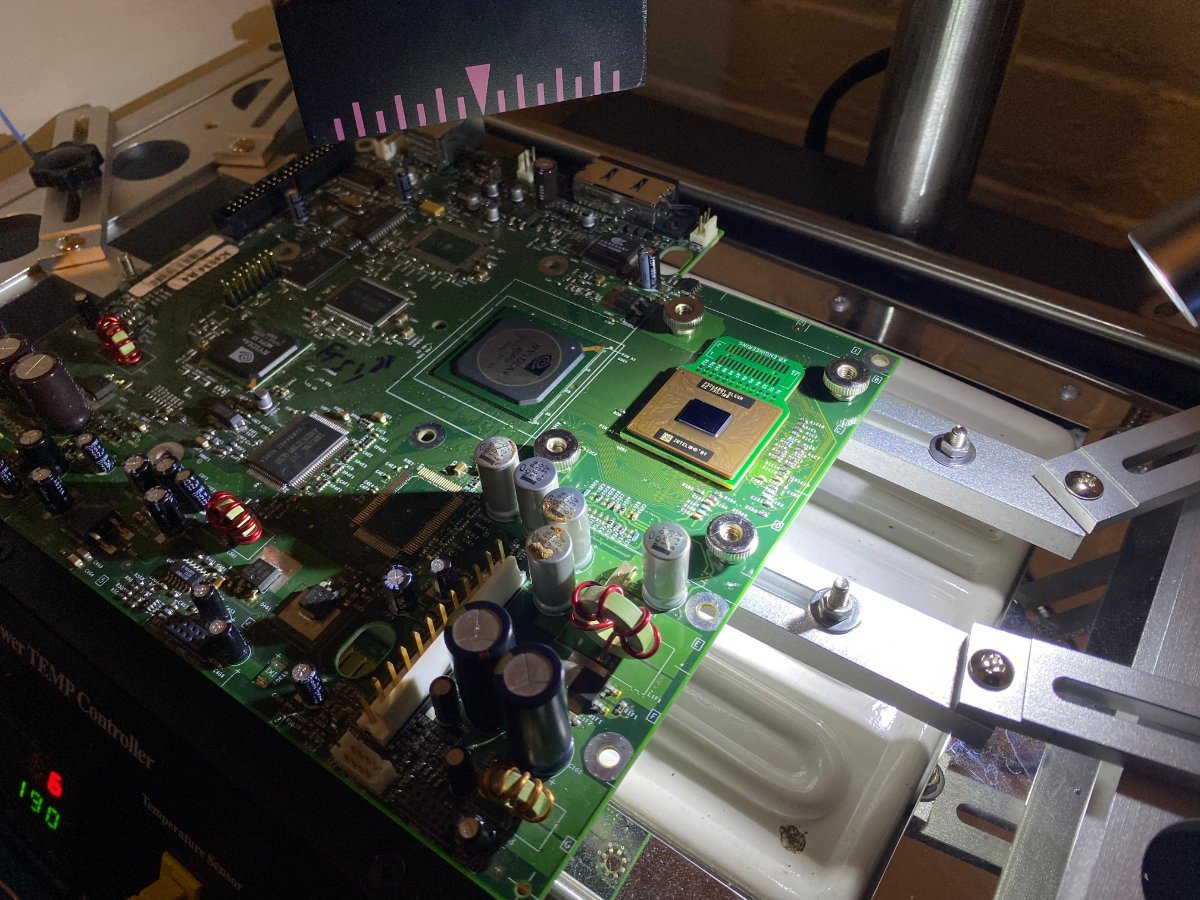
Hardware debugging the original Xbox CPU (Pentium III) using a custom JTAG CPU interposer
About the Original Xbox
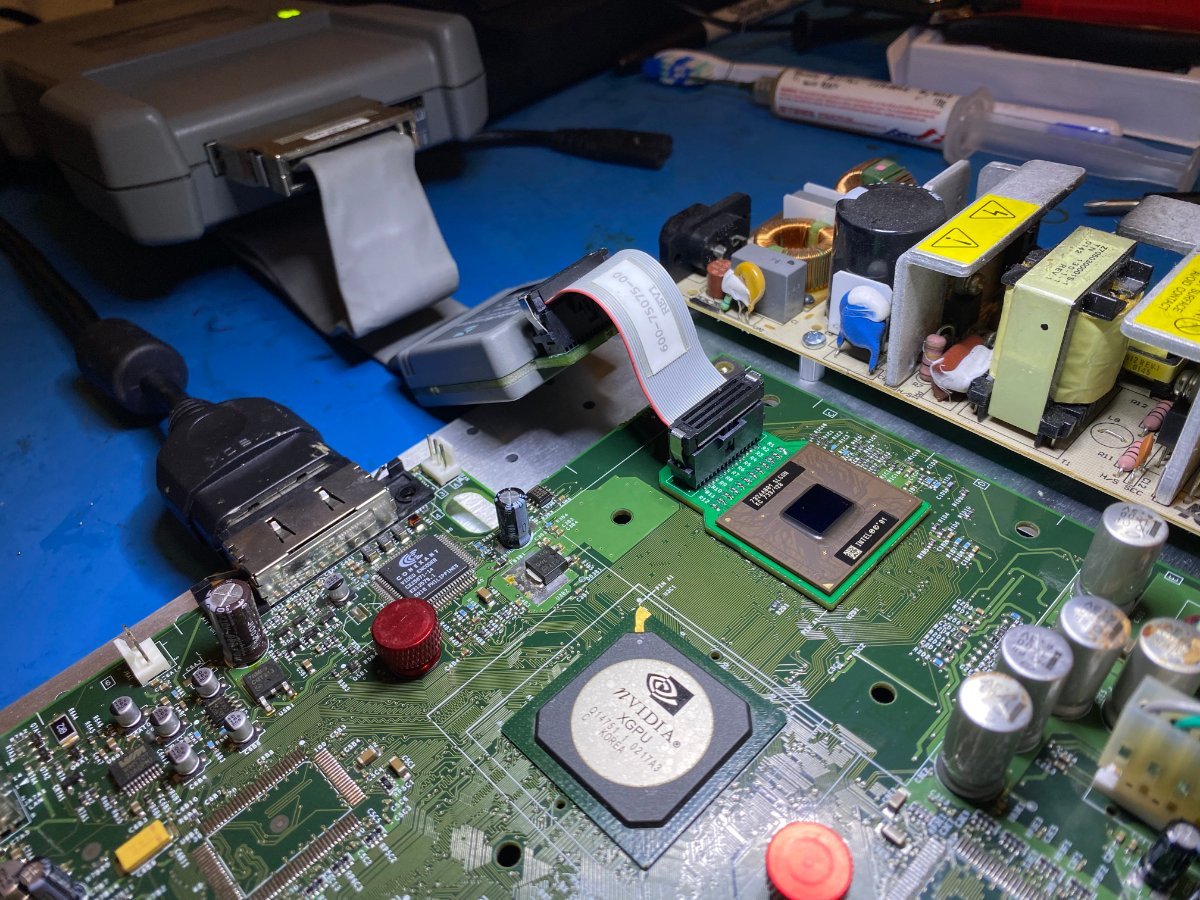
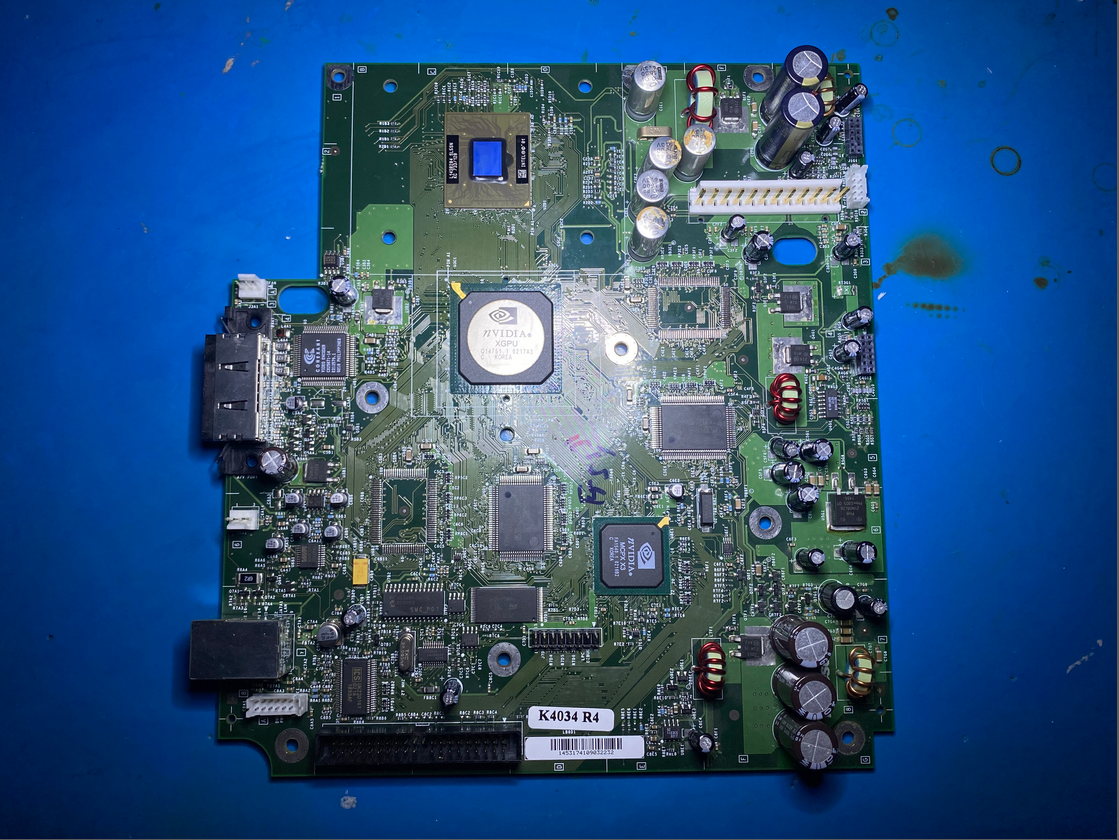
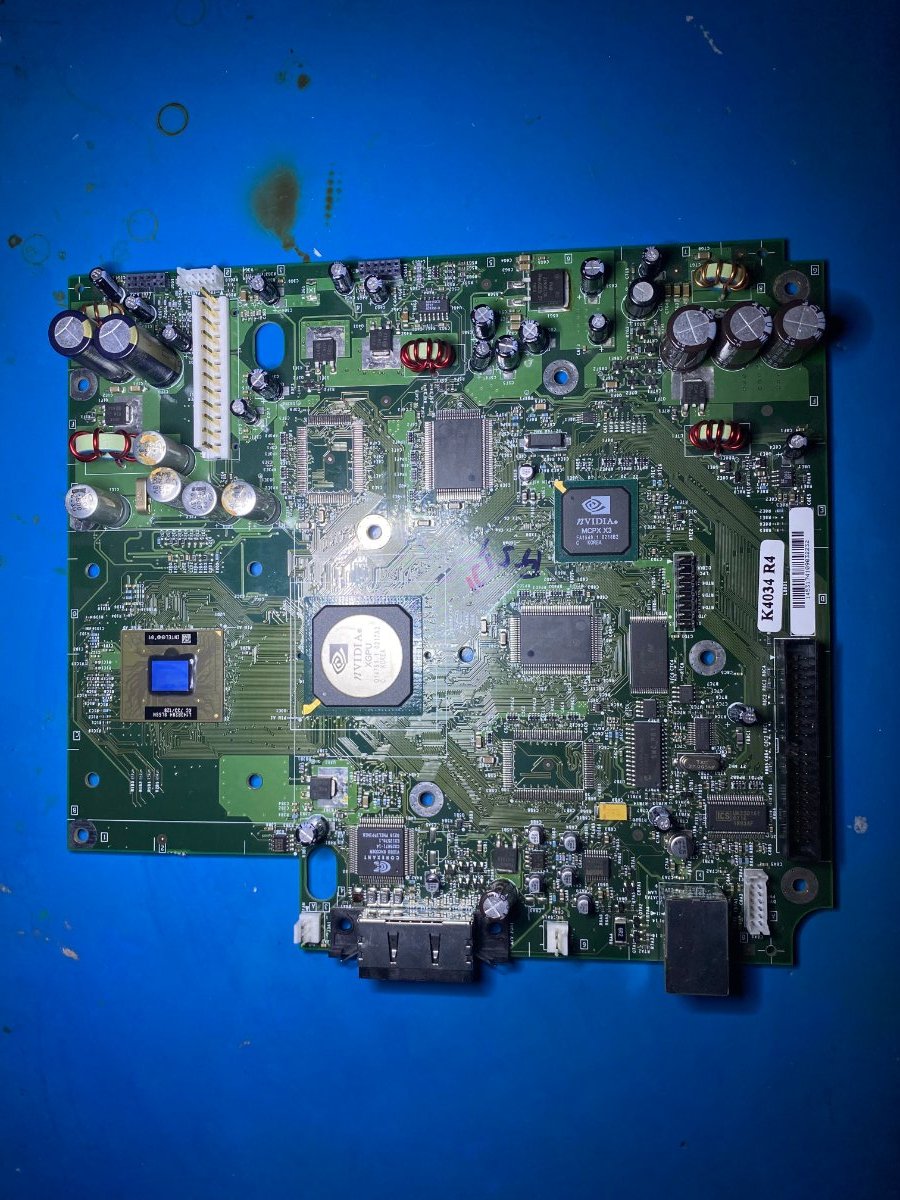
Unlike some of the other early 2000s game consoles, the original Xbox was a remarkably straight-forward hardware platform built around an Intel CPU + NVIDIA GPU with a unified memory architecture. Microsoft designed a system that would be easy to transition existing PC game developers onto, tapping into their dominance of the PC market.
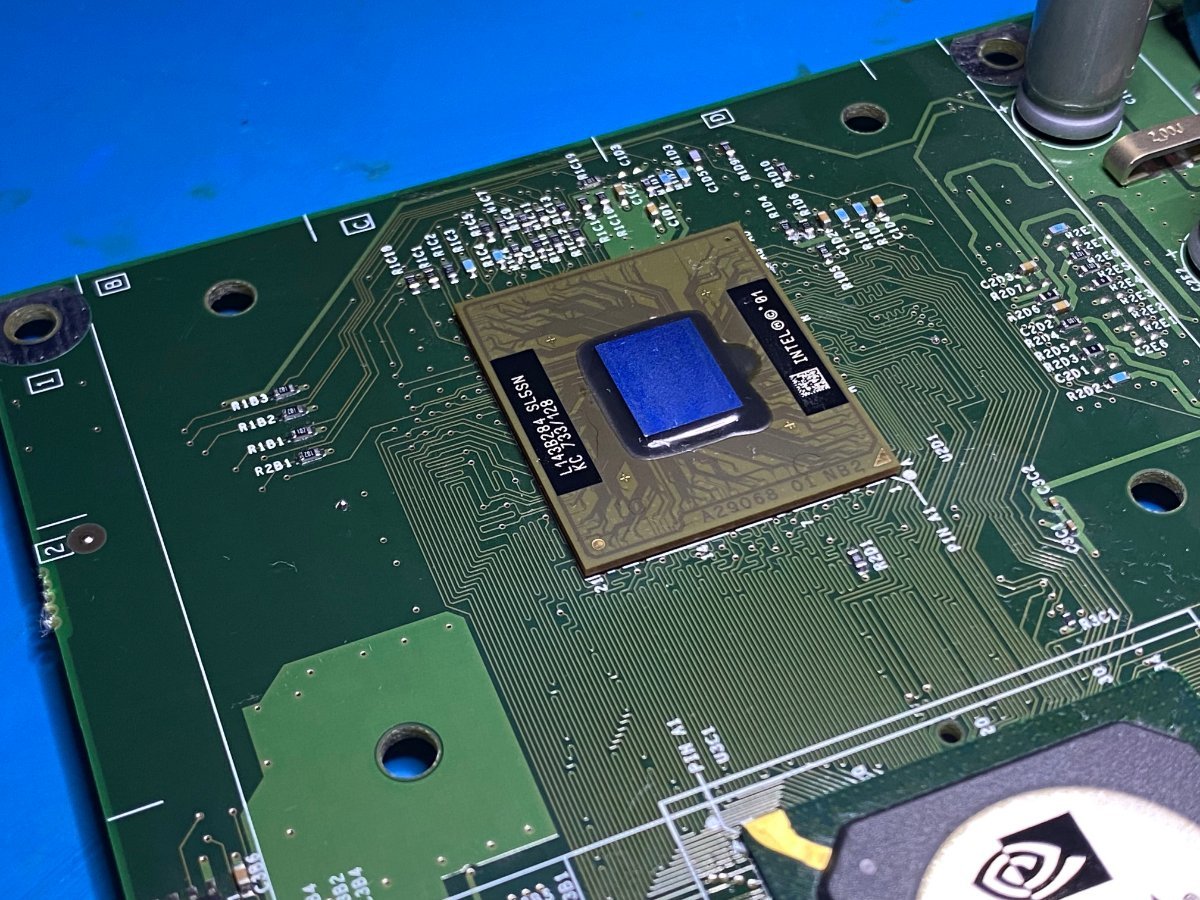
Original Xbox 1.0 motherboard: An ATX board with a 32-bit 733 MHz Intel Pentium III CPU and a custom NVIDIA GPU
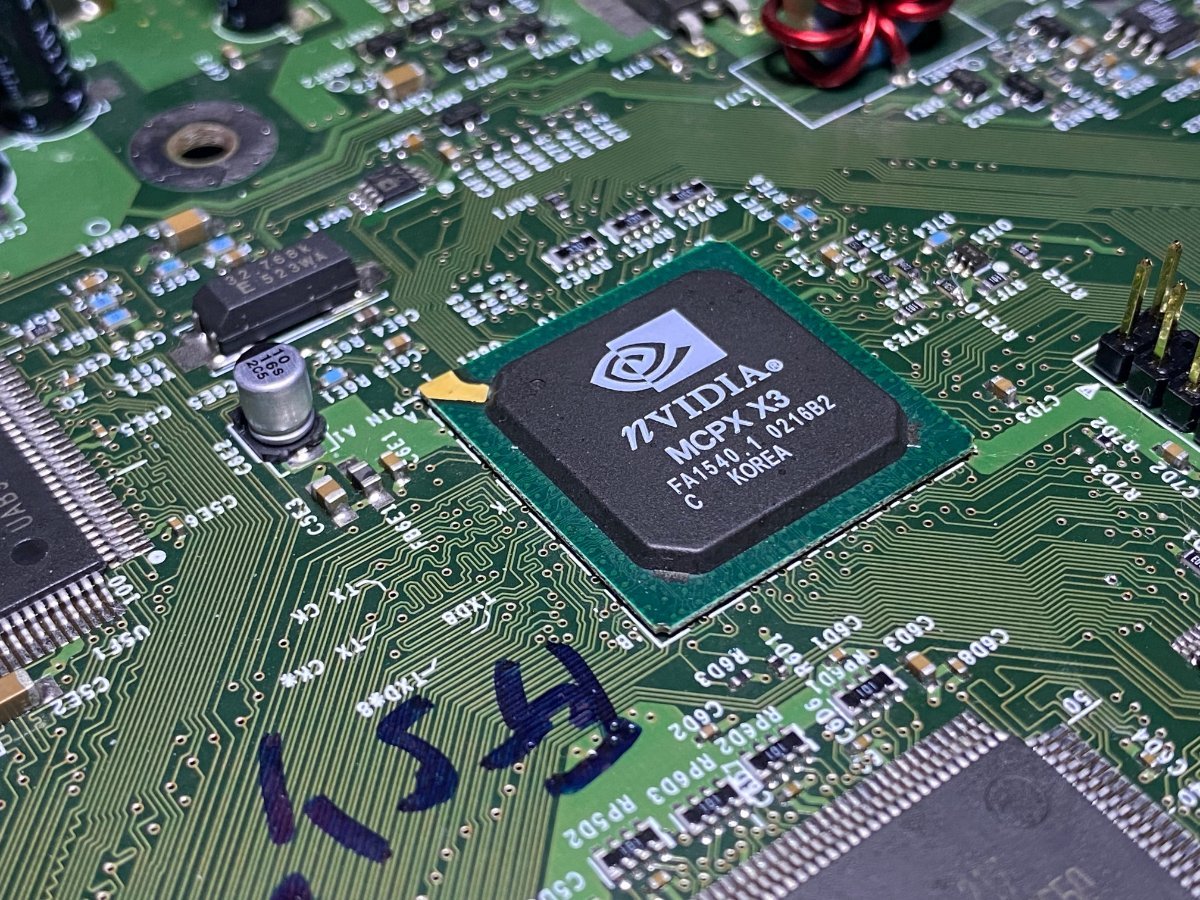
But the security of the Xbox leaned heavily on a “secret” 512 byte bootrom that was carefully hidden within the system’s custom NVIDIA MCPX Southbridge to establish a chain of trust. Within three months of launch, this secret bootrom was infamously dumped by Andrew “bunnie” Huang blowing the console wide open to further research.
Bunnie dumped the secret ROM using an FPGA to sniff the ROM on the HyperTransport bus as it left the MCPX on its way to the Northbridge / GPU, before traveling over the Front-side bus to the CPU. This attack (among others) is described in great detail in bunnie’s 2003 book: “Hacking The Xbox” (now free.)
The MCPX is the "Media Communication Processor" (southbridge) which also plays host to the secret ROM
Looking back at the race to dump secret ROM, there was some amount of discussion which weighed trying to use Intel’s CPU JTAG functionality to probe the system and read out this elusive bootloader:
“The JTAG boundary scan approach was rejected on the grounds that the TRST# pin, used to hold the JTAG chain in reset, was tied active in a manner that was difficult to modify without removing the processor.”
– Excerpt from Keeping Secrets in Hardware: The Microsoft Xbox (TM) Case Study, by Andrew Huang, 2002
Microsoft had intentionally tied the TRST# pin to ground underneath the Xbox CPU in an effort to disable the Intel JTAG interface and dissuade anyone from poking around.
Original Xbox CPU: 32-bit 733 MHz Intel Pentium III with 128 KB L2 cache as a mobile BGA2 chip package
More importantly, blackbox reversing Intel’s private JTAG instructions in order to query memory, registers, or perform other debugger-like actions was considered non-trivial:
“Removal and socketing of the processor was considered to be prohibitively expensive and time consuming; the cost of a BGA socket for the Pentium III is estimated to be in the hundreds to thousands of dollars. In addition, the JTAG boundary scan codes for the Pentium III are largely proprietary and would have to be reverse engineered as well…”
– Excerpt from Keeping Secrets in Hardware: The Microsoft Xbox (TM) Case Study, by Andrew Huang, 2002
But as the Xbox homebrew ecosystem flourished over the next several years, a slew of other methods were discovered to cheaply break, dump, or escape the chain of trust Microsoft had tried to establish with the secret ROM. There was little incentive pursuing these more challenging hardware attacks, so they were left behind and largely forgotten.
Intel x86 JTAG
While there is little else to be gained from new methods to dump or bypass secret ROM today, the ability to hardware debug the Xbox CPU would still provide unrivaled introspection to further study and preserve the rich history of the platform. Some of the benefits of JTAG debugging the CPU includes:
- Debug the system from the very first instruction executed (a.k.a the reset vector)
- Non-intrusive debugging without modifying the OS or any software running on the hardware
- Debugging retail BIOS images and other runtimes without native kernel debugging capabilities
- If it runs on the CPU, you can debug it – the Xbox Kernel, Linux, a custom RTOS, Windows (etc.)
- JTAG surpasses emulators in fidelity for studying hardware-specific behavior and un-emulated peripherals
Yet, twenty years later there is zero open-source hardware or software solutions privy to Intel’s private JTAG instructions… which seem odd given how ubiquitous x86 is. The alternative, locating a semi-complete “highly proprietary” hardware debugger (and its software components) from days past, is almost equally as challenging:
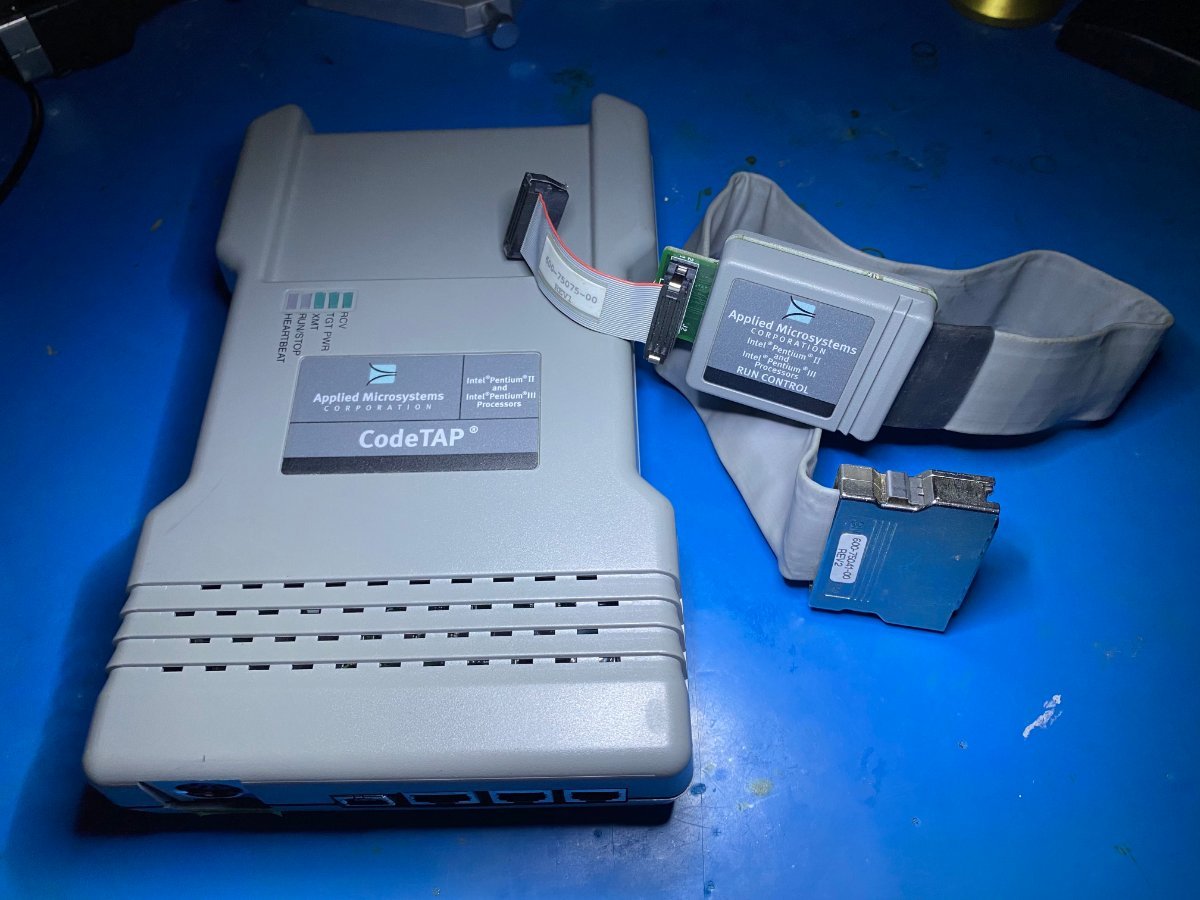
An Applied Microsystems CodeTAP debugger for Intel Pentium II / III, purchased "AS IS"
From my research, the best Pentium III debuggers (maybe even the only ones) of the early 2000s were made by American Arium and Applied Microsystems. These ranged from as low as $9k to over $40k USD for some of the Arium units. Allegedly, Intel bound these firms by 10-15 year NDAs when developing these solutions.
The main customer of these debuggers would have primarily been OEMs performing hardware validation or BIOS/firmware development while stabilizing new motherboards. With a pretty narrow market, there’s no more than a few thousand hardware debuggers of this period produced by either company.
In 2023 these vintage hardware debuggers seldom pop up, and aren’t bought for much more than $25-75 USD.
Rolling Your Own CPU JTAG
One of the more challenging aspects of tackling JTAG on Xbox is the fact that TRST# was tied to ground under the CPU. While yes, in theory drilling out the connection to release TRST# may allow us to drive the JTAG state machine, I had no clue how the CodeTAP / hardware debugger might respond to TRST# not operating as expected.
I began reviewing old Intel processor datasheets, hardware developer manuals, motherboard reference designs, and platform recommendations of the era to start piecing together a better understanding of how these hardware debuggers are meant to physically interface with the CPU.
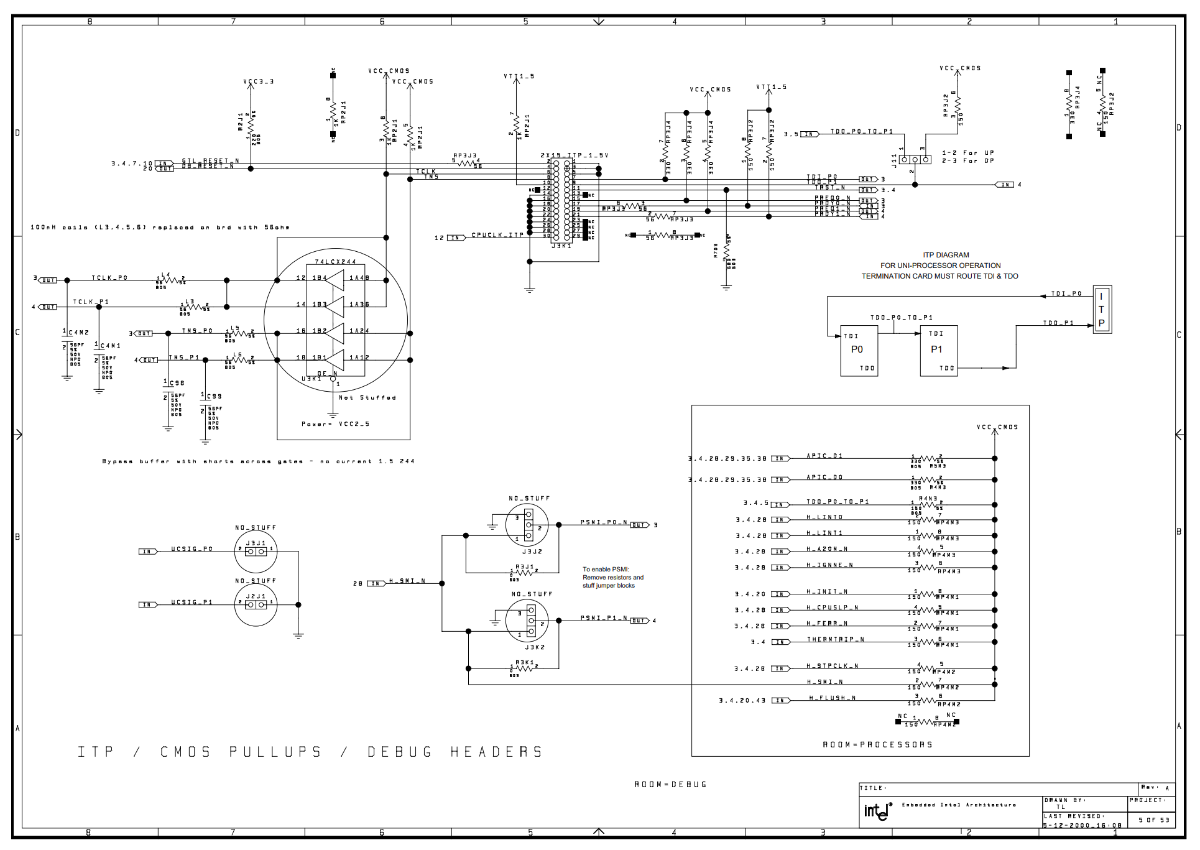
Intel reference schematic of ITP, from Intel Pentium III Processor/840 Development Kit Manual, April 2001
As predominantly a software researcher by trade, manipulating the physical integration of an Intel CPU is not something I wanted to cut corners on. In order to remove all hardware ambiguity, I decided it would be best to design a CPU interposer PCB to cleanly breakout the JTAG signals, adapting from Intel’s specifications to rebuild an ITP port.
A dedicated CPU interposer would allow me to isolate the JTAG signals (and other CPU control signals) while skipping reverse engineering anything else the Xbox motherboard may have been doing to them. This would also enable me to neatly collect the relevant signals into a physical port the debugger normally expected to tap.
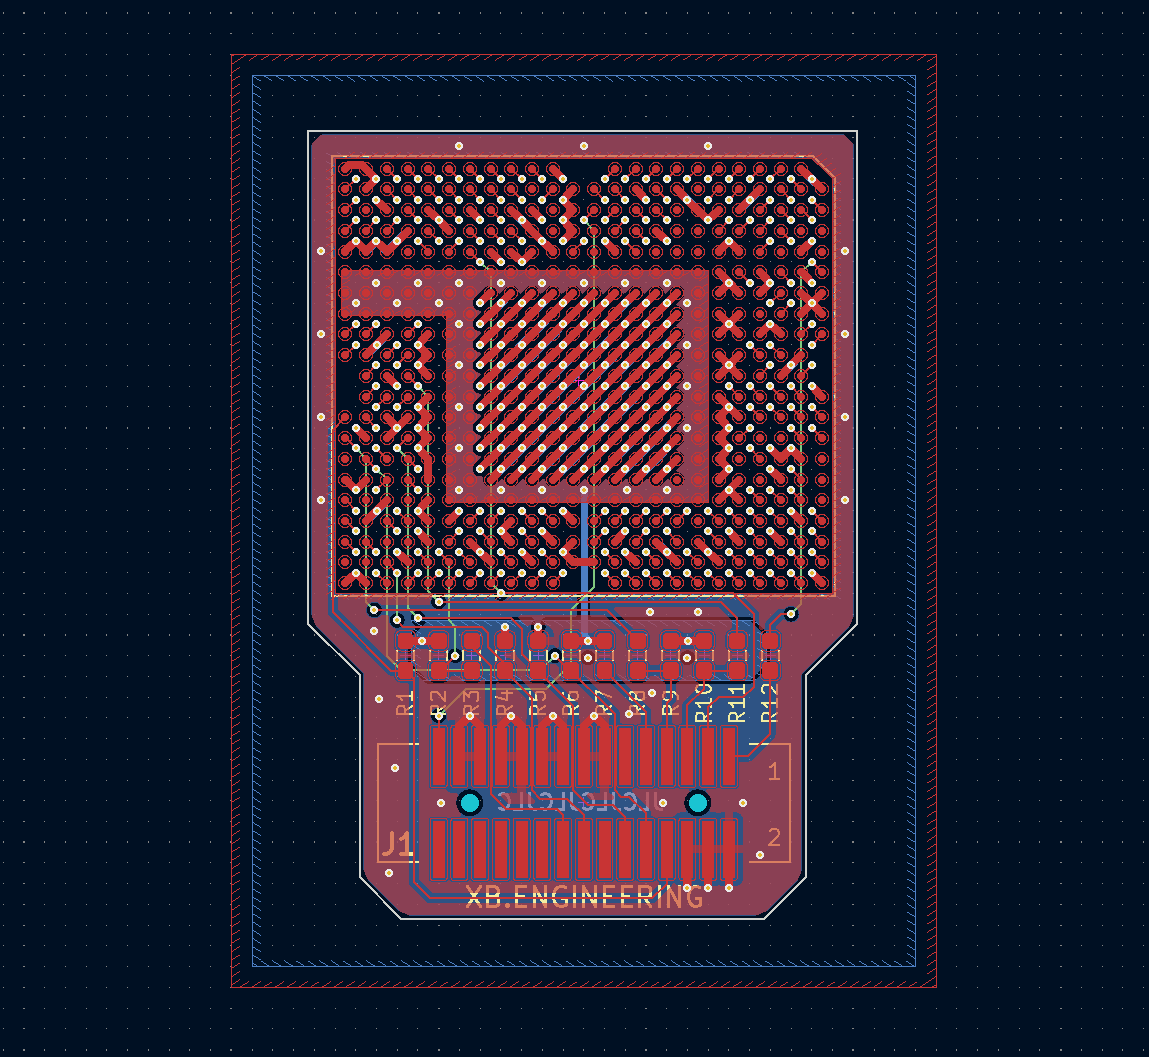
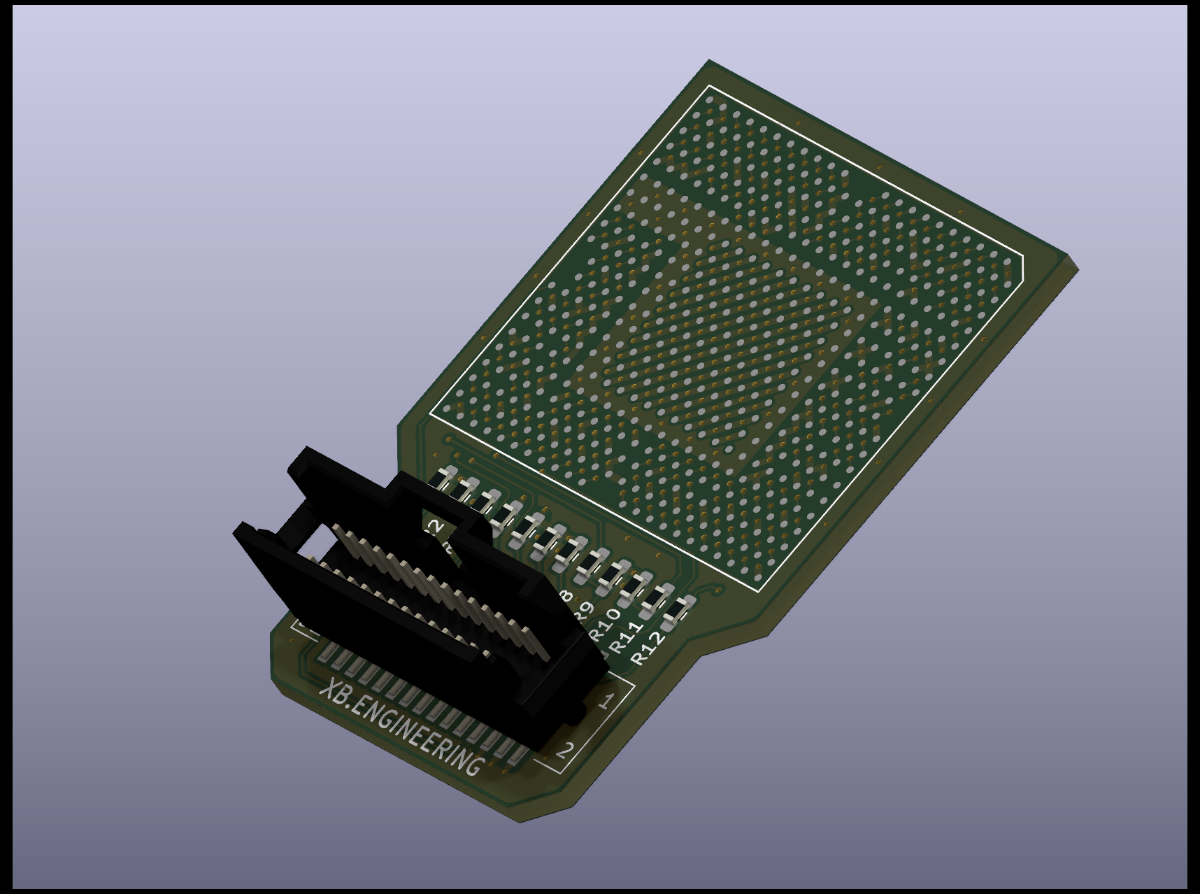
Designing the 4-layer CPU JTAG breakout interposer in KiCad 7.0
The large majority of CPU signals simply plunge through the 4-layer CPU interposer PCB 1-for-1. This interposer was originally designed simply as a 2 layer PCB, but was bumped up to 4 layers after some peer-review and negligible cost differential of hobbyist PCB production today.
The JTAG / CPU control signals of interest are pulled out using an internal routing layer (green), with the second internal layer (hidden above) simply serving as a ground plane. The breakout is a 30 pin SMT System 50 connector per Intel specs – the header alone cost $15 USD.
A render of the JTAG breakout interposer PCB from KiCad, prior to physical order
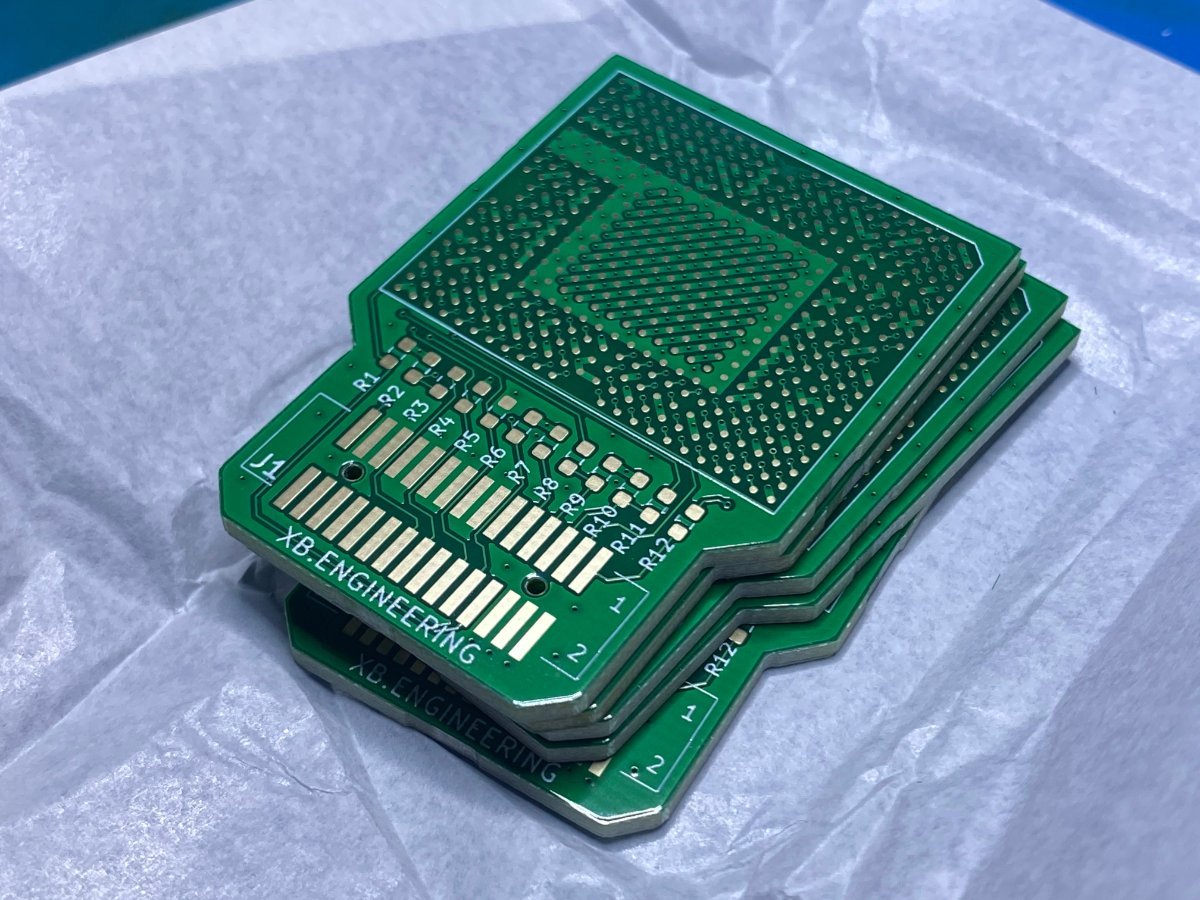
Five JTAG breakout interposers, fresh from JLCPCB
The minimum order of five 4-layer ENIG PCBs from JLCPCB cost $20 USD, and $20 for DHL shipping. While waiting on the JTAG interposer PCBs to arrive, I reballed a loose Xbox CPU or two I had leftover from a separate project.
Eight days after ordering, I had the JTAG breakout CPU interposers in-hand and a board ready for the install attempt.
Installing the JTAG breakout CPU Interposer
Even with semi-professional equipment, installing the JTAG breakout interposer is a tedious process that will be unforgiving of errors. The following image series depicts the rough sequence of steps for removing the original CPU and installing the JTAG interposer.
The original Xbox CPU with flux around it to aid in reflow, under a BGA rework station, prior to chip removal
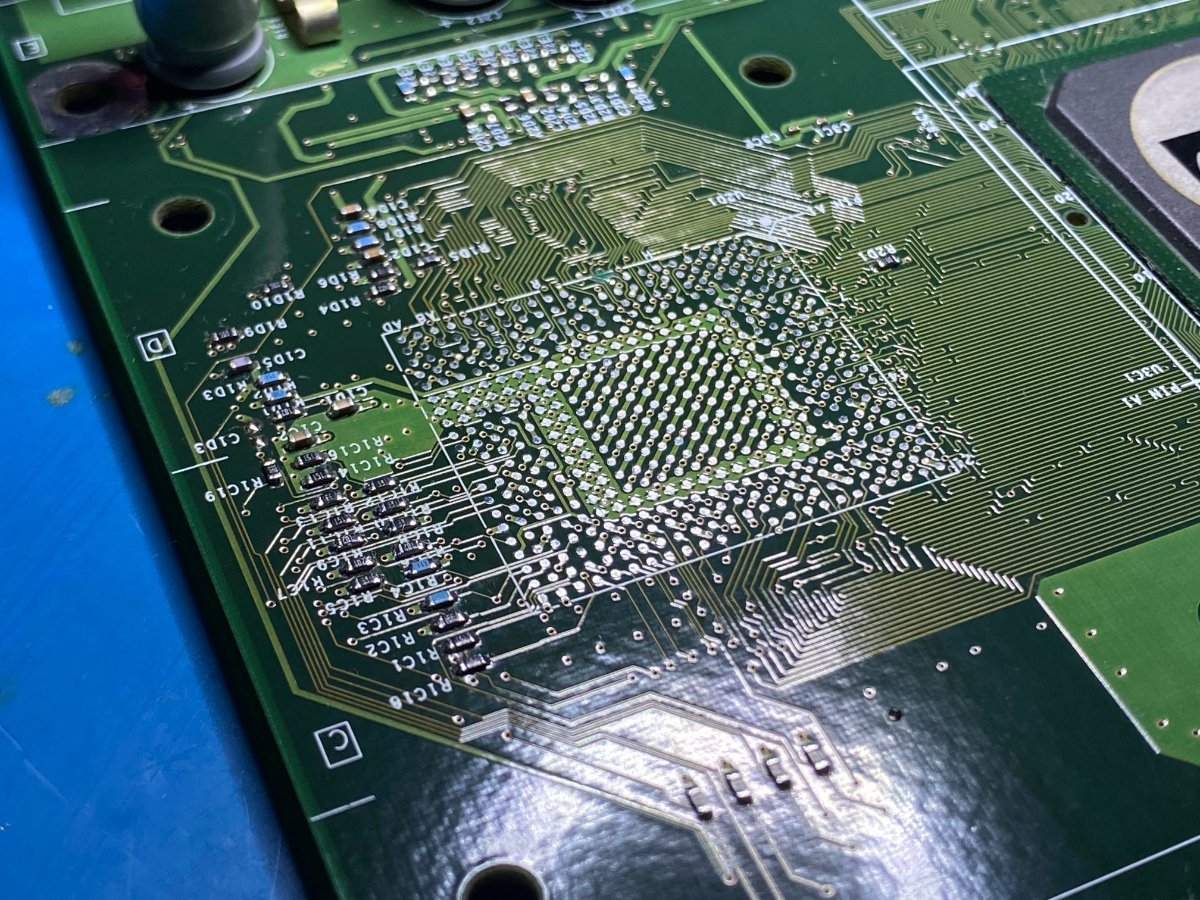
The BGA footprint of the original Xbox CPU after removal from the motherboard and pad cleanup
Bottom of JTAG breakout interposer, sitting in a 3D printed jig to aid with reballing alignment (0.76mm balls, leaded)
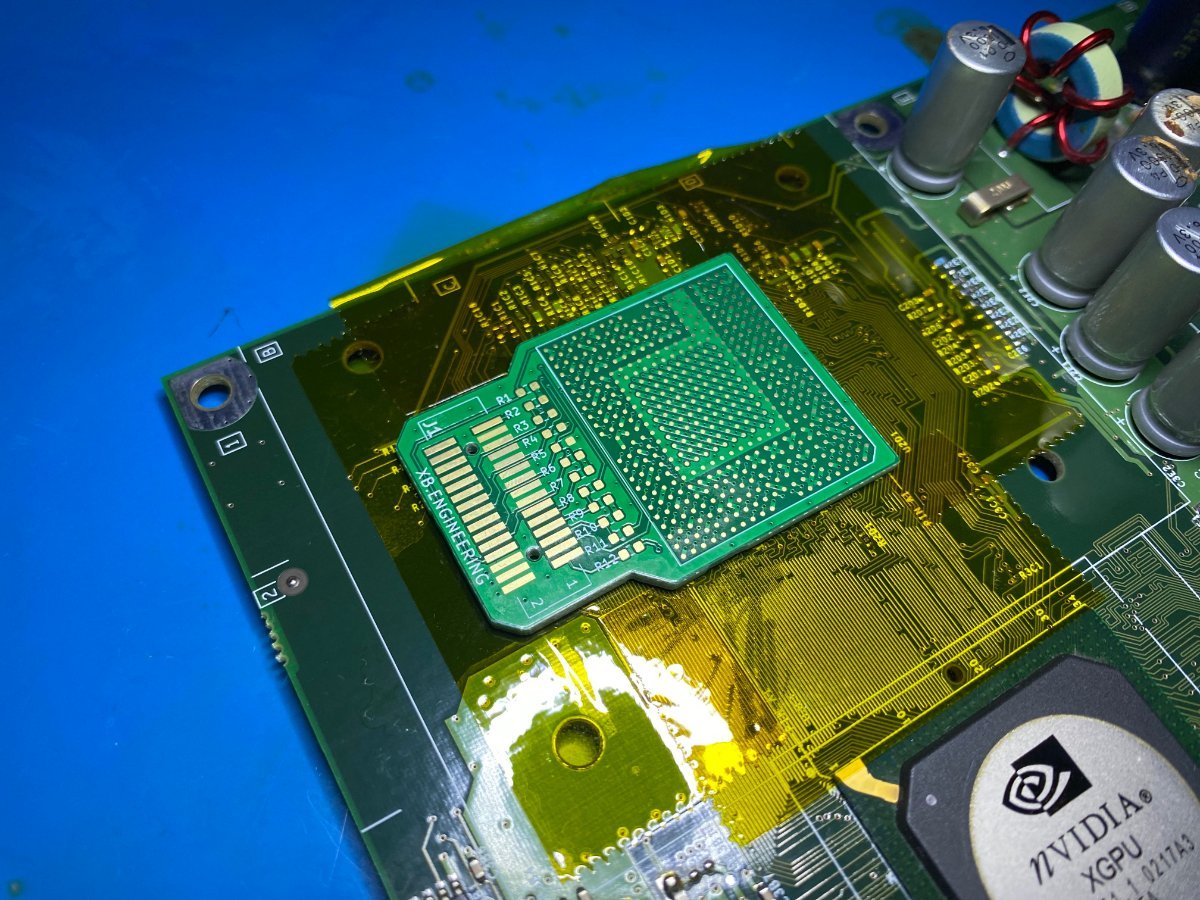
A test fit of the JTAG interposer and its expected alignment prior to final install
CPU and interposer on a cheap BGA rework station, both about to be soldered during a single reflow profile
The most critical part of the install was nailing the alignment and reflow of not just one, but BOTH ball-grid-arrays for welding over a single rework profile. While I had some kapton to help better ensure alignment of the bottom array (interposer to motherboard), the top ball array (CPU to interposer) was done by eye.
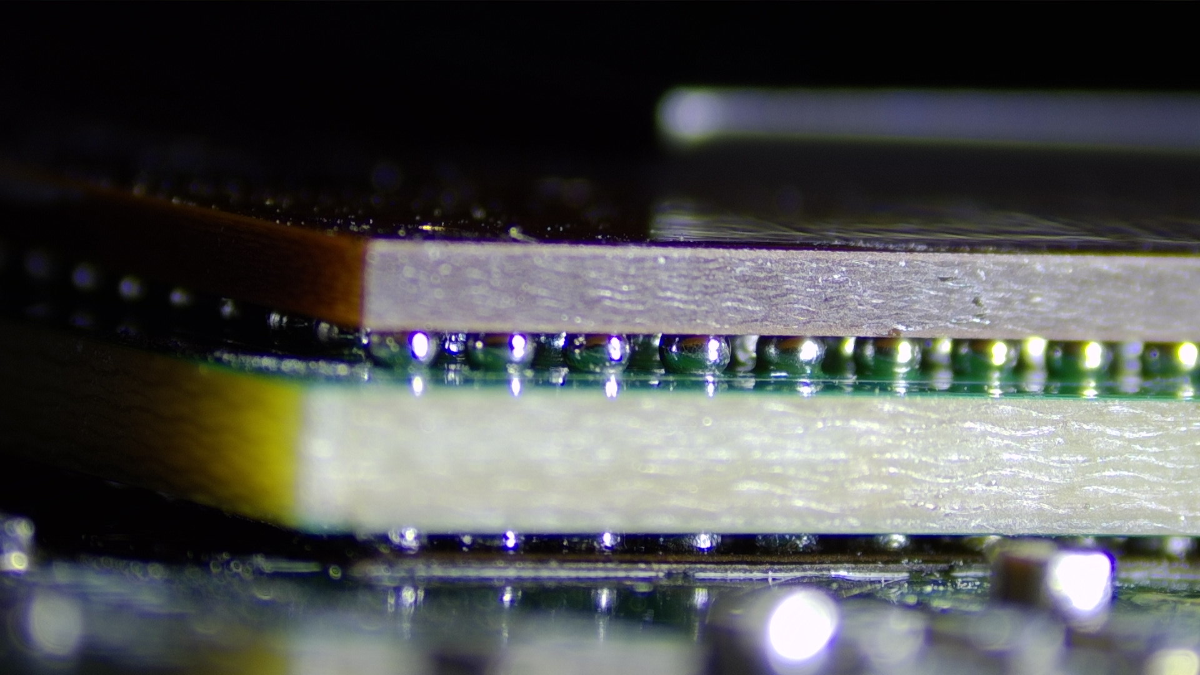
BGA camera of CPU + interposer stackup, after the BGA profile has completed the reflow profile
Some “supports” (no-op SMD resistors) were put underneath the header portion of the interposer prior to reflow. While these supports are not visible and do not serve any electrical purpose, they provide some mechanical strength to help prevent stress or cracking of BGA balls when plugging or un-plugging the JTAG ribbon.
As a prototype, I wasn’t even sure this JTAG interposer (or the install) would be without error so I wasn’t too concerned about ideal construction or longevity for this attempt at a proof-of-concept.
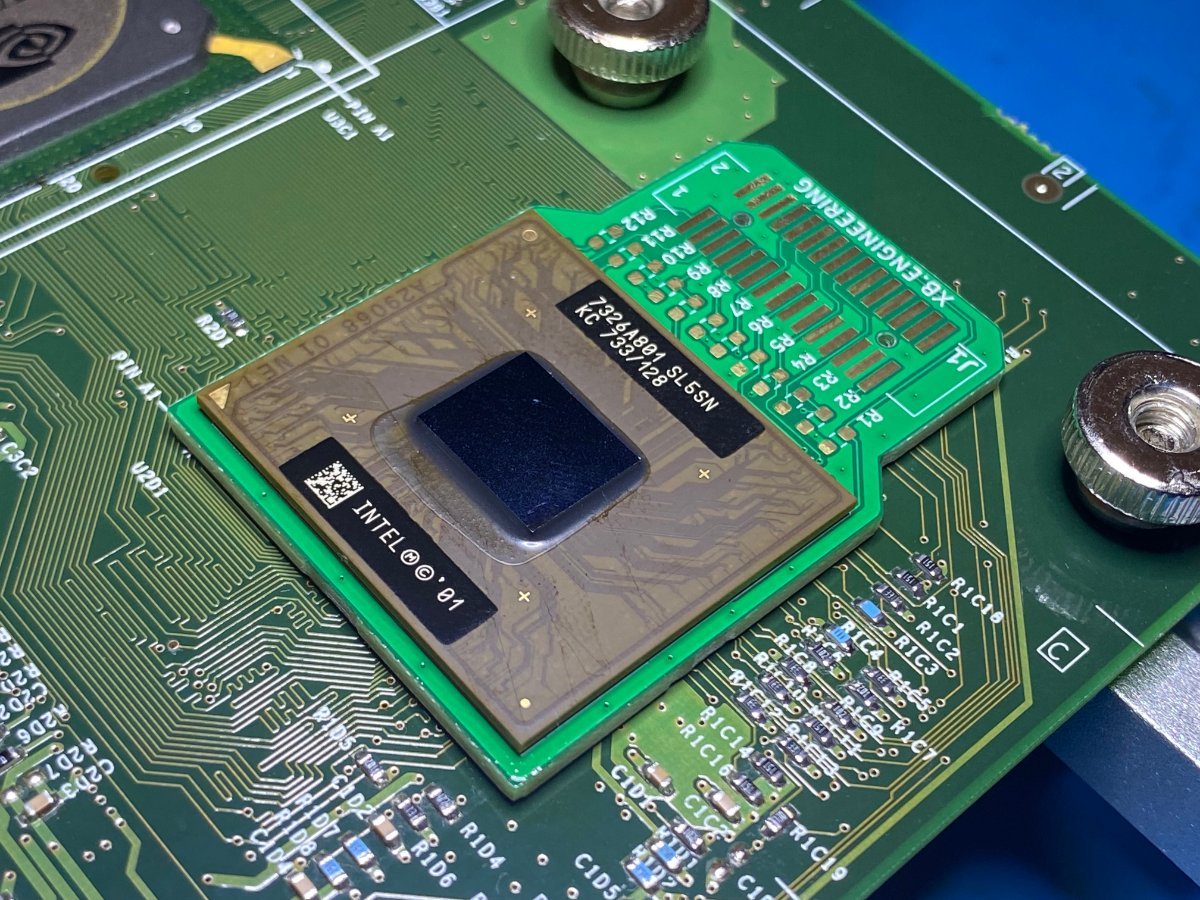
The successfully installed JTAG interposer - the system was able to boot normally at this point
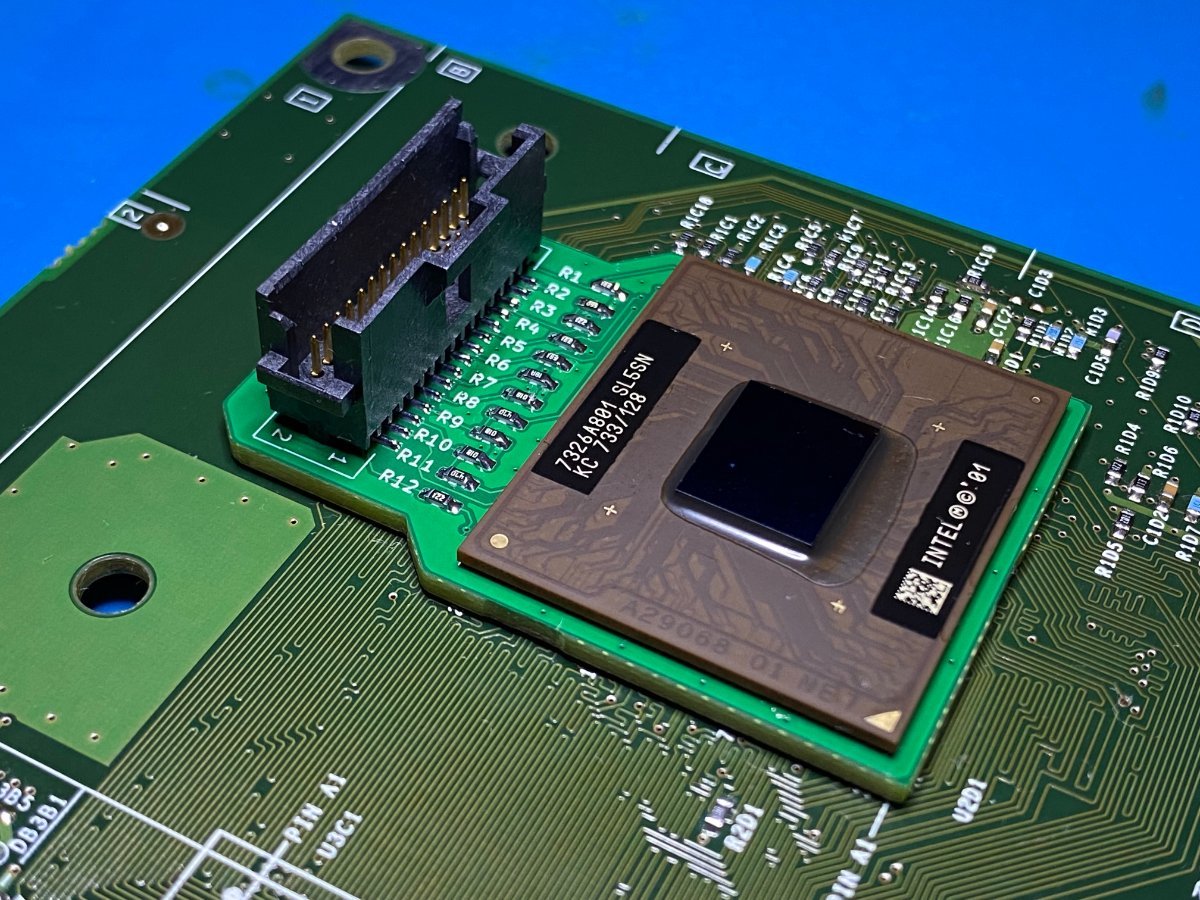
The fully populated JTAG interposer ready for testing with the CodeTAP hardware debugger
The interposer is populated by hand after completing the reflow process. I did not trust the 30-pin header to not melt under the heat required to solder the CPU and JTAG interposer. Given the complexity of this install and using an un-vetted design to interpose 150 sensitive CPU signals, things went remarkably smooth.
With the CPU interposer installed, thankfully the Xbox boots as one would normally expect. But would JTAG work?
Dumping Secret ROM
Testing the JTAG setup for the first time was difficult because I had zero clue what a “normal” attach sequence would look like for both the hardware and software and no documentation. I had acquired the CodeTAP “AS-IS” and struggled to find a Pentium II / III motherboard with an ITP port (usually rare engineering boards) to test it against.
Plugging the hardware debugger into my JTAG interposer and connecting the software (CAD-UL XDB) to it, the Xbox would “FRAG” (flashing-red-and-green, a general system fault state) when trying to boot.
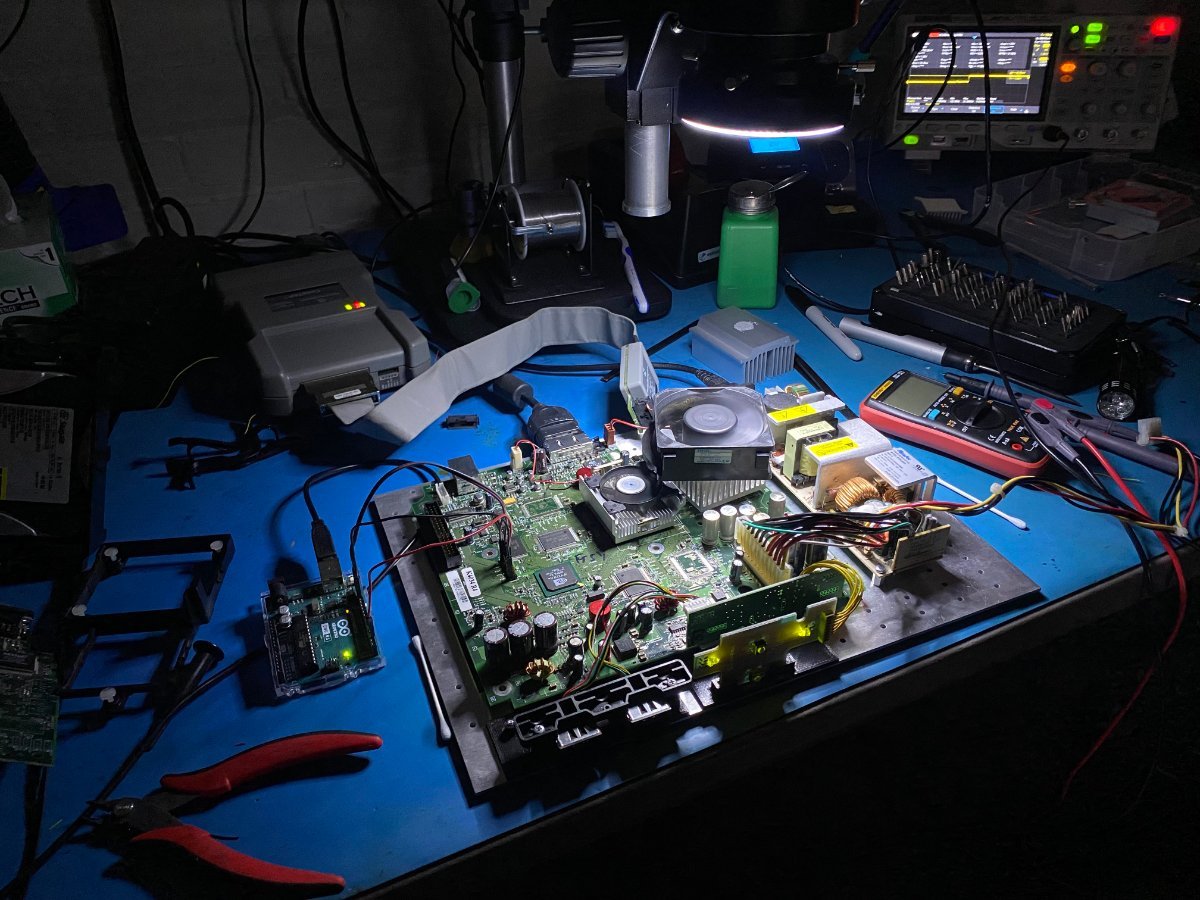
Plugging the CodeTAP JTAG debugger into the interposer when prepping the board post-install
The debugger software kept failing to attach stating “Target RESET asserted” while the CodeTAP hardware wasn’t even indicating it could sense power from the target (TGTPWR). I had a slight suspicion of what the issue could be, but triple checked my schematics, pinout, and probed across the motherboard to verify that the CPU was indeed being RESET.
The source of the problem is that System Management Controller (a PIC16 MCU) on the original Xbox expects the CPU to pass a set of system integrity tests within about 200ms of boot or it will reset the entire device chain. I had configured the debugger to resume on system attach, but apparently this was not working, or not the way I expected it to.
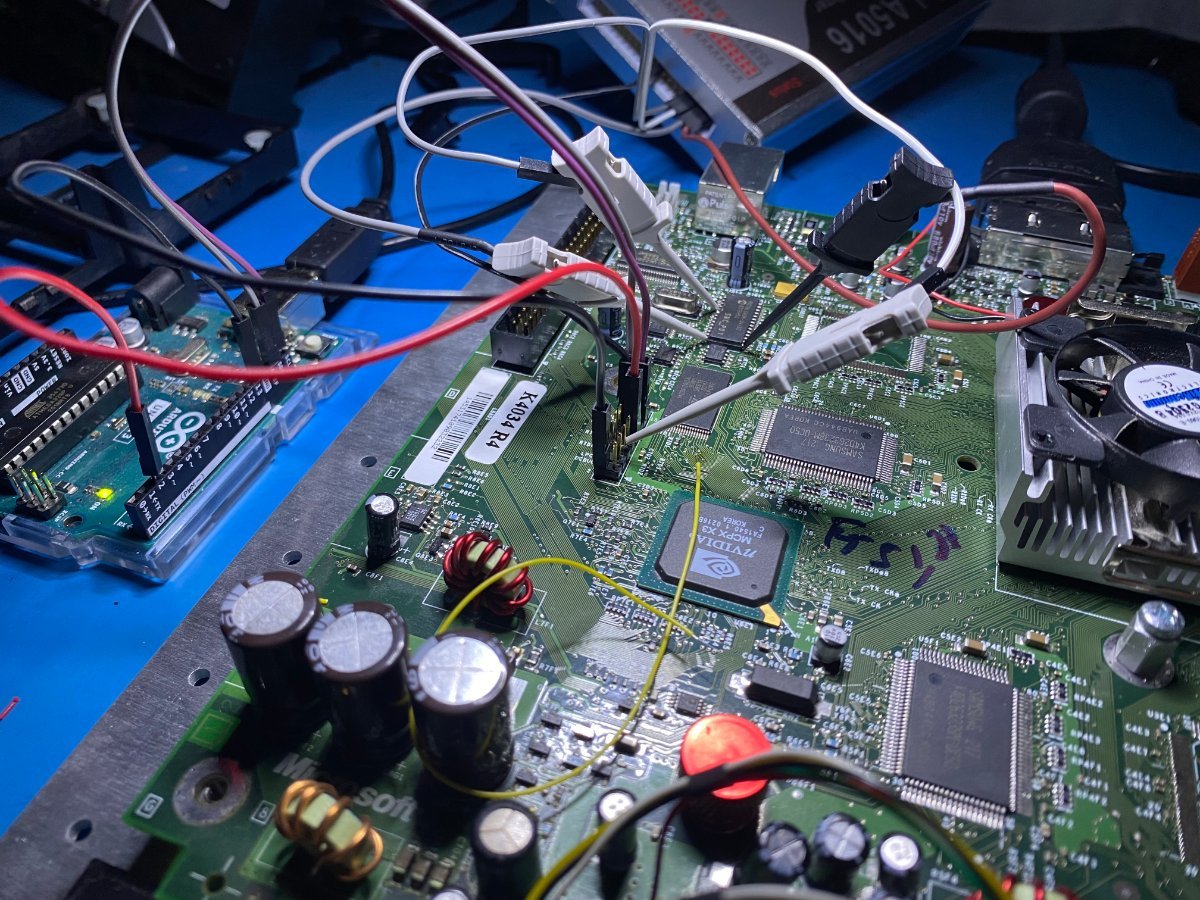
Probing signals off the SMC with a logic analyzer while also injecting messages on I2C
I put together a small sketch for an Arduino Uno and placed it on the I2C bus that normally runs between the SMC and MCPX. This way, I could fulfill the SMC’s system integrity challenges in lieu of normal CPU execution.
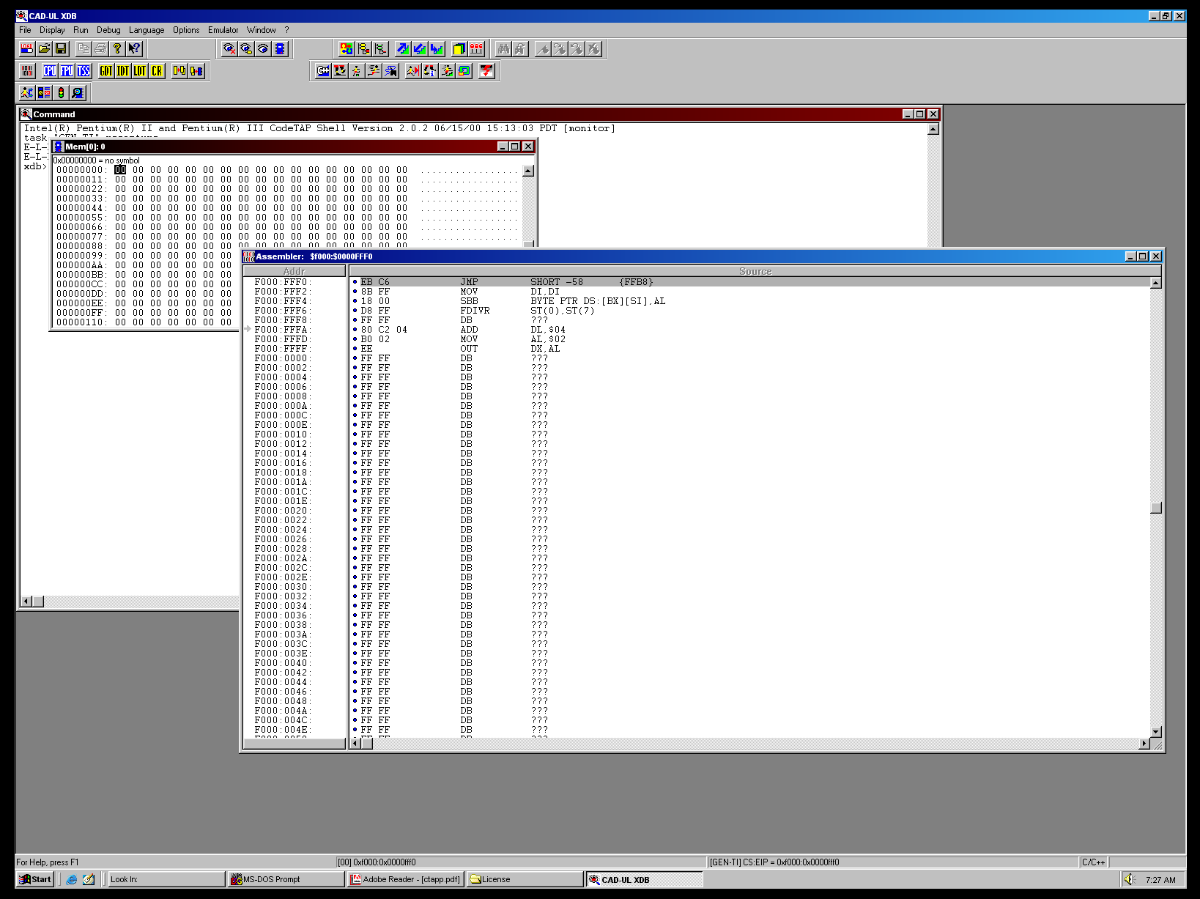
All at once, everything had suddenly clicked into place and the JTAG debugger attached – I had glimpsed the CPU reset vector of the Xbox’s original 1.0 secret ROM, in all its glory:
CAD-UL XDB (JTAG debugging software) initial attach, at the Xbox's CPU reset vector
Navigating to the top 512 bytes of memory, dumping the infamous MCPX secret ROM 1.0 via JTAG
After fighting to get acquainted with the debugger and a few system resets, I was able to navigate the XDB memory view to the top 512 bytes of system memory (around the reset vector) - dumping the complete, original 1.0 secret bootrom, from a retail Xbox motherboard, using JTAG.
Finally, one of the oldest theoretical attacks against the system - put to rest.
Continued Discovery
Blending nostalgic curiosities with a fun opportunity for establishing a deeper appreciation of computer hardware was the real purpose of this research. Further, the ability to hardware debug the Xbox CPU opens up several new tangential projects that I find personally interesting towards further research of the platform and general OS internals.
The pure chaos of JTAG hacking the Original Xbox, 20 years in the making
While insufficient, Microsoft made active effort to layer security mechanisms in the Xbox. Having released TRST# via the interposer, satisfied SMC security challenges with an arduino, and dumped secret ROM using JTAG… they hid one last trick to bind an abnormal CPU startup with a forced reset from MCPX a few seconds after boot.
Identifying the origin of this final reset, its history within the system, and ultimate disablement could be its own separate blogpost, highlighting that perhaps there are a few mysteries within the Xbox still worth contextualizing.
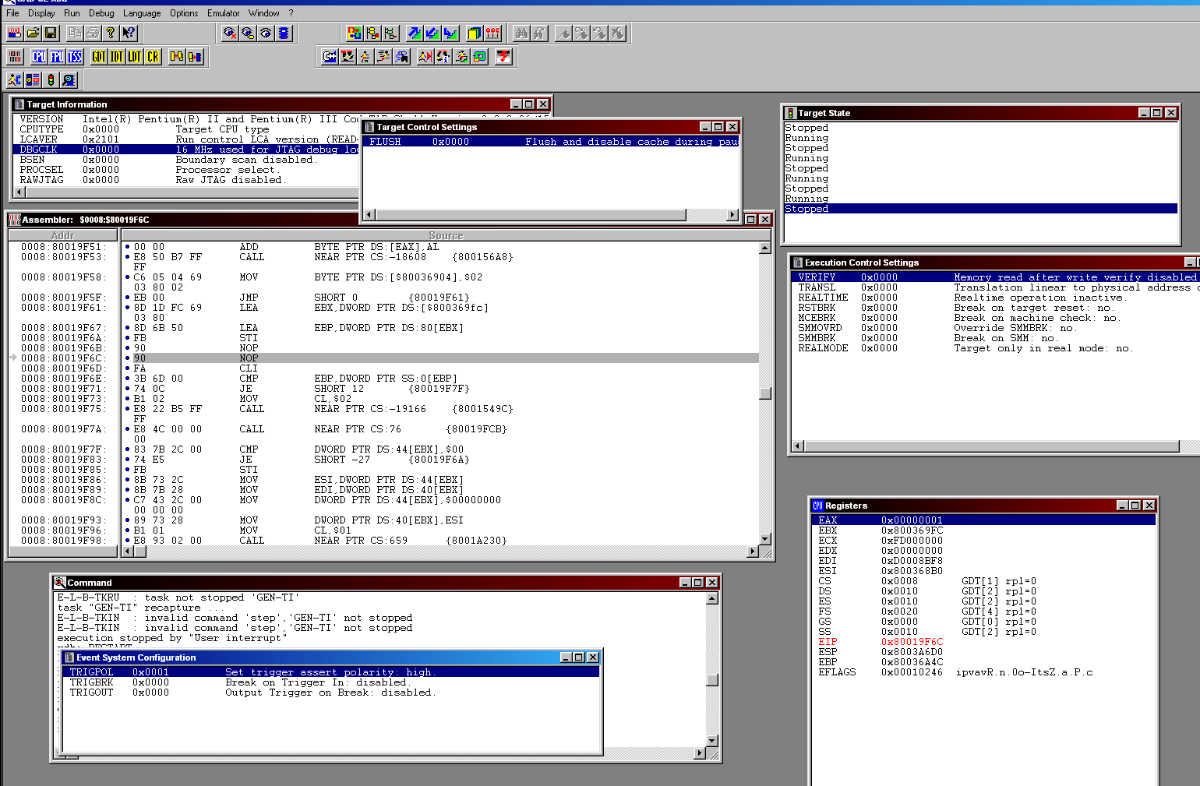
A screenshot of breaking with the JTAG debugger while the system is fully up and running
With Intel JTAG on Xbox now fully functioning, there is less uncertainty in refining this work by eliminating the arduino and likely even the CPU interposer. Over the longer term, this Pentium III JTAG setup provides a good basis for studying the private Intel JTAG instructions as a derivative of this work with broader application.
If you are interested or familiar with bespoke Intel JTAG technologies, please consider contributing (what you can) to the fledgling open knowledgebase being established here on GitHub. This is one of the only modern resources aimed at preserving or documenting x86 JTAG, which proved important in the work described by this post.
Conclusion
This blogpost revisited an old idea that the original Microsoft Xbox could have been hacked through Intel’s x86 CPU JTAG interface. A custom CPU interposer PCB was created to breakout the JTAG signals to a CodeTAP hardware debugger. The secret Xbox bootrom was successfully dumped via Intel JTAG, with real debug capabilities from the very first instruction of execution - closing the chapter on a 20 year old theory.
Hardware CPU debugging can offer unique system introspection over more traditional software and OS-based kernel debugging technologies. These types of hardware solutions used to be highly proprietary and very little public information exists for them, making this a challenging but equally rewarding research experience.

-
1
-
It intercepts the LPC commands between the chipset and an LPC flash chip, rewriting the command and address bits so you can use larger, later chips that don't normally reside at the same addresses as typical LPC flash chips used in simpler mods like the Aladdin , and does so while adding as few extra clock cycles as possible to the transaction
-
1
-
-
Nice looking forwards to what you come up with.
-
1
-
-
-
Moving across from the Dreamcast, I waited in the street for almost 24 hours on launch day to get one. Once i got my hands on this beauty the rest is history. Lol
-
That looks awesome. I think someone was working on a pico solution for power supply not sure if it ever got abandoned. Maybe Kek or someone can offer some advice.
-
Good to see some Aussie time zones getting covered. Such a struggle living in the future

-
 2
2
-
-
Cant go past these classics, wasted **invested so much of my childhood time with these.
Fifa & Fifa Street games
Ninja Gaiden
Grand Theft Auto: San Andreas
Burnout 3: Takedown
Fable
Prince of Persia: The Sands of Time
Top Spin
-
1
-
-
Chess Street Fighter 2
CHESStreet Fighter 2 is a chess homebrew game for Xbox. Play versus all the opponents, beat all of them, and you will become the ultimate Chesstreet Fighter.
Gameplay
In Chesstreet Fighter, you can select a character, and after that you must defeat all the opponents in Chesstreet Fighter matches.
What is a match? In a match, you will play two chess games versus your opponent (one with white pieces, and the other with black pieces). After this two rounds, if you have managed to score more than 1 point (for example if you win both two games, or if you win one and tie the other) you have won the match and you have defeated your opponent. At this point, the progress is automatically saved.
Obviously, if you score less than one point (for example if you loose both two games, or if you loose one and tie the other) you have lost the match, and the game is over. Don't worry, the characters that you managed to defeat, will allways appear as defeated in the future (so you don't need to win all the opponents in a row).
Finally, if you play Round 1 and Round 2 and the score is a draw (for example if you win one game and loose the other, or if you tie both two games), you have the chance to play a "Final Round".
In the final round, you choose if you want to play with white or black pieces, but be careful, because if you pick white, you need to win the Final Round. On the other hand, if you choose black, a draw in the Final Round is enough to win the match.
The progress
When you defeat an enemy, the game will automatically save your progress.
This defeated character will allways appear in Black and White colors in the selection screen.
Will you be able to defeat all the enemies?
Offering draw
Chesstreet Fighter oponents are extremely combative, and they will keep playing every game until the checkmate.
A game is automatically declared DRAW if there is a situation of "stalemate", or 3 repetitions of the same position, or the "50 move rule" without capturing or moving a pawn applies. In any other situation, the oponents will try to keep playing.
Anyways, it would be ridiculous to keep playing during 50 moves a position of king and bishop versus king and bishop (where nobody can win). In this kind of situations, you can press the white button in your turn, to "offer draw" to your oponent. But be warned about the combativity of your oponents: they will only accept a draw in these positions:
- King versus king.
- King and bishop versus king.
- King and knight versus king.
- King and knight versus king and knight.
- King and knight versus king and bishop.
- King and bishop versus king and bishop.
Regular opponents
There are 8 regular opponents, and you can fight versus which you want. Besides their name and their portrait, there are two main differences between these opponents:
Their chess level - They are ordered from the worst player to the best player. You will see that worst players as Zangief or Blanka are very easy to defeat (they even loose pieces stupidly), the difficulty increases as you see more characters, and you will see that Ryu or Dhalsim will be really tough.
Their personality - Each character has his or her own personality and preferred openings. For example, Dhalsim allways tries to play de INDIAN defense, Zangief plays the RUSSIAN (Petrov) defense, Ryu uses the DRAGON variation of the Sicilian... so each one will be a different challenge.
The 8 regular opponents, ordered from weaker to tougher, are these: Zangief, Blanka, Ken, Honda, Guile, Chunli, Dhalsim, Ryu.
Cheater opponents
Besides the 8 regular opponents, you can play versus 4 special opponents that "cheat". If you are looking for a game of straight chess, play simply with the regular ones. But if you want a different challenge, give them a try.
The cheater opponents play at full strength (they have the same knowledge level than Ryu, the strongest of the regular characters) but they do these cheats:
- Balrog - He steals one of your pawns at the beginning of each game. Will you be able to win or even tie with a pawn disadvantage?
- Vega - He has 4 knights (instead of bishops), and he loves to use them. Use your bishops wisely to stop the power of the cavalry.
- Sagat - He has 4 bishops (instead of knights). It is an extremely difficult challenge.
- Bison - The ultimate challenge. Bison steals TWO of your pawns at the beginning of the game. Impossible to win? Maybe, or maybe not.
FAQ
Q. How can I save my progress?
Your progress is automatically saved every time that you win a match.
Q. How can a I save a game to PGN format?
At the moment, it is not possible, sorry.
Screenshots:
Credits:
Thanks to all the Xbox and chess lovers, who inspired me to begin this project.
-
Submitter
-
Submitted07/13/23
-
Category
-
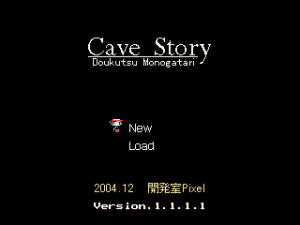
CaveStoryX
CaveStoryX is a port of the Cave Story/Doukutsu Monogatari for the Xbox. It is a freeware sides-crolling action/adventure/platformer title with leanings towards Wonderboy and recent side-scrolling Castlevania titles
Features:- Play Cave Story/Doukutsu Monogatari.
- Selectable English/Japanese language.
- Selectable cheats - invincible, unlimited ammo.
- Selectable text size/spacing.
- Save states (seems to work, but not extensively tested).
User Guide:
About Cave Story
You control a little amnesiac who runs around helping out these rabbit-ish creatures called Mimigas while trying to find your way out of the giant cave inside the floating island which makes up the game's setting.
You can expand your health meter by collecting Life Capsules in similar fashion to Metroid games, while you can get stronger by collecting energy to boost your firearms' output. Each weapon can be built up to the maximum level fairly quickly, but taking damage will drain energy from its experience meter, sometimes causing it to level down. Given how quickly they power up this only tends to be an issue during boss fights, and even then there's usually plenty of opportunities for collecting more weapon energy.
The game has loads of secrets, too. For a freeware Japanese platformer, it's fairly lengthy and has quite a large amount of text. For each play-through, provided you knew what you were doing, would take about 4-6 hours. Tack on an extra couple of hours if you don't know what you're doing, possibly for extreme problems with nasty bosses (which this game has plenty of, especially towards the end).
There are also three very different endings, plenty of plot, and quite a cast of charming characters.
Notes
- To start the game, go to Select Game and then select a profile.
- Do not try to load or save a state while in the game menu. Only load/save states while playing the game.
Controls:D-Pad/Left-Stick - Movement, Menu selection
A - Jump
X - Shoot
Y - Item
B - Map
L - Previous Weapon
R - Next Weapon
Back - ESC key (brings up the Exit menu, will exit game if you press again)
White - F1 key (continue playing from the Exit menu)
Black - F2 key (return to game menu from the Exit menu)
These can be reconfigured in the usual way if you wish.
Screenshots:
Credits:
Many thanks to Pixel for providing the source code to this.
Cave Story Tribute Site - https://www.cavestory.org/download/cave-story.php
-
Submitter
-
Submitted07/13/23
-
Category
-
Bubble Trouble SX
Bubble Trouble SX is a clone of the maze game Bubble Trouble, originally released on Mac in 1996. The gameplay is almost exactly the same as the original, despite a few difference (e.g. powerups ignored).
Controls:A - Select, Push bubbles
Black/White - Cycle custom soundtracks
Start - Pause
Screenshots:
Credits:All graphics were ripped from the real Bubble Trouble.
Thanks to everyone who tested or did anything towards the project.
-
Submitter
-
Submitted07/10/23
-
Category
-
-
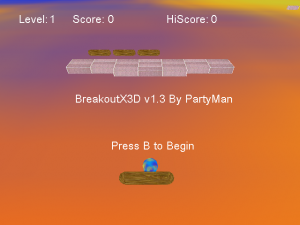
BreakoutX 3D
BreakoutX3D is a 3D Breakout clone for the Xbox.
Controls:Thumbsticks - Move paddle
Y - Pause
A/X - Turn off/on background
L/R+Black - Back to dash
Credits:Thanks to:
- The guys at xboxhacker.net who know their stuff (you know who you are.)
- The Chemical Brothers.
- Drunken Hyena for some great DirectX tutorials which got me started.
-
Submitter
-
Submitted07/10/23
-
Category
-
BraXil 2014
BraXil 2014 is a retro soccer game for Xbox. Its game-play is inspired in some old classic games like Kick and Run, Match Day 2, Sensible Soccer or Super Sidekicks, gathering details of these games. But it is developed trying to simulate the Brazil 2014 Soccer World Cup.
You will be able to choose the teams of the real Brazil 2014 World Cup, and play with its real player names. The development of the tournament is the same than the real World Cup: in the first round, your team is in a group of 4 teams, you must play with all them and you must finish in the top-2 places to advance to the second round (the knockout). If you manage to qualify, you will face a series of knockout matches with the rest of surviving teams, in your road to the final match.
User Guide:
Game modes
When you press the A-button in the main screen, a menu is prompted and you can select one of 3 game modes:
World Cup - The main game. Choose a team, and play a simulation of the Brazil 2014 Soccer World Cup.
Exhibition - A single match. Choose your team, choose an opponent, and play a soccer match.
Penalty shoot-out - A penalty shoot-out series. Choose your team, choose your opponent, and play a series of 5 penalty shoots each one (plus a sudden-death if the first series ends in a tie).High shoot technique
The more time you keep pushed the X button, the higher the ball will go. There is a maximum high, determined by the Strength value of the player who is shooting.
Also, the distance advanced by the ball is determined by the time that you press the button too, so this shoot is the best choice if you want to make a precise pass.
Advanced technique: If you tap the X button when your player has the ball, he will kick a short self-pass. This can be useful to control the ball and avoid opponents.
Player abilitiesEach team has 3 abilities: Speed, Strength and Skill. All the players of the team have the same Speed, Strength and Skill values, except one player marked with a "Star". This "Star" player (the "Ace") has higher Speed, Strength and Skill values.
Speed - Players with a high speed can run faster. Besides, goalkeepers with a high speed can do longer jumps.
Strength - Players with a high strength can do stronger/longer shoots with A-button, longer passes with B-button, and longer/higher passes with X-button. On the other hand, if your team has a very low strength value, you will probably need to use only the A-button even for your passes, because B-passes and X-passes will be really short.
Skill - Players with a high skill will get the ball more easily (read the Catching the ball section for more information). Besides, goalkeepers with a high skill will have an slightly better IA, making their reaction time a bit faster when they receive a shoot.
As in real life, teams are NOT balanced. There are stronger and weaker teams, and it would be much more difficult to win the World Cup with a weak team, than doing it with a strong team.
Catching the ballPlayers can only catch the ball if it is moving very slow (or it is stopped), it is not high, and it is close to them. Players cannot catch the ball if it is running fast, or high, or it is far from them.
If the player has a high skill, he will be able to get the ball even if it is at a slightly longer distance, so skill is good for catching the ball. But skill only affects to the distance; so even if your player has a high skill, he will not be able to catch a ball that is moving fast or high. This has been done purposely, to avoid players with a high skill making unstoppable quick passes.
Goalkeepers are a bit different: if they are close to the ball, they can always catch it, even if it is moving fast or high.
Stealing the ballIn Braxil 2014, there are no "tackles" or "faults". If a rival player is moving with the ball and you want to steal it, you must go towards the ball with one of your players and press one of the buttons to make a shoot (A, B or X) when you are close.
In some situations, you can even steal the ball simply walking with your player close to it, but it will not work in every case, so the easiest way to steal a ball, is simply shooting it with one of your players, towards the position of another of your players.
Tournament rulesIf you select the World Cup game mode, you must choose a team, and you will play a simulation of the Brasil 2014 World Cup. In the first stage, your team is in a group of 4 teams. You must play with the other 3 teams, and try to finish in the top-2 places. A win gives you 3 points, a tie gives you 1 point, and a defeat gives you 0 points.
Note that in the first stage you can lose a match, and the game is not over, because maybe you still have chances of qualifying in the top-2.
After you have played with all your opponents, if your team is in the top-2 of the group, you are qualified for the second round (the knockout). On the other hand, if you fail, your team is eliminated and the game is over.
So, if you manage to finish the first stage in the top-2 positions, your team is qualified for the final stage (the knockout). Then, you must play up to 4 matches with the other surviving teams (Round of 16, Quarter-finals, Semi-finals, and Final game). If you loose a match in the knockout, you are eliminated and the game is over. On the other hand, if you win all the matches, you are the World Champion!
Finally, if you play a match in the knockout and it ends in a draw, you will play an extra-time. If the tie persists after the extra-time, you will play a serie of 5 penalty shoot-out. If the tie persists after all the penalties, you will play the "sudden death", shooting one penalty at a time until one team scores and the other fails (like in real life).
FAQQ. Why is this game named BraXil 2014?
Because it is inspired in the Brazil 2014 World Cup, and it is a game for Xbox.
Q. This game is too easy/difficult!!
You can try to play the world cup with a stronger/weaker team, to have a different challenge level.
Q. How can I control the goalkeeper?
Goalkeepers are automatically controlled by the CPU.
There is only one exception: in penalty shoot-outs, you can select the direction that your goalkeeper will jump to.
Q. Can I manually change the names of the players?
Yes, there is a folder named "rosters" with TXT files with the names of the players.
You can change these names if you want.
Q. Can I manually change the abilities or even the uniforms of the teams?
Yes, you can edit the "t.txt" file to change everything related to the teams. Be warned that you must keep the exact format of this file, or the game may crash.
So, it is recommended to backup the original "t.txt" file if you want to change it, so that you can restore it if anything fails after your modifications.
Controls:
In game:
D-Pad - Moves the player of your team that is closest to the ball
A - Strong flat shoot (use this to shoot to goal, or make long passes)
B - Weak flat shoot (use this to make short passes)
X - High shoot
Start - Pause gameplay, Quit current game (progress will be lost)
Menus:
D-Pad - Move the cursor to make a selection (if available)
A - Select, Accept, Continue
Start - Pause gameplay, Quit current game (progress will be lost)
White+Black (title screen) - Quit the game and exit to the dashboard
Screenshots:
Media:
Credits:Thanks to all the persons that, during the years, have built an awesome scene for the Xbox: developers, graphic artists, contributors, Xtras creators, admins, moderators, and gamers too.
Thanks to all the people that have helped me in the development of this or any other of my projects: Neobomb, Hyper_Eye, Madmab, Wimpy, Freakdave, weinerschnitzel, XtecuterX73, darknoir, bigby, Waal, elconejotres, the Surreal64 CE team, dominater01, NOTTHESAME, xcalibur, and many more.
Huge thanks to Paolo Nicoletti (Karza Games), as he ripped a lot of the sprites and gave me permission to use them in this game.
-
Submitter
-
Submitted07/10/23
-
Category
-
-
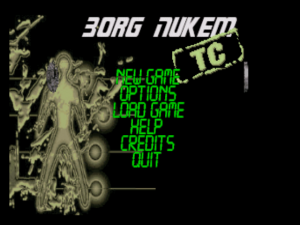
Borg Nukem
This is a port of kef_Nukem's Borg Nukem, using A600's xDuke for the Xbox, which is a port of Duke Nuken 3D based on JFDuke3D.
Installation:Download contains xDuke, which includes Borg Nukem standalone mod.
This port supports HDTV modes but it you want to use the 720p mode, you must run the default720.xbe or rename it to default.xbe.
Controls:
Left-Stick - Move Forward/Backward/Strafe
Left-Stick Thumb - Crouch
Right-Stick - Turn Right/Left, Look Up/Down
Right-Stick Thumb - Center View
L - Run
R - Shoot
White - Use MedKit
Black - Quick Kick
A - Activate, Select Menu Option, Confirm
B - Use Inventory Object, Back to the Previous Menu
Y - Map On/Off
D-Pad Up/Down - Next/Previous Weapon
D-Pad Left/Right - Inventory left/right
Start - Escape
Back - Jetpack
Screenshots:
Known issues:Polymost renderer has some minor graphic glitches (this is a JFDuke3D bug).
Credits:
Thanks to the SDLx libs by Lantus, Jonof and Mephisto.
-
Submitter
-
Submitted07/10/23
-
Category
-
-
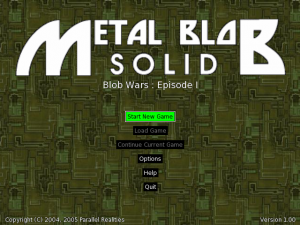
Blob Wars X
BlobWarsX is a port of Blob Wars for the XBox.
It's a platformer similar in theme to Metal Slug where you must rescue MIAs, collect weapon power-ups, etc.
User Guide:
To resize the screen, press Start on the main menu. Then use the Left/Right Thumbsticks. Then press Start again.
Cheats are available in the Options menu.
Controls:Left-Stick - Move guy, navigate menus
A - Jump
B - Use jetpack
X - Fire weapon
Y - Show map
Start - Pause
Back - Escape/Cancel
Screenshots:
Credits:
Super thanks to Lantus for his SDL-XBox libraries.
-
Submitter
-
Submitted07/10/23
-
Category
-
-
BlasteroidsX
An original game developed for the xbox, similar to Asteroids.
Installation:Copy the default.xbe, arial18normal.bmf, hiscores.txt, Media and Graphics folder to your Xbox.
Execute default.xbe
Controls:Left-Stick - Rotate
Right-Stick - Thrust
D-Pad - Alternative Rotate and Thrust
R/A - Fire
Screenshots:
Credits:By MorseKode (MorseKode@xfactordev.net).
Kudos goes out to Wishi and Ben_3D for the help and support.
xfactor on efnet.
-
Submitter
-
Submitted07/10/23
-
Category
-
-
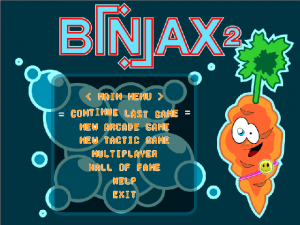
Biniax 2
This is the XBOX port of BINIAX 2, a challenging and logical puzzle game developed by Jordan Tuzsuzov.
User Guide:Biniax 2 has three game modes (two single player and one multiplayer).
In each of these modes you move a cursor block around a grid arrangement, destroying two-color blocks by moving into them.
A block can only be cleared if one of the two colors that comprise it matches the color of your cursor block.
After you cleared a block, your cursor changes to the other color of that block.
As you progress, more blocks will push their way down the screen. The game is over if you are pushed off the screen.
Highscores and autosaves are stored in E:\TDATA\00103081.
Controls:D-Pad/Left-Stick - Cursor, Navigate through the menu
A/Start - Select an option in the menu
Y - Sweep a column of blocks (not available in multiplayer mode)
B/Back - Return to the menu (the game can be resumed)
Screenshots:
-
Submitter
-
Submitted07/10/23
-
Category
-


[DL] TruHeXEn 2024 - Unofficial by OGXBox (1fichier & Mega) (21.08.2024)
in Xbox Homebrew Apps
Posted
Hidden Content