

Dempsey_86
-
Posts
576 -
Joined
-
Last visited
-
Days Won
15
Content Type
Profiles
Forums
Store
Gallery
Events
Downloads
News
Tutorials
Files posted by Dempsey_86
-
MednafenX Nes
By Dempsey_86 in Emulators
MednafenX-NES - NES Emulator for XBox
User Guide:
Features :
- Emulates NES/Famicom Disk System/VS UniSystem
- Excellent compatibility - ported from Mednafen
Default ROM dir is D:\NESROMS
Everything can be changed from the configuration menu.
If you have never used one of my ports before, I highly suggest you go
through all of the various configuration screens (particularly
"General Settings") to see what you can do.
Even if you are already familiar with the standard XPort interface,
I suggest you at least take another look at "General Settings" because
there may be options you have not seen before.
Controls:
Select menu options with the DPAD or with R/LTrigger. The speed of
R/LTrigger movements can be controlled by :
Configuration -> General Settings -> Page 2 -> Menu Scroll Speed
There are some places where you can enter or change values. This
can usually be done in a variety of ways include DPAD Left/Right,
R/L Trigger, and L/R Thumb. Try all of them if the values are changing
too slowly.
"A" selects the highlighted choice. "B" cancels/returns.
"Y" from a file-select list will go up one directory.
"X" to select a game brings up the game configuration screen
"WHITE" to select a game adds it to your favorites.
"BLACK" to select a game (on your favorites list) deletes it from the list.
Screenshots:
Credits:
X-port for porting a great collection of emu's over to the xbox, releasing the source code, and answering my stupid questions.
Atariage (Albert in particular) - For providing a place for me to ramble on. For encouragement in general.
Gilou9999 for a new PM3 skin, synopsis, suggestions, rumble setups, etc.
Wimpy for giving us a home and irc channel on the web.
Megaman_? for a mega cheat code database.
BombBloke for scripts that make life easier.
Cbagy for suggestions for the Skin and showing me how to create good quality game previews. More of that to come, and hopefully some neat skin stuff!
Nate1579 for some XBE Icons.
Kenshiro for ensuing hilariousness.
Waal, Bigby, Carnage By Bob, Stupot for motivating me to get working on lesser known systems.
Comments of support from various interested parties.
If I missed anybody shoot me an email and I'll update this file.
1 download
(0 reviews)0 comments
Submitted
-

Mednafenx Lynx
By Dempsey_86 in Emulators
MednafenX-Lynx - Lynx Emulator for XBox
User Guide:
Features :
- Emulates Atari Lynx
- Excellent compatibility - ported from Mednafen
Default ROM dir is D:\LYNXROMS
Controls:
Select menu options with the DPAD or with R/LTrigger. The speed of
R/LTrigger movements can be controlled by :
Configuration -> General Settings -> Page 2 -> Menu Scroll Speed
There are some places where you can enter or change values. This
can usually be done in a variety of ways include DPAD Left/Right,
R/L Trigger, and L/R Thumb. Try all of them if the values are changing
too slowly.
"A" selects the highlighted choice. "B" cancels/returns.
"Y" from a file-select list will go up one directory.
"X" to select a game brings up the game configuration screen
"WHITE" to select a game adds it to your favorites.
"BLACK" to select a game (on your favorites list) deletes it from the list.
================
Text File Viewer
================
DPAD Up - Up one line
DPAD Down - Down one line
DPad Left - Up one page
DPAD Right - Down one page
R Trigger - Scroll down
L Trigger - Scroll up
A - Start search
X - Continue last search
White - Top of file
Black - End of file
Y - Simulate fixed-width font
Back - Decrease width of simulated fixed-width font
Start - Increase width of simulated fixed-width font
B - Exit
Screenshots:
Credits:
3 downloads
(0 reviews)0 comments
Submitted
-
MAMEoXtras
By Dempsey_86 in Emulators
MAMEoXtras - MAME/Arcade Emulator for XBox
Controls:
Available ROMs screen:
X - Show Help file (the readme.txt isn't kept up to date, except
for this one key :))
MAME input mappings:
As of version 0.5a, there is no INI file to reconfigure the keypad mappings.
Reconfiguration can be done via editing the osd_customize_inputport_defaults
function in xbox_JoystickMouse.c.
All UI config utilizes the "back" (coin 1) button, as this is (hopefully)
the least disruptive during normal play.
"Cancel" : Joypad 1, BACK and START
"Toggle Crosshair" : Joypad 1, BACK and Left Analog button
"UI Configure" : Joypad 1, BACK and White button
"Pause" : Joypad 1, BACK and Black button
"On screen display" : Joypad 1, BACK and Right Analog Button
"Reset ROM" : Joypad 1, BACK, Left Trigger, and Right Trigger
"Load State" : Joypad 1, BACK, Right Analog button, and Left trigger
"Save State" : Joypad 1, BACK, Right Analog button, and Right trigger
Player Controls
Button 1 - A
Button 2 - X
Button 3 - B
Button 4 - Y
Button 5 - Left Trigger
Button 6 - Right Trigger
Button 7 - Left Analog button
Button 8 - Right Analog button
Button 9 - White
Button 10 - Black
Enter Coin - Back
Start - Start
Screenshots:
FAQ:
Q How do i install this emulator
A See below
First check your xbox E:\Tdata\4d414d46 folder to make sure there is no previous save file
folder inside it If there is it will be called system just remove it before booting MAMEoXtras
for the 1st time To install on your Xbox HDD just simply pick your preferred emulator folder
and FTP it across
Q Why When i try to start a game the Emulator loads a different one and Then Errors out
A You didnt remove your previous save file before booting up this new version
Q How do i skip warnings before the games load
A In the main menu make sure all skip warning settings are enabled
Q What games does this play
A Mame arcade games only
Q Does it play console games
A Dont be a daftie
Q Does it play Final Burn Legends Arcade Games
A Nope use FBL v1.26
Credits:
MAMEoXTRAS contains coding by: Erik Abair, opcode, luckyMIC, superfro, XPort,
bendermike, Ebsy, HK$, IQ_132, gamezfan, BritneysPAIRS, dink, leonv32 and grant2258.
----------------------------------------------------------------------
This is an update to MameDOX based on version 1.1 it contains new updated driver work
by IQ_132 gamezfan and BritneysPAIRS, plus brand spanking new skins by destronger
and cbagy, plus it features support for many Arcade games that are playable nowhere
else on the Xbox.
Thanks go out to floydthebarber for creating and sharing out the MAMEoXtras
Best Of The Best Rompack tattyfurby for creating all those Art and Sample packs
and leonv32 for renaming many romsets back to what they should be and spotting
many roms which were not declared correctly in the source.
Big Thanks To....
MadMab
+T+
IQ_132
dink
BritneysPAIRS
grant2258
mahoneyt944
leonv32
cbagy
destronger
hcf
XtecutorX73
For help guidance and support Thx alot guys couldn't have done it without you
9 downloads
(0 reviews)0 comments
Updated
-

MADrigalX
By Dempsey_86 in Emulators
MADrigalX makes possible to play a lot of the "game and watch" handheld simulators developed by MADrigal... in your original Xbox! It is a standalone emulator based on the "game and watch" Libretro core and the work of Andre Leiradella.
User Guide:
Currently, 59 games are supported (54 of them are already playable at full speed!). You don't need to search for "roms", as the games are already included in the emulator.
Controls:
Each game has different controls, because each machine has different buttons. If you keep pressed the START button, you will see a help window with the key mapping for the game that you are playing to.
In a lot of games, the LEFT and RIGHT TRIGGERS are mapped to the "Game A" and "Game B" buttons. So, to start playing you should press the LEFT trigger (easy game) or the RIGHT trigger (difficult game). A few games have different controls though, and you can always see them pressing START.
Besides, if you press BACK you will toggle the ZOOM mode, making the screen larger. Please, be informed that zoom mode is experimental.
If you simmultaneously press START+BACK, you will exit from the game.
Known issues:
* There are a few games that are still not playable: Chicky Woggy, Crazy Chewy, Donkey Angler and Pac Man.
* The "zoom" functionality is still working bad in a few games.
* The coconut doesn't work well in the "Donkey Kong Jr (Panorama version)". This is not important because you can play the Coleco version, that is basically the same and works well 😉
* A few games rarely crash when booting. If this happens, please re-launch the emulator and run the game again.
These issues will hopefull been fixed in later updates.
Screenshots:
Credits:
Big thanks to Luca "MADrigal" Antignano for developing these awesome simulators and giving permission to make this possible, and also for his huge support with the rom list interface.
Besides, big thanks to Andre Leiradella (twitter handle: @leiradel) for his incredible work converting those simulators to Lua and creating the libretro core to run them.
Also big thanks to the Libretro team for caring about generic emulation for everybody!
1 download
(0 reviews)0 comments
Submitted
-
KegsX
By Dempsey_86 in Emulators
KEGS-X Apple IIgs/e/c/+ Emulator port for XBox
User Guide:
Almost everything can be changed from the configuration menu. Here are the
things that require manual modifications to the KEGSX.INI file included in
the package:
Samba share name - goes in the [GENERAL] section. Example:
smbshare=SMB://USERNAME:PASSWORD@COMPUTERNAME/SHARENAME
Screenshot directory - default is E:\SCREENSHOTS - goes in [GENERAL] section
Example:
screenshot_dir=E:\SCREENSHOTS
Skin directory - where skins can be found. Default is D:\EMUSKINS - goes in
[GENERAL] section. Example:
skin_dir=D:\EMUSKINS
Save directory - this is where you want all your saved games to be stored.
Default is E:\SAVES\KEGSX. Goes in [GENERAL] section. Example:
save_dir=E:\SAVES\KEGSX
The default ROM directory INI setting goes in the [GENERAL] section as follows:
rom_dir=d:\APPLEDISKS
If you change any of the above items, then you must upload the new KEGSX.INI
file to your XBox, load up KEGSX, then select "Force Reload D:\\*.ini
Settings" from the Configuration menu. Please note that this will overwrite
any of the setting changes you might have made after you first loaded
KEGSX.
Controls:
Select menu options with the DPAD or with R/LTrigger. The speed of
R/LTrigger movements can be controlled by :
Configuration -> Menu Scroll Speed
There are some places where you can enter or change values. This
can usually be done in a variety of ways include DPAD Left/Right,
R/L Trigger, and L/R Thumb. Try all of them if the values are changing
too slowly.
"A" selects the highlighted choice. "B" cancels/returns.
"Y" from a file-select list will go up one directory.
Screenshots:
Credits:
Huge thanks to J-RED for another excellent skin!
1 download
(0 reviews)0 comments
Submitted
-
Handheld DreamX
By Dempsey_86 in Emulators
Handheld DreamX emulates a lot of old handheld machines from Coleco, Bandai, Tomy, Epoch... plus some vintage electronic games like "MB Simon".
Controls:
Controls are different for each game, and could be redefined in the second option of the main menu (press Start to get this menu).
But usually, games start pressing the WHITE button or the A button. In a few cases like the Pacman games, we should press Left or Up to start the game.
The normal controls include the 4 directions Up-Down-Left-Right and sometimes one or two buttons (usually A and B). In some games (marked in yellow color) a keyboard is recommended to be able to play.
Pressing BACK the emulator will prompt you if you want to finish the game. Press A to confirm or BACK again to cancel.
Several games have an option in the main menu ("Machine configuration") where you can set different difficulty levels or kinds of gameplay.
Finally, the emulator supports a simple feature to save state. To save state you must press the RIGHT THUMBSTICK (and A button to cofirm, or BACK to cancel), and to load state you must press the LEFT THUMBSTICK (and again, A button to confirm). This is useful because some handheld machines begin the game in a very slow speed (and sometimes it is boring if you are an expert in that game). Saving a state in the moment that the game becomes interesting, makes possible to skip this initial stage.
Screenshots:
Credits:
Handheld DreamX
by hcf
2 downloads
(0 reviews)0 comments
Submitted
-
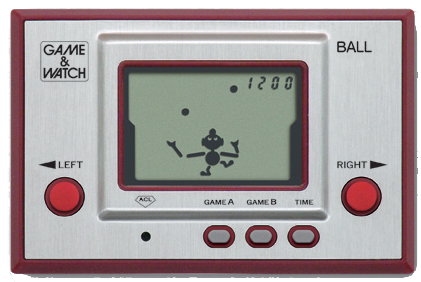
Game&WatchX
By Dempsey_86 in Emulators
Game & Watch emulator for xbox.
User Guide:
Game&WatchX is an emulator to play all the "Game & Watch" games (more than 50!) in your Xbox.
It supports all those games, including Multi Screen, Tabletop, Panorama and MicroVS ones,
plus the new homebrew game "Bride".
The rom for the free game "Bride" is included. To get the rest of the games, please read the section
"Getting roms". Put your roms in the "roms" folder and launch the emulator to play. It should work both
from hard disk and DVD.
Controls:
The controls are simple: D-pad for direction, A and B are the actions buttons (if they exist in the game),
START to play "Game A" (Easy) and BACK to play "Game B" (Hard). Press START+BACK to exit.
Screenshots:
Credits:
It is inspired in Mame and the work of bzhxx and kbeckmann. Thanks a lot!
8 downloads
(0 reviews)0 comments
Submitted
-
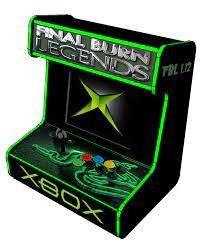
Final Burn Legends
By Dempsey_86 in Emulators
Final Burn Legends
User Guide:
Most games work perfectly (and at 60 FPS). Most of the ones that don't
work require VM. Some games don't work correctly or at all but that is
rare.
If a game does not run at 60 FPS, the first thing to do is
disable software filters. Another option is to run in 480p. Games that
use VM may run better in lower resolutions since there is more RAM.
Controls:
ROM Browser:
Digital Pad Up/Down: Select a game
Left/Right trigger: Fast scroll
A: Start a game
Right Analog stick Left/Right: Cycle through screenshots
White: Add/Remove from favorites
Y: Go to top of the list
Digital pad Left/Right: Selects a game in the next/previous letter
of the alphabet
Back: View arcade information
Start: View arcade images
Emulation:
Right Analog Stick click: Pause emulation
Menus:
Right Analog stick Up or A: Increase value or accept
Right Analog stick Down or X: Decrease value
B: Cancel or exit
Screenshots:
FAQ:
Question: I added games to the ROMs folder and/or changed the ROM paths.
The games don't show up in the list.
Answer: Main Menu->Options->Rebuild Game List. Make sure the rom files
are lower case
Question: When I move text in the GUI off the screen the Xbox crashes.
Answer: The Xbox doesn't like to render text outside of the screen.
There's nothing I can do to fix that.
Question: Can I change the controller that is used for the GUI.
Answer: Yes. Change DefaultController in the FinalBurnLegends.ini file.
The emulator must be run at least once before this file is
created.
Question: Are any files saved in TDATA/UDATA folder?
Answer: Other than the icon, no.
Question: When I start Final Burn Legends, it just returns to the Xbox
dashboard.
Answer: Verify that all files and folders copied to the Xbox.
Question: When I start a game it displays an error message and returns
to the GUI.
Answer: Verify your ROMs with ROM Center.
Question: I verified my ROMS with RomCenter, but some NeoGeo games say
M1-ROM error.
Answer: RomCenter doesn't detect this. The names and CRC of some files
will match the dat file, but the ROM is still wrong. The only
way to fix this is to get a new ROM.
Question: Where do I get ROMs from?
Answer: They are created from your arcade board with tools you create
to read the data.
Question: Are you going to release a torrent with all the games?
Answer: Not a chance
Question: Will my ROMs from FBA-XXX Pro work with this port?
Answer: Some will. Many won't. Use the dat file provided to verify
and fix your games. It will also generate a list of what games
are missing.
Question: Several NeoGeo games take a long time to start.
Answer: That's the best it will be. The Xbox doesn't have enough RAM
to start them as fast as a PC can.
Question: What are the recommended audio and video settings?
Answer:
For a modern look:
Flicker Filter set to 0 or 1, Soften turned off, Software Filter
SuperScale2X, Low pass filter turned off, Vsync enabled, and Hardware
filter Bilinear (or Point if running in 720p or 1080i).
For a more original look:
Answer: Flicker Filter set to 0 or 1, Soften turned on, Software Filter
Simple2X, Low pass filter turned off, Vsync enabled, and Hardware filter
Bilinear.
Credits:
Kenshiro (Big thanks to him for the NeoGeo and other VM code). The
NeoGeo compatibility would be much lower without his code.
iq_132 for the PGM code and other help
Wac0 (Most of the GUI was done by him), Giles9999 (GUI), and anyone who
made a logo
Xport, FinalDave, and anyone who worked on any of the FBA PC versions or
Xbox ports.
Antirad for the great logo.
Anyone I forgot.
3 downloads
(0 reviews)0 comments
Submitted
-

Final Burn Consoles
By Dempsey_86 in Emulators
Final Burn Consoles
User Guide:
This was originally going to be something I put together just for my
own use but as others expressed interest in the idea I decided to
release it. Final Burn Consoles is a build of Final Burn Legends that
contains only drivers for the home console systems currently supported by
FBA; the Sega Genesis, the Neo Geo AES console, and the Capcom CPS Changer.
FBC is also optimised to provide as authentic a recreation as possible
of playing games on these systems. Please see the FAQs below for more
information.
Controls:
OM Browser:
Digital Pad Up/Down: Select a game
Left/Right trigger: Fast scroll
A: Start a game
Right Analog stick Left/Right: Cycle through screenshots
White: Add/Remove from favorites
Y: Go to top of the list
Digital pad Left/Right: Selects a game in the next/previous letter
of the alphabet
Back: View arcade information
Start: View arcade images
Emulation:
Right Analog Stick click: Pause emulation
Menus:
Right Analog stick Up or A: Increase value or accept
Right Analog stick Down or X: Decrease value
B: Cancel or exit
Screenshots:
FAQ:
Question: What's the point of this? Can't I just do the same thing by
playing with settings in FBL?
Answer: Yes. But this is for people that like the idea of having a separate
emulator for the home console variants of these systems.
Question: How is the Genesis driver better than NeoGenesis?
Answer: It isn't. Although it probably runs some pirate cartridges that
Neogenesis doesn't and I'm told the scanline filter is better.
Question: Why don't my FBL ROMs work?
Answer: Because FBC uses console ROM dumps where possible. These can be
built from a full FBL set. Check the DATs provided in the tools\ folder.
Question: Why are some Neo Geo games missing?
Answer: Because not all Neo Geo MVS arcade games were released as AES
home console cartridges.
Question: CPS Ch... Wha?!
Answer: The CPS Changer was Capcom's answer to the home Neo Geo. It
played specially modified CPS1 cartridges of which only 12 were ever
released. Use Google, there's a lot of good info available on this rare
system.
Question: Why use only one emulator? Why not just take a bunch of existing
Xbox emulators and patch them into the FBL UI?
Answer: Don't be stupid.
Credits:
Many thanks to:
nes6502 for this excellent Xbox port of FBA.
iq_132 for the Xbox PGM drivers and countless other driver additions.
kenshiro for his updated drivers and fixes.
The Neosource community for many FBA code updates and fixes.
lantus for FBANext.
Neil222 for his help and the new default skin.
Special thanks to neoryu for his testing and support.
And to Alinky for her HDTV and patience.
Antirad for the great logo.
Kenshiro (Big thanks to him for the NeoGeo and other VM code). The
NeoGeo compatibility would be much lower without his code.
iq_132 for the PGM code and other help
Wac0 (Most of the GUI was done by him), Giles9999 (GUI), and anyone who
made a logo
Xport, FinalDave, and anyone who worked on any of the FBA PC versions or
Xbox ports.
Anyone I forgot.
4 downloads
(0 reviews)0 comments
Submitted
-
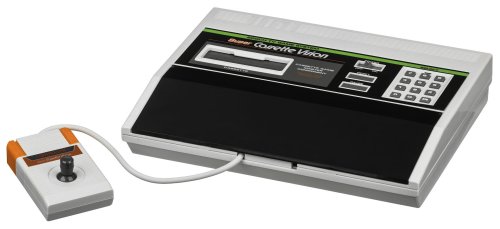
EpochX
By Dempsey_86 in Emulators
EpochX is an emulator of the Epoch Super Cassette Vision console for the original Xbox.
User Guide:
Copy the emulator in the hard disk of your Xbox. Then, roms must be copied compressed in ZIP format, inside of the "roms/scv" folder (don't delete the existing files!). Then, launch the emulator and select your desired game from your list, or select "Doraemon Nobita's Time Machine" to play the Doraemon game.
Controls:
Although each game may have different controls (and you can redefine them), basically the WHITE button is "1" in the console, the BLACK button is "2", and the "A" button is Start. With this in mind, press the buttons to select your desired game mode in the menus, and finally press "A".
In the main part of the games you will need to press this sequence of buttons to play in Amateur mode: WHITE, WHITE and A buttons (because Amateur mode is usually the "1" option in the menus). In order to play with other difficulty level, you will need to press BLACK (to select the "2" option) or even "Y" (to enter in a submenu, like in Comic Circus).
OTHER CONTROLS (they can also be redefined in the main menu):
* START: Opens or closes the main menu
* BACK: Exits to the rom list or cancels an option.
Screenshots:
Credits:
2 downloads
(0 reviews)0 comments
Submitted
-
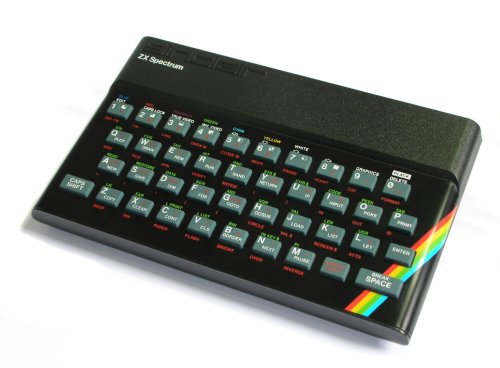
DidntXSpectrum
By Dempsey_86 in Emulators
DidntXSpectrum FUSE Spectrum Emulator port for XBox
User Guide:
- Emulates the Spectrum 16/48/128/Plus2/Plus2a/Plus3/Plus3e/TC2048/
TC2068/TS2068/Pentagon/Scorpion/SE
- Excellent compatibility - ported from FUSE
Put games in the \SPECGAMES directory
Controls:
If your keyboard is not acting the way you want, make sure that all
the joystick configuration options are turned off.
Screenshots:
Credits:
X-port for porting a great collection of emu's over to the xbox, releasing the source code, and answering my stupid questions.
Atariage (Albert in particular) - For providing a place for me to ramble on. For encouragement in general.
Gilou9999 for a new PM3 skin, synopsis, suggestions, etc.
Stupot for making lotsa game preview videos.
Comments of support from various interested parties.
If I missed anybody shoot me an email and I'll update this file.
Here's to the two people out there that use this emulator.
4 downloads
(0 reviews)0 comments
Submitted
-
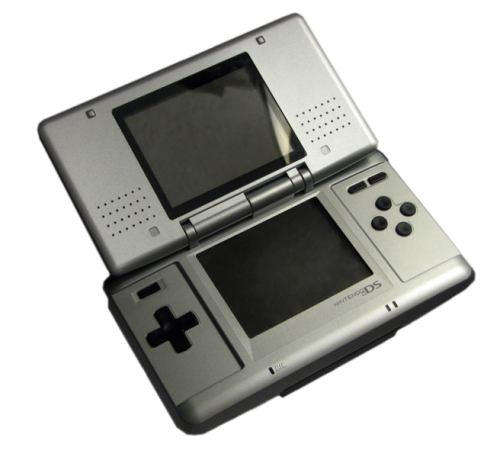
DesmumeX
By Dempsey_86 in Emulators
DesmumeX is a Nintendo DS emulator for Xbox. It is based on the 0.9.11 version of Desmume.
User Guide:
Please, don't expect a good emulation in many of your roms. This emulator is still not fully optimized. Anyways, this version can play some games quite well.
IMPORTANT: To toggle between the different display modes, press the BLACK BUTTON (read the "Controls" section for more information). If all the action only happens in one screen, you will feel a much better experience if you choose to show only that screen at full resolution.
Only uncompressed roms are supported.
INSTALLING:
-----------
To install the emulator, simply copy it to your hard disk, and put the roms inside the "roms" folder. Create a "cfg" folder if you want to store config files.
If you had old screenshots for the rom list, you will need to rename their extensions from JPG to PNG (this was explained in the section "ROM LIST RESOLUTIONS").
IMPORTANT!!!!!
---------------
* Roms MUST be placed in the "roms" directory.
* Roms must be UNCOMPRESSED, with the .NDS extension.
* This emulator can only work from hard disk.
* Games can be trimmed with a program like "NDSTokyoTrim25Beta2.exe" to make them smaller, and they will use less space in disk.
* Remember that when you have selected a configuration for your rom in the GUI, you can press the "Y" button (before starting to play the game) and then the emulator will create a config file for that game (stored in the "cfg" folder). Next time that you play that game, the emulator will "remember" your favorite configuration. This system needs that the folder "cfg" is existing, to be able to create the config files. A few sample configurations have been included.
Controls:
The Nintendo DS has 2 screens. The screen of below can be touched with a digital pen named "Stylus". In DesmumeX, I have implemented both the physical buttons of the DS, and the possibility of "touching" the screen with a virtual "stylus".
Physical buttons:
* D-pad: It's mapped to the D-pad of the Nintendo DS
* A,B,X,Y buttons: They are mapped to the Triangle, Square, Circle, Cross buttons of the DS.
* Left and right triggers are mapped to the triggers of the DS. Start button is mapped to the Start button of the DS.
Control of the Stylus:
* Left thumbstick: Move the virtual cursor.
* White button: Touch the screen with the virtual cursor. You can even drag and drop, keeping the white button pressed.
* Pressing the right thumbstick changes the color of the cursor.
* Pressing the left thumbstick toggles if we want to display the amount of free memory, and the frames per second.
If you don't need the Stylus, you can move the cursor down below the screen, and it will disappear. Move it up, and it will appear again.
Change of screen:
* Black button: Changes the screen to be displayed on the TV. We can toggle between seeing both 2 screens (above and below), only the first screen at full resolution, or only the second screen at full resolution.
Note: Showing only one screen is slightly faster than displaying the 2 screens.
With the BACK button, the configuration menu is displayed. Pressing START + BACK simmultaneously, you will exit to the rom list.
FAQ:
Q: Can I use compressed/zipped roms?
A: No
Q: The game is running, but the image is frozen!
A: Try selecting "Graphics: everything", or selecting a different value for Frameskip. Some games only refresh the screen on odd frames or on even frames. So, if we use an odd value for frameskip and the game refreshes in odd frames, we will not see any change on the screen...
Q: Can I use some software to make the big roms smaller?
A: Yes, some programs like "NDSTokyoTrim25Beta2.exe" can make roms a bit smaller.
Q: This game is too slow, even changing the configuration options!
A: I'm sorry, this emulator is still not fully optimized. If you want to help to improve this emulator, let me know 😉
Q: This game is too fast!
A: Try enabling the "Limit to 60 FPS" option, and the game should work at a proper speed now. If it does not work, then disabling the dynamic recompiler will make things much slower.
Q: I have selected my language in the configuration options, but the game is played using another language!
A: You must check that your rom supports the language that you selected. For example, if you want to play in French or Spanish, sometimes you should choose the European version of that game, because the [US] one will probably admit only English.
Q: My screenshots are not displayed anymore!
A: The new rom list looks for screenshots with the extension PNG. Rename the old JPG extension of your screenshots to PNG, and you will see them again.
Q: My screenshots are very small now!
A: You are probably using an Xbox with HD resolution, so the rom list is displayed in HD resolution now... but you are still using SD screenshots. You will need larger screenshots. There are some samples included in "media\artwork\action\HD artworks"; simply move them to the "media\artwork\action" folder and they will be displayed very well (your roms must be named with the same filename, except the extension).
Screenshots:
Credits:
Thank you very much to Gilou9999, Madmab, SPPV, Weinerchnitzel, Neobomb, Freakdave, Hyper_Eye, XtecuterX73, and everybody else who helped!
12 downloads
(0 reviews)0 comments
Submitted
-

DaphneX
By Dempsey_86 in Emulators
DaphneX Emulator
User Guide:
Installation
------------
Recommended Resolutions for Dragons Lair and Space Ace are 640x480, however
720x480 should also work. This is mainly to support DVD-VIDEO mpeg rips.
Games with overlays should be generally be 512x480. See the Daphne website
for valid resolutions. Resolutions of 720x480 should be considered the
maximum for DaphneX.
I highly recommend a single mpeg as the seeking will be faster and the general
gameplay experience will be better. Also the DVD-ROM mpegs are not very good
quality and have interlacing issues. Keep this in mind, since Daphne can only
display as good as the source. The best source is to use your original laserdisc.
Supply .m2v, .ogg, .dat files for the game you with to play. If you have a PC
version of Daphne, you are in luck as you can use your same mpeg/ogg/dat files.
You will also need to supply the ROM images for the games. For help creating mpegs
to use with DaphneX, please visit the Daphne website (http://www.daphne-emu.com)
Controls:
Note that return to menu is now 'LEFT TRIGGER + RIGHT TRIGGER + PRESS LEFT THUMBSTICK
Exit to Dashboard is 'LEFT TRIG + RIGHT TRIG + START + BACK' on Main Menu
Seektest - Highlight game to seek and press left thumbstick
Screenshots:
Credits:
DaphneX V0.96 Beta 06/14/03
by Kubik
6 downloads
(0 reviews)0 comments
Updated
-
.thumb.jpg.719e0de69cb93011c339bd21f1608841.jpg)
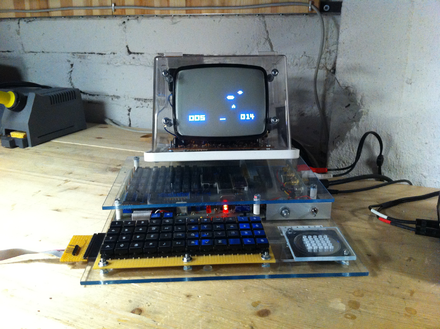
Classic99X
By Dempsey_86 in Emulators
Classic99x - Texas Instruments 99 Emulator for XBox
User Guide:
Place your cartridge games in the \TIGAMES directory.
The file format for TI99 cartridge images is rather strange. Each cartridge
game consists of 1 to 3 files. These files need to be named in a specific
manner to be correctly interpreted. The naming is like this:
XXXXXC.BIN
XXXXXD.BIN
XXXXXG.BIN
Where XXXXX is the descriptive name of the game and C/D/G represent the different
parts of the cartridge ROM.
All you have to do to play these is select one of the C/D/G files. Classic99X
should be able to locate all of the appropriate pieces and put them together.
Be sure to select "Cartridge" as the image type during game configuration.
Due to this strange naming, there is not currently any formal support for ZIPped
cartridge images. You should use the uncompressed BIN files instead.
How to Use Disk Files
---------------------
Place your disk files in the \DISKFILES directory.
Select one of the disk files and choose "Program File" as the image type.
This will also automatically generate some text that can be pasted into
the emulator that will assist you in running the program file you selected.
After configuring the game, you will enter the emulation. You can select
regular or extended BASIC. Once the BASIC selection is loaded, go to the emulation
options menu (press RTHUMB) and then select "Paste Lines into Emulator" to
initiate a command sequence that should launch the program. You can hand-edit
these lines to be pasted if you wish.
If you use a cartridge game that needs to read information off of a disk drive
device (DSK1) then you can place the files it needs in the \DISKFILES directory.
The \DISKFILES directory is always mounted as the DSK1 device whenever you
launch a cartridge image. If you launch a disk file image, then DSK1 will be
mounted as the directory in which the disk file image is located.
How to Use the TI99 System
--------------------------
Please consult the section "USING TI PROGRAMS" of the LoadingFiles.txt file for
useful information on how to use TI99 programs.
Controls:
Default button mapping to enable rewind is BLACK+WHITE.
Once rewind is enabled, press LTRIGGER to actually rewind.
Screenshots:
Credits:
1 download
(0 reviews)0 comments
Submitted
-
Chip8x
By Dempsey_86 in Emulators
Chip8X - CHIP8/SuperCHIP8 Emulator for XBox
User Guide:
Features:
- Emulates the CHIP8/SuperCHIP8
- Excellent compatibility - ported from Chuit
Put games in the \CHIP8ROMS directory
Controls:
Default button mapping to enable rewind is BLACK+WHITE.
Once rewind is enabled, press LTRIGGER to actually rewind.
Screenshots:
Credits:
X-port for porting a great collection of emu's over to the xbox, releasing the source code, and answering my stupid questions.
Surreal CE team - Just because they are cool!
+T+, iq_132, NeoBomb, and XtecuterX73 for helping keep the xbox-scene alive.
Atariage (Albert in particular) - For providing a place for me to ramble on. For encouragement in general.
Wimpy and Perr - For also providing a place for me to ramble and to make my goods available. 🙂
Gilou9999 for new COLOUR SD and HDTV skins, synopsis, suggestions, rumble codes, etc.
Shout out to Hyper_Eye, SPPV, hcf, A600, Destronger, +T+, Neobomb, incrediclint, Surreal CE team and all those who are honourable and keep the xbox-scene alive.
Comments of support from various interested parties.
If I missed anybody shoot me an email and I'll update this file.
4 downloads
(0 reviews)0 comments
Submitted
-
.thumb.jpg.373deb3b8daba99b4cfb8a92677bd8a2.jpg)
Bluemsxbox
By Dempsey_86 in Emulators
BlueMSXBox BlueMSX Emulator port for XBox
User Guide:
Features :
- Emulates MSX/MSX2/MSX2+
- Excellent compatibility - ported from BlueMSX
Default ROM dir is D:\MSXROMS
When you change disks while playing, the configuration of the game is updated as well.
For example, if I start a game with DISK1 and then during the game I change the disk
in drive 1 from DISK1 to DISK2, then the configuration of the game will now state
that the disk in drive 1 is DISK2. When you start the game again from the main menu,
it will try to boot off of DISK2. This is intentional. Save states for multiple disk
games requires that the disks present in the drives when the state was saved are there
when the state is reloaded.
If you are playing a game where you have to change the disks during gameplay, then
I strongly suggest these tips:
- Turn on auto-loading of save states
- After you have changed a disk, wait until the game has finished loading whatever
it needs and then save the state. Always remember to save the state after
each disk swap. If you do this, then when you exit the game and restart it in the
future, the disks will be set correctly in the configuration screen, the state will
automatically load, and you'll be all set.
There is a bug that affects games like Dig Dug and Mappy which makes the video screen
jump around all willy-nilly. This is a problem with the core and apparently has already
been fixed, but won't be available until the next version of BlueMSX is available.
Everything can be changed from the configuration menu.
To change things like default save directory, default game directory, etc, go to
Main Menu -> Configuration -> Change Default Directories
Controls:
Select menu options with the DPAD or with R/LTrigger. The speed of
R/LTrigger movements can be controlled by :
Configuration -> Menu Scroll Speed
There are some places where you can enter or change values. This
can usually be done in a variety of ways include DPAD Left/Right,
R/L Trigger, and L/R Thumb. Try all of them if the values are changing
too slowly.
"A" selects the highlighted choice. "B" cancels/returns.
"Y" from a file-select list will go up one directory.
Screenshots:
Credits:
X-port for porting a great collection of emu's over to the xbox, releasing the source code, and answering my stupid questions.
Atariage (Albert in particular) - For providing a place for me to ramble on. For encouragement in general.
Wimpy and Perr - For also providing a place for me to ramble and to make my goods available. 🙂
Gilou9999 for a new HD skin, his PM3 skin, synopsis, suggestions, etc.
Bombbloke for converting the BlueMSX cheat codes to a format my code uses.
Bigby for working thru the tortuous process of doing Xtras for the MSX and noticing alot of longstanding issues with BlueMSXxbox. May your legacy live.
Cbagy for providing 3d boxart templates for the MSX Xtras.
Xtras team for comments and suggestions especially concerning the new Dummy/Lockdown mode settings, and lock game screen options.
Comments of support from various interested parties.
If I missed anybody shoot me an email and I'll update this file.
2 downloads
(0 reviews)0 comments
Submitted
-
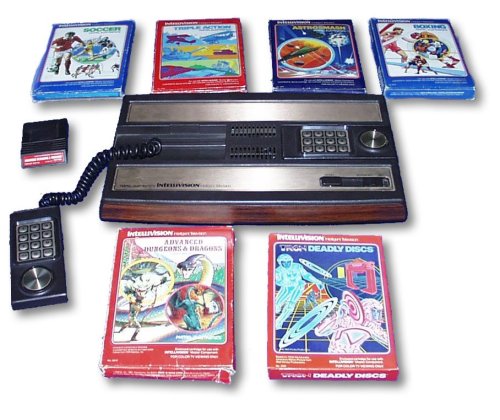
Blissx
By Dempsey_86 in Emulators
Blissx Intellivision Emulator Port For Xbox
User Guide:
Features :
- Emulates the Intellivision
- Excellent compatibility - ported from Bliss
+ Intellivoice games do *not* work yet.
Various Important Notes:
Default ROM dir is D:\INTVROMS
Leave these files in this directory:
D:\intvroms\exec.bin
D:\intvroms\grom.bin
D:\intvroms\ecs.bin
D:\intvroms\ivoice.bin
The Intellivision is very reliant on something called Overlays for proper gameplay. Hence the reason I added overlay support. You can access the overlay by pressing the right analog stick button. If you're still having trouble check out the manuals using the media browser.
Do NOT! Zip up the Intellivision BIOS Roms (eg.. ecs.bin, exec.bin, grom.bin, and ivoice.bin)
Controls:
Select menu options with the DPAD or with R/LTrigger. The speed of
R/LTrigger movements can be controlled by :
Configuration -> Menu Scroll Speed
There are some places where you can enter or change values. This
can usually be done in a variety of ways include DPAD Left/Right,
R/L Trigger, and L/R Thumb. Try all of them if the values are changing
too slowly.
"A" selects the highlighted choice. "B" cancels/returns.
"Y" from a file-select list will go up one directory.
Screenshots:
Credits:
X-port for porting a great collection of emu's over to the xbox, releasing the source code, and answering my stupid questions.
Atariage (Albert in particular) - For providing a place for me to ramble on. For encouragement in general.
Carnage By Bob for kicking things in gear with his BlissX Xtra's.
Gilou9999 for a new PM3 skin, synopsis, suggestions, etc.
Comments of support from various interested parties.
If I missed anybody shoot me an email and I'll update this file.
3 downloads
(0 reviews)0 comments
Submitted
-
Atarixlbox
By Dempsey_86 in Emulators
AtariXLBox Atari 800/5200/130/320/XL/XE Emulator
User Guide:
Almost everything can be changed from the configuration menu. Here are the
things that require manual modifications to the ATARIXLBOX.INI file included in
the package:
Samba share name - goes in the [GENERAL] section. Example:
smbshare=SMB://USERNAME:PASSWORD@COMPUTERNAME/SHARENAME
Screenshot directory - default is E:\SCREENSHOTS - goes in [GENERAL] section
Example:
screenshot_dir=E:\SCREENSHOTS
Skin directory - where skins can be found. Default is D:\EMUSKINS - goes in
[GENERAL] section. Example:
skin_dir=D:\EMUSKINS
Save directory - this is where you want all your saved games to be stored.
Default is E:\SAVES\ATARIXLBOX. Goes in [GENERAL] section. Example:
save_dir=E:\SAVES\ATARIXLBOX
The default ROM directory INI setting goes in the [GENERAL] section as follows:
rom_dir=d:\ATARIDISKS
If you change any of the above items, then you must upload the new ATARIXLBOX.INI
file to your XBox, load up ATARIXLBOX, then select "Force Reload D:\\*.ini
Settings" from the Configuration menu. Please note that this will overwrite
any of the setting changes you might have made after you first loaded
ATARIXLBOX.
Controls:
Select menu options with the DPAD or with R/LTrigger. The speed of
R/LTrigger movements can be controlled by :
Configuration -> Menu Scroll Speed
There are some places where you can enter or change values. This
can usually be done in a variety of ways include DPAD Left/Right,
R/L Trigger, and L/R Thumb. Try all of them if the values are changing
too slowly.
"A" selects the highlighted choice. "B" cancels/returns.
"Y" from a file-select list will go up one directory.
Screenshots:
Credits:
X-port for porting a great collection of emu's over to the xbox, releasing the source code, and answering my stupid questions.
Atariage (Albert in particular) - For providing a place for me to ramble on. For encouragement in general.
RessurectionX for all that Xtra's stuff, synopsis, suggestions, etc.
Gilou9999 for a new PM3 skin, synopsis, suggestions, etc.
Bigby, Du0ph0ne, TheMaster3, Nytmar3 for some beta testing.
Kr0tki for the NTSC filter and answering my n00b questions.
Atarimac for reverse engineering the VAPI image format.
Cospefogo for the new onscreen keyboard. Frank Morris for fixing the minor spelling error in the onscreen keyboard.
Stupot for the tons of game previews.
Comments of support from various interested parties.
If I missed anybody shoot me an email and I'll update this file.
2 downloads
(0 reviews)0 comments
Updated
-

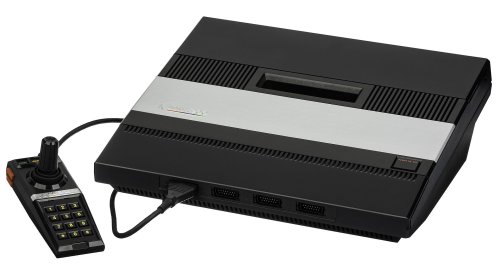
Atari7800x
By Dempsey_86 in Emulators
Atari7800x Atari 7800 Emulator port for XBox
User Guide:
Put games in the \A7800ROMS directory
Controls:
Default button mapping to enable rewind is BLACK+WHITE.
Once rewind is enabled, press LTRIGGER to actually rewind.
Screenshots:
Credits:
X-port for porting a great collection of emu's over to the xbox, releasing the source code, and answering my stupid questions.
The beta testers - NE146, mimo, run088. I know you all are busy but thanks for the support and input.
Atariage (Albert) - For providing a place for my beta testing thread.
Makers of the prosystem emu. Maybe someday I'll have time to port it over to the xbox.
Curt Vendel for providing the source code to Desert Falcon and Dan Boris for reading the schematics and confirming the button behavior of Proline joysticks.
Nobody for nothing ( Just checking to see if people are reading this. )
Comments of support from various interested parties.
If I missed anybody shoot me an email and I'll update this file.
If I missed anybody shoot me an email and I'll update this file.
4 downloads
(0 reviews)0 comments
Submitted
-
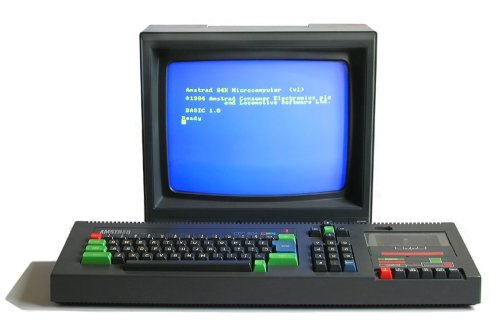
ArnoldX
By Dempsey_86 in Emulators
ArnoldX Amstrad CPC Emulator port for XBox
User Guide:
Default ROM dir is D:\CPCROMS
===============
Important Notes
===============
When you change disks while playing, the configuration of the game is updated as well.
For example, if I start a game with DISK1 and then during the game I change the disk
in drive 1 from DISK1 to DISK2, then the configuration of the game will now state
that the disk in drive 1 is DISK2. When you start the game again from the main menu,
it will try to boot off of DISK2. This is intentional. Save states for multiple disk
games requires that the disks present in the drives when the state was saved are there
when the state is reloaded.
If you are playing a game where you have to change the disks during gameplay, then
I strongly suggest these tips:
- Turn on auto-loading of save states
- After you have changed a disk, wait until the game has finished loading whatever
it needs and then save the state. Always remember to save the state after
each disk swap. If you do this, then when you exit the game and restart it in the
future, the disks will be set correctly in the configuration screen, the state will
automatically load, and you'll be all set.
Controls:
===============
Menu Navigation
===============
Select menu options with the DPAD or with R/LTrigger. The speed of
R/LTrigger movements can be controlled by :
Configuration -> Menu Scroll Speed
There are some places where you can enter or change values. This
can usually be done in a variety of ways include DPAD Left/Right,
R/L Trigger, and L/R Thumb. Try all of them if the values are changing
too slowly.
"A" selects the highlighted choice. "B" cancels/returns.
"Y" from a file-select list will go up one directory.
================
Text File Viewer
================
DPAD Up - Up one line
DPAD Down - Down one line
DPad Left - Up one page
DPAD Right - Down one page
R Trigger - Scroll down
L Trigger - Scroll up
A - Start search
X - Continue last search
White - Top of file
Black - End of file
Y - Simulate fixed-width font
Back - Decrease width of simulated fixed-width font
Start - Increase width of simulated fixed-width font
B - Exit
Screenshots:
Credits:
2 downloads
(0 reviews)0 comments
Submitted
-
.thumb.jpg.536c8878ea6a1368f207f84d0ad736cd.jpg)
AdamX
By Dempsey_86 in Emulators
AdamX Colecovision / Adam Emulator for Xbox
User Guide:
Default ROM dir is D:\ADAMGAMES
===============
Important Notes
===============
If you want to run Adam disk/tape images, then select Adam emulation from
the game configuration menu and change the format from cartridge to disk
or tape.
Controls:
===============
Menu Navigation
===============
Select menu options with the DPAD or with R/LTrigger. The speed of
R/LTrigger movements can be controlled by :
Configuration -> Menu Scroll Speed
There are some places where you can enter or change values. This
can usually be done in a variety of ways include DPAD Left/Right,
R/L Trigger, and L/R Thumb. Try all of them if the values are changing
too slowly.
"A" selects the highlighted choice. "B" cancels/returns.
"Y" from a file-select list will go up one directory.
Controls for text browser:
A -> Start Search
B -> Exit
X -> Continue Last Search
Y -> Simulate width font
White -> Previous file
Black -> Next file
Start -> Help screen
Back -> Reset view as if document was loaded for first time.
Dpad -> Up/down, Left-> Up Page, Right-> Down Page
Left Analog button -> Set font size
Left Analog Up -> Top of file
Left Analog Down -> End of file
Right Analog button -> Set text screen size
Right Analog left/right -> decrease/increase fixed-width font size
Left/Right triggers - Move up/down text file.
----------------------------------------------
Controls for screenshot browser:
A -> Lock/Unlock Aspect Ratio
B -> Exit
Y -> Delete file (Utilities-> browse screenshots only)
White -> Previous file
Black -> Next file
Start -> Help screen
Back -> Toggle between "Full Size" and "Size to fit screen".
Dpad -> Up/Down/Left/Right -> Move image 1/4th the total size of the image.
Left Analog button -> Music Control Menu
Left Analog up/down -> Move screen up/down.
Right Analog left/right -> decrease/increase screen size. Size changes proportional to distance the stick is pressed.
Screenshots:
Credits:
X-port for porting a great collection of emu's over to the xbox, releasing the source code, and answering my stupid questions.
Atariage (Albert in particular) - For providing a place for me to ramble on. For encouragement in general.
Wimpy & Perr - For providing me even a better place for me to ramble on.
Surreal CE team - Just because they are cool!
Gilou9999 for new COLOUR SD and HDTV skins, synopsis, suggestions, rumble codes, etc.
Cospefogo for the onscreen keyboard used by AdamX. Frank Morris for fixing the minor spelling error in the onscreen keyboard. 😛
jamahowal for some neat Adam images.
Guybird for the "Button List" concept/idea and waal for the "Popup Action List" idea.
Comments of support from various interested parties.
If I missed anybody shoot me an email and I'll update this file.
4 downloads
(0 reviews)0 comments
Submitted
-
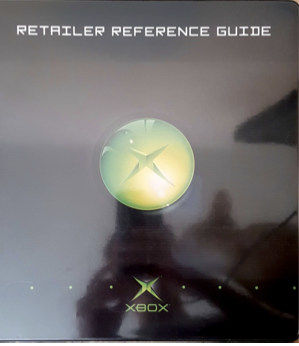
Xbox Retailer Reference Guide
By Dempsey_86 in User Manuals & Tutorials
Xbox Retailer Reference Guide
8 downloads
(0 reviews)0 comments
Submitted
-
 (0 reviews)
0 comments
Submitted
-
(0 reviews)
0 comments
Submitted
-
Complete Tutorial for Xbox DVD-ROM Replacement using SamSung SD-616T
By Dempsey_86 in User Manuals & Tutorials
Complete Tutorial for Xbox DVD-ROM Replacement using SamSung SD-616T
6 downloads
(0 reviews)0 comments
Submitted