

Dempsey_86
-
Posts
576 -
Joined
-
Last visited
-
Days Won
15
Content Type
Profiles
Forums
Store
Gallery
Events
Downloads
News
Tutorials
Files posted by Dempsey_86
-
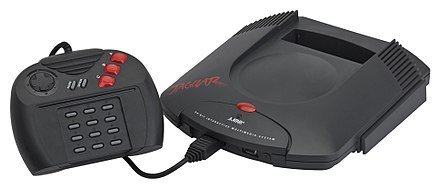
Virtual JaguarX
By Dempsey_86 in Emulators
Virtual JaguarX is an Atari Jaguar emulator for Xbox. It is a port of an old version of the Virtual Jaguar emulator (v1.0.5) with some improvements taken from later versions, and some specific optimizations for Xbox.
User Guide:
Roms MUST be placed in the "roms" directory. Lots of formats are valid, even zipped roms (if you have troubles with a zip, read the final part of this description). Furthermore: be sure that the "roms" directory contains at least one rom, or the emulator will crash.
Besides, keep in mind that this version of the emulator can only work from hard disk.
Also, if you have a Trusty Xbox, read the final part of the "Configuration Options" section ("Limit to FPS").
To install the emulator, simply copy it to your hard disk, and put the roms inside the "roms" folder.
If you had a previous version of Virtual JaguarX, simply overwrite the old folder with the new one. You will even keep your saved games if you keep the content of the "eeproms" folder.
Controls:
As far as the key mapping is related, you know that the Jaguar has 3 standard buttons (A, B and C) and a numeric keypad. The standard buttons are the most used, and they are mapped in the Xbox buttons A, B and X. After that, we must decide which is the better way to map the numeric pad. At the moment I have mapped the buttons in this way: START = 0, Y = 1, Black = 2, White = 3, Left Trigger = 4, Right Trigger = 5, dPad UP = 6, dPad Right = 7, dPad Down = 8, dPad Left = 9. Anyways, feedback will be very well received, to discuss the best way to map all these buttons.
So, please remember that you must use the analog stick to control your character while you play, because the D-pad is mapped to some of the numeric buttons.
You can exit of the game pressing START+BACK simmultaneously. You can launch a very limited in-game menu pressing BACK to change the frameskip. In fact, there is only one option that can beconfigured by the user:
* Frameskip: The default value is ZERO, because many games run at full speed (or at least at playable speed) without using frameskip. But if you play a game that runs slow, maybe increasing the frameskip can help a bit to make the game playable. Please, be warned that increasing the frameskip in the middle of the game is possible, but decreasing frameskip in the middle of the game can make it crash (you probably will have to re-launch the rom).
FAQ:
Q: What about CD support?
A: It is still not supported, sorry.
Q: My rom (in ZIP format) did not work!
A: There are lots of formats valid for this emulator (JAG, J64, BIN...) and it has been added the possibility to compress them in ZIP format, but this ZIP support is very basic: each ZIP file can only have ONE file inside. If you have a ZIP file which contains more than one file, it will probably not work. Besides, I have found roms in internet whose zip file was corrupt. So, my advice if you are having troubles with a compressed rom, is to uncompress it.
Screenshots:
Credits:
I want to say thanks to all the people that helped me in the port process: Neobomb, Hyper_Eye, Madmab, Freakdave, weinerschnitzel, XtecuterX73, darknior, the Surreal64 CE team, the creators of the original Virtual Jaguar emulator (nwagenaar, Caz, Adam Green, Aaron Giles, David Raingeard, Bernd Schmidt, Sam Lantinga, Ryan C. Gordon, Curt Vendel, Reboot, byuu, and mainly thanks to Shamus for his help!) and the creators of all the libraries for Xbox.
Huge thanks to weinerschnitzel for his great idea about using optimized code in Xbox applications, freakdave for his improved video management code, and madmab for all his help and teaching 😉
Big thanks to Shamus for his help, support, and his work in the original Virtual Jaguar.
Besides, big thanks to all the people that make possible the Xbox scene and the emuxtras project, Neobomb (again!), Wimpy, Waal, Bigby, Madmab, Perr, Mega Man, SPPV... Thank you very much for your work!
And finally, huge thanks to the beta testers that helped testing this emulator in HD! They were gabbers, XeNoMoRPH, Gn0Mo, darknior and gilou9999.
The sources of the emulator are in the same package, so if anyone wants to see them and try to improve them, it will be very wellcome. You can contact me if you want to do it.
5 downloads
(0 reviews)0 comments
Submitted
-
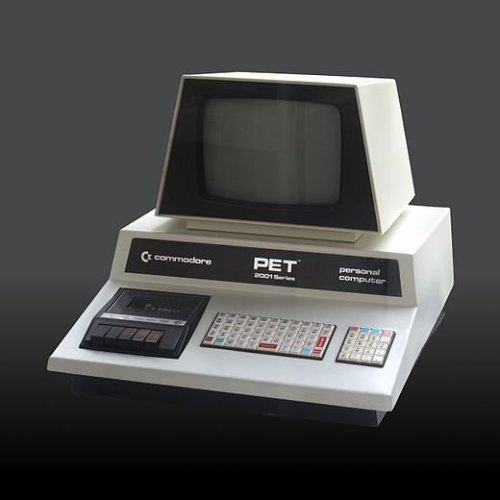
Vicepetx
By Dempsey_86 in Emulators
VicePETX Commodore PET Emulator port for XBox.
User Guide:
- Emulates Commodore PET
- Excellent compatibility - ported from Vice
- Loads disk images, PRG/P00 files
Default ROM dir is D:\PETGAMES
===============
Important Notes
===============
There is some initial weirdness when starting games for the first few times.
At startup, when you load a game it will sometimes boot normally and then
present with the "LOAD ..." "SEARCHING FOR..." text and then seemingly hangs.
Sometimes it just takes a while, other times requires exiting the game and
restarting. Sometimes it takes a number of restarts before things finally
"kick in" but after that everything runs fine the first time.
I would have investigated this problem more, but I suspect that 99.9% of
the people who use XBox emulators will either not try this one at all or
will not use it again after the first time because the games are not
captivating by today's standards at all. I ported it for my own personal
amusement since there are a number of titles that I enjoyed very much decades ago.
=============
Configuration
=============
Almost everything can be changed from the configuration menu. Here are the
things that require manual modifications to the VICEPETX.INI file included in
the package:
Samba share name - goes in the [GENERAL] section. Example:
smbshare=SMB://USERNAME:PASSWORD@COMPUTERNAME/SHARENAME
Screenshot directory - default is E:\SCREENSHOTS - goes in [GENERAL] section
Example:
screenshot_dir=E:\SCREENSHOTS
Skin directory - where skins can be found. Default is D:\EMUSKINS - goes in
[GENERAL] section. Example:
skin_dir=D:\EMUSKINS
Save directory - this is where you want all your saved games to be stored.
Default is E:\SAVES\VICEPETX. Goes in [GENERAL] section. Example:
save_dir=E:\SAVES\VICEPETX
The default ROM directory INI setting goes in the [GENERAL] section as follows:
rom_dir=d:\PETGAMES
If you change any of the above items, then you must upload the new VICEPETX.INI
file to your XBox, load up VICEPETX, then select "Force Reload D:\\*.ini
Settings" from the Configuration menu. Please note that this will overwrite
any of the setting changes you might have made after you first loaded
VICEPETX.
Controls:
===============
Menu Navigation
===============
Select menu options with the DPAD or with R/LTrigger. The speed of
R/LTrigger movements can be controlled by :
Configuration -> Menu Scroll Speed
There are some places where you can enter or change values. This
can usually be done in a variety of ways include DPAD Left/Right,
R/L Trigger, and L/R Thumb. Try all of them if the values are changing
too slowly.
"A" selects the highlighted choice. "B" cancels/returns.
"Y" from a file-select list will go up one directory.
Screenshots:
Credits:
X-port for porting a great collection of emu's over to the xbox, releasing the source code, and answering my stupid questions.
Atariage (Albert in particular) - For providing a place for me to ramble on. For encouragement in general.
Gilou9999 for suggestions, etc.
Bigby, Du0ph0ne, TheMaster3, Nytmar3 for some beta testing.
Comments of support from various interested parties.
If I missed anybody shoot me an email and I'll update this file.
Does anyone use this emu?
2 downloads
(0 reviews)0 comments
Submitted
-
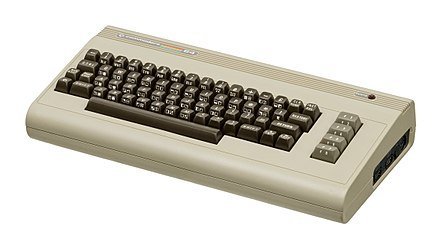
Vice64X
By Dempsey_86 in Emulators
Vice64X Commodore 64 Emulator port for XBox.
User Guide:
- Emulates Commodore 64
- Excellent compatibility - ported from Vice
- Loads disk images, tape images, cartridges
Default ROM dir is D:\C64DISKS
====================================
Important Tips on Usage - README!!!!
====================================
Different games require different options. Please try as many configurations as
possible before deciding that a game doesn't work. For example, some games require
true drive emulation to be enabled and some require it to be disabled. Some games
require reSID and will not work with fastSID.
Enabling true drive emulation makes loading of games *very slow*. Be patient!
You can either sit there holding the throttle button down or you can walk away
for a few minutes. When it has loaded, I suggest saving the state so you don't
have to go through the loading procedure again.
========================
Playing with Disk Images
========================
The ideal way to play disk images is unzipped and on your XBox hard drive. If you are
playing a disk-based game and it needs to write data back to the disk, then it will
not being able to do so if the disk image is zipped or if the disk image resides on
non-writable media (e.g. CDRW/DVD-R ). Furthermore, it also cannot write back to
disk images that are loaded from across a network share.
============================
Save States With Disk Images
============================
Whenever you save a state, that state can only be re-loaded if the same disk image is
loaded. For example, let's say you start playing Ultima 3. First you select Ultima 3
disk #1 from the game-select menu. After it has loaded, it will tell you to insert disk #2.
After you have done so, you can actually play the game. At this point, you decide to
save the state. The next time you want to play from that save state, you have to
select disk #2 from the game-select menu instead of disk #1 and then load the state.
=============
Configuration
=============
Almost everything can be changed from the configuration menu. Here are the
things that require manual modifications to the VICE64X.INI file included in
the package:
Samba share name - goes in the [GENERAL] section. Example:
smbshare=SMB://USERNAME:PASSWORD@COMPUTERNAME/SHARENAME
Screenshot directory - default is E:\SCREENSHOTS - goes in [GENERAL] section
Example:
screenshot_dir=E:\SCREENSHOTS
Skin directory - where skins can be found. Default is D:\EMUSKINS - goes in
[GENERAL] section. Example:
skin_dir=D:\EMUSKINS
Save directory - this is where you want all your saved games to be stored.
Default is E:\SAVES\VICE64X. Goes in [GENERAL] section. Example:
save_dir=E:\SAVES\VICE64X
The default ROM directory INI setting goes in the [GENERAL] section as follows:
rom_dir=d:\C64DISKS
If you change any of the above items, then you must upload the new VICE64X.INI
file to your XBox, load up VICE64X, then select "Force Reload D:\\*.ini
Settings" from the Configuration menu. Please note that this will overwrite
any of the setting changes you might have made after you first loaded
VICE64X.
Controls:
===============
Menu Navigation
===============
Select menu options with the DPAD or with R/LTrigger. The speed of
R/LTrigger movements can be controlled by :
Configuration -> Menu Scroll Speed
There are some places where you can enter or change values. This
can usually be done in a variety of ways include DPAD Left/Right,
R/L Trigger, and L/R Thumb. Try all of them if the values are changing
too slowly.
"A" selects the highlighted choice. "B" cancels/returns.
"Y" from a file-select list will go up one directory.
Screenshots:
Credits:
X-port for porting a great collection of emu's over to the xbox, releasing the source code, and answering my stupid questions.
Atariage (Albert in particular) - For providing a place for me to ramble on. For encouragement in general.
Gilou9999 for a new PM3 skin, synopsis, suggestions, etc.
Comments of support from various interested parties.
If I missed anybody shoot me an email and I'll update this file.
6 downloads
(0 reviews)0 comments
Submitted
-
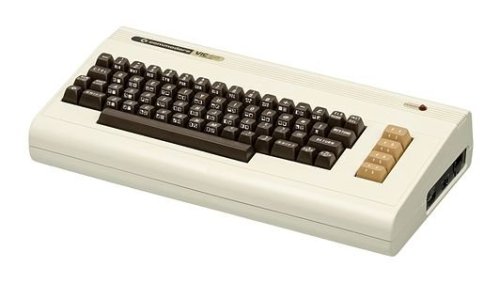
Vice20x
By Dempsey_86 in Emulators
Vice20X Commodore VIC-20 Emulator port for XBox.
User Guide:
- Emulates Commodore VIC-20
- Excellent compatibility - ported from Vice
- Loads disk images, tape images, cartridges
Default ROM dir is D:\VIC20GAMES
Almost everything can be changed from the configuration menu. Here are the
things that require manual modifications to the VICE20X.INI file included in
the package:
Samba share name - goes in the [GENERAL] section. Example:
smbshare=SMB://USERNAME:PASSWORD@COMPUTERNAME/SHARENAME
Screenshot directory - default is E:\SCREENSHOTS - goes in [GENERAL] section
Example:
screenshot_dir=E:\SCREENSHOTS
Skin directory - where skins can be found. Default is D:\EMUSKINS - goes in
[GENERAL] section. Example:
skin_dir=D:\EMUSKINS
Save directory - this is where you want all your saved games to be stored.
Default is E:\SAVES\VICE20X. Goes in [GENERAL] section. Example:
save_dir=E:\SAVES\VICE20X
The default ROM directory INI setting goes in the [GENERAL] section as follows:
rom_dir=d:\VIC20GAMES
If you change any of the above items, then you must upload the new VICE20X.INI
file to your XBox, load up VICE20X, then select "Force Reload D:\\*.ini
Settings" from the Configuration menu. Please note that this will overwrite
any of the setting changes you might have made after you first loaded
VICE20X.
Controls:
Select menu options with the DPAD or with R/LTrigger. The speed of
R/LTrigger movements can be controlled by :
Configuration -> Menu Scroll Speed
There are some places where you can enter or change values. This
can usually be done in a variety of ways include DPAD Left/Right,
R/L Trigger, and L/R Thumb. Try all of them if the values are changing
too slowly.
"A" selects the highlighted choice. "B" cancels/returns.
"Y" from a file-select list will go up one directory.
Screenshots:
Credits:
X-port for porting a great collection of emu's over to the xbox, releasing the source code, and answering my stupid questions.
Atariage (Albert in particular) - For providing a place for me to ramble on. For encouragement in general.
Gilou9999 for suggestions, etc.
Bigby, Du0ph0ne, TheMaster3, Nytmar3 for some beta testing.
Comments of support from various interested parties.
If I missed anybody shoot me an email and I'll update this file.
2 downloads
(0 reviews)0 comments
Submitted
-
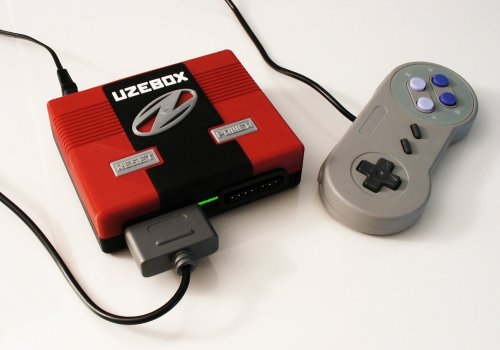
uzeboxx
By Dempsey_86 in Emulators
Uzeboxx is a port of the Cuzebox emulator for Xbox (Cuzebox was originally developed by Sandor Zsuga "Jubatian"). It is an emulator of the Uzebox console: a retro-minimalist open source game console based on Atmel's ATmega644 microcontroller.
The main goal of the Uzebox console is encouraging homebrew development, so in its catalog you can find lots of original projects.
In this page you can find many games for Uzebox: http://uzebox.org/wiki/Games_and_Demos
Besides, there is a lot of activity in its forums. Many of its homebrew games show a lot of creativity, so it is a very interesting machine to have emulated in the black box!
User Guide:
Copy the emulator on the hard drive of your Xbox, and put your roms in the "roms" folder. Then launch the "default.xbe".
Press A to select a game in the rom list
Press START + BACK to exit from a game to the rom list
FAQ:
Q: Is this emulator finished?
A: No, it currently runs at around 80% of full speed, so games are totally playable but they still need some small optimizations. If there is interest, I will keep working on this project.
Q: Could you recommend a game?
A: Zombienator!!! 😄
Screenshots:
Credits:
Cuzebox was originally developed by Sandor Zsuga "Jubatian"
2 downloads
(0 reviews)0 comments
Submitted
-

Surreal64CE
By Dempsey_86 in Emulators
Surreal64 CE 'Community Edition' Modification
FAQ:
Q: What does Range Fog and Linear Fog mean? *
* A: Range Fog is the default fog method and usually correct method *
* fog. Linear Fog refers to depth based fog on a linear filter. It is *
* less costly, but requires the Software Vertex Clipper, which itself *
* uses more resources than the old hardware method. Linear Fog can *
* create a more visually appealing thickness of fog, but some less *
* desirable artifacts may appear. Rice 6.12 only. *
* *
* Q: Software Vertex Clipper, what? *
* A: The Software Vertex Clipper uses code that also relies on DirectX *
* features unsupported by XBOX. You can witness the missing side *
* textures on treasure chests in Legend of Zelda. The rest of the *
* functionality is enough to work, and it also corrects some bad *
* vertex clipping seen in Conker's BFD in the level "Enter the Vertex." *
* You can enable the Software Vertex Clipper by selecting "Software *
* Vertex Processing" in Video Settings. Rice 6.12 only. *
* *
* Q: 1964 1.1 and PJ64 1.6 support cheats, what gives? *
* A: I never implemented a menu scheme to modify and activate cheats. *
* In the meantime, PJ64 1.6 can load "permanent cheats" that correct *
* some big issues. (i.e. Zelda SubScreen Delay Fix, and Pokemon Snap) *
* *
* Q: I am experiencing graphics glitches in X game. *
* A: That's not really helpful. 😕 The most common graphics issues *
* result from Rice Video's lack of [Hardware] Framebuffer Emulation. *
* Garbled textures, missing effects, bad vertex clipping, and black/ *
* missing textures can be a result of a plugin incompatibility rather *
* than a port incompatibility. Check your PC for compatibility with *
* the closest Rice Video plugin to determine if the bug is in fact a *
* regression or something that can be fixed. Next, you can do some *
* research to find out what type of bug you are encountering and if it *
* can be fixed. Emutalk.net forums and BigHead's compaitibility list *
* are helpful here. Gonetz' GLideN64 dev blog has great explanations *
* for N64 HLE graphics problems here: http://gliden64.blogspot.com/ *
* After that, report the game, tell me exactly whats wrong, what *
* emulator and plugins you're using, include a screenshot, and I might *
* look into fixing it. Otherwise... Don't bother! 😛 *
* *
* Q: I am experiencing a crash after X in Y game. *
* A: Make sure you are giving the emulator enough RAM, and try setting *
* Texture Memory to AUTO. Some games handle the auto texture memory *
* trick better than others. If crashes persist, report the game, *
* emulator & plugins, how to reproduce the crash, and any combination *
* of plugins that worked in the past. *
* *
* Q: PJ64 1.6 doesn't play opening animations all of the time. Why? *
* A: There are some changes to PJ64 where previous optimizations don't *
* work as gracefully. The result is that some opening animations get *
* skipped at the cost of good emulation speed. *
* *
* Q: Turok Dinosaur Hunter doesn't work or crashes on me. Why? *
* A: PJ64 1.6 won't boot it due to optimization issues. 1964 1.1 will *
* only boot it with audioMusyX. Both emulators will eventually crash, *
* either randomly, or after the first key is recovered. Mupen64 would *
* be needed to play this game fully. *
* *
* Q: Players 2 and 4 are unplayable in Conker's BFD deathmatch. *
* A: Sorry. Again, this is a core issue. *
* *
* Q: Can I tweak the speed of a game? *
* A: Yes. Adjust the Counter Factor value in the emulator's .ini or *
* .rdb. A lower CF value emulates closer to a real N64, while a higher *
* CF value will create a better experience on old hardware like the *
* Xbox. Generally, adjusting CF will do a better job than Frameskip. *
* *
* Q: Load/Save States as well as the In Game Menu cause me crashes. *
* A: Yes, these bugs have been around since Surreal64 1.0. They are a *
* result of the emulator and plugins running natively with the lower *
* level xbox functionality written into various parts of Surreal64. *
* Most emulators for the Xbox include a simple App that the emulator *
* is built ontop of.with Surreal64, when a problem occurs, the *
* interface becomes inaccessible.
Screenshots:
Credits:
Surreal64 CE 'Community Edition' Modification
Based on Surreal64 XXX
Authors:
freakdave, Ez0n3, weinerschnitzel
Additional Rice Video Fixes:
death2droid, microdev
Skin Developers:
cbagy, FrankMorris, Neil222
Synopsis:
MegaMan(?)
Beta Testers:
Bigby, Scorp316, YRUSirius
Custom N64 Boxart packs:
cbagy
Hyperspin-FE 3D Boxart:
Azzbarb, http://www.hyperspin-fe.com/
Contributed by Bigby
Community .ini file tweaks:
Darknior, Monkeys69, scorp316, Spbaabck, Xmodder deluX
Xpfrags, Greatant, Mwaterbu, Dnyce1987
Previous Testing / Ideas / Support:
Neo369, Bomb Bloke, greatant, edwardar, Darknior, que2eqe
Special thanks to:
Schibo, madmab, Hyper_Eye, nes6502, Iriez
The EmuXtras Team
The ones who made it all happen:
oDD & Lantus
Visit us at:
http://surreal64ce.wikidot.com
http://forums.xbox-scene.com
#surreal64ce on EFNET
Surreal64 XXX Modification
Authors:
Team XXX
GogoAckman, freakdave, Artik
http://www.logic-sunrise.com/forums
http://freakdave.xbox-scene.com
Skin by:
NeverWill
Music found on OCRemix:
http://www.ocremix.org
Beta Tester:
Dukedoom
Shouts go out to:
oDD and Lantus for bringing N64 emulation to the XBOX
XBINS
Xantium
Iriez
XPort
the XBOX-SCENE community for waiting too long for this
and last but not least:
the #A-Shock Kindergarden!!!!1111Shift(1)
and the rest of our beloved scene whiners...
1964 / UltraHLE / Launcher /Plugins
oDD
Project64 / Plugins
Lantus
Testing / Ideas / Support
Iriez
Very Special Thanks
Azimer for his HLE audio code
Rice for his support with his video plugin
Greets and Thanks
Carcharius, Xport, TJ, DragonZ
and anyone else we forgot
1964 Credits
Authors
Schibo and Rice
Copyright (C) 1989 - 1991
Thanks
steb, zilmar, anarko, Azimer, Jabo
Greets
Angelo, ContraSF, Cricket,
_Demo_, duddie, Emul8or, epsilon,
F|RES, FlyingNR6, hartec, Houe, hWnd,
icepir8, LaC, Lemmy Lionel, Niki Waibel,
Phrodide, rcp, Scav, slacka, Smiff,
SpectRe, Spikez, subice, StrmnNrmn,
TNSe
PJ64 Credits
Authors
Zilmar and Jabo
Copyright (C) 1998 - 2001
Contributors
Tooie and Witten
Support
Smiff and The Gentleman
Thanks and Greets
Anarko, Breakpoint, Cricket, _Demo_,
Duddie, F|ReS, Icepir8, LaC,
Lemmy, rcp, schibo, slacka,
smiff and anyone i missed
UltraHLE Credits
Authors
Epsilon and RealityMan
Copyright (C) Epsilon and RealityMan, 1998
Greets
Fox and _64Bit_ (Emulators Unlimited),
JoseQ (EmuViews), Atila (Retrogames),
Dextrose, Niki Waibel, Mike Tedder,
Anarko, Romberman 64, Brian Faber,
Jim at EmuNews and the whole
emulation community.
Rice Video Plugins
Author
Rice
Copyright (C) 2003 Rice1964
Daedalus Video Plugins
Author
StrmnNrmn
Copyright (C) 2001 StrmnNrmn
Input Plugin
Authors
oDD and Lantus
Copyright (C) 1989 - 1991
SDL Sound Plugin
Author
JttL
Copyright (C) 2003 by Juha Luotio aka JttL
HLE Sound Plugin
Author
Azimer
Copyright (C) 2000 - 2001 Azimer
RSP Plugin
Author
Hacktarux
Copyright (C) 2001 Jabo and Zilmar
9 downloads
(0 reviews)0 comments
Submitted
-
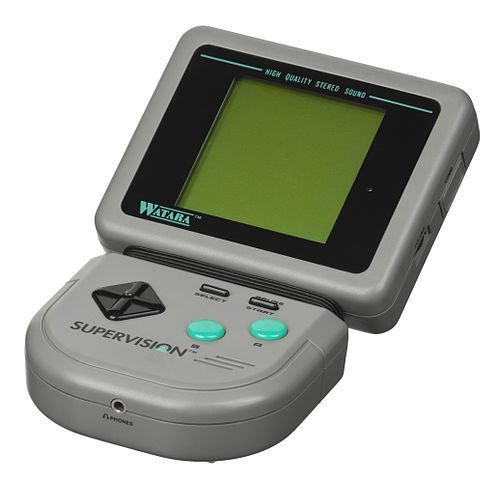
SuperVisionX
By Dempsey_86 in Emulators
SuperVisionX - Watara Supervision Emulator for XBox.
User Guide:
- Emulates the Watara Supervision
- Excellent compatibility - ported from Potator
Put games in the \SVROMS directory
- All standard XPort features
- Sound
- ZIP/Relax/SMB support
- Save states
- Rewind support
This is now a core feature of the XPort UI and will be added to all
other ports (eventually) as long as the port supports saving states.
Controls:
Default button mapping to enable rewind is BLACK+WHITE.
Once rewind is enabled, press LTRIGGER to actually rewind.
Screenshots:
Credits:
X-port for porting a great collection of emu's over to the xbox, releasing the source code, and answering my stupid questions.
Atariage (Albert in particular) - For providing a place for me to ramble on. For encouragement in general.
Gilou9999 for a new PM3 skin, synopsis, suggestions, etc.
Bigby, Du0ph0ne, TheMaster3, Nytmar3 for some beta testing.
Comments of support from various interested parties.
If I missed anybody shoot me an email and I'll update this file.
3 downloads
(0 reviews)0 comments
Submitted
-
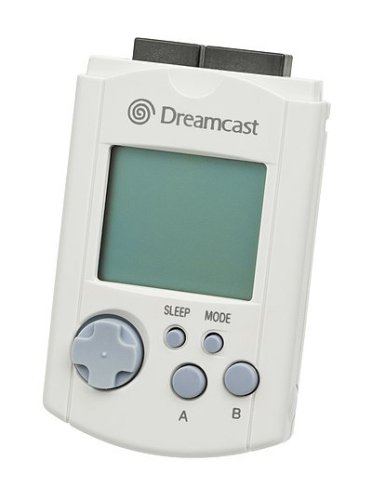
SoftVMUX
By Dempsey_86 in Emulators
SoftVMUX - Sega Dreamcast VMU Emulator for XBox.
User Guide:
- Emulates the Sega Dreamcast VMU
- Excellent compatibility - ported from SoftVMU
Put games in the \VMUROMS directory
Controls:
Default button mapping to enable rewind is BLACK+WHITE.
Once rewind is enabled, press LTRIGGER to actually rewind.
Screenshots:
Credits:
X-port for porting a great collection of emu's over to the xbox, releasing the source code, and answering my stupid questions.
Atariage (Albert in particular) - For providing a place for me to ramble on. For encouragement in general.
RessurectionX for all that Xtra's stuff, synopsis, suggestions, etc.
Gilou9999 for a new PM3 skin, synopsis, suggestions, etc.
Bigby, Du0ph0ne, TheMaster3, Nytmar3 for some beta testing.
Comments of support from various interested parties.
If I missed anybody shoot me an email and I'll update this file.
2 downloads
(0 reviews)0 comments
Submitted
-
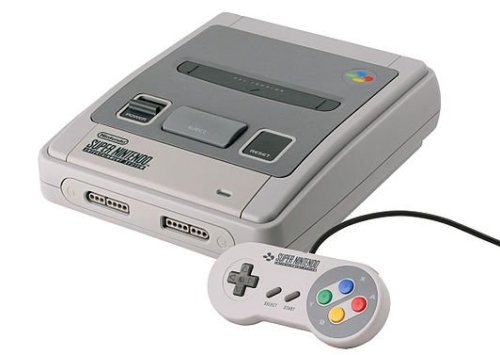
Snes9xbox
By Dempsey_86 in Emulators
SNES9XBox Super Nintendo Emulator for XBox.
User Guide:
- Excellent compatibility - ported from SNES9X v1.43
- All the usual XPort features ( ZIP support, save states, rewind, autofire,
cheat codes, fast forward, graphic filters, etc, etc.)
- If you leave rewind on it will crash after a few minutes.
Best to just turn it on when you need it.
Screenshots:
Credits:
X-port for porting a great collection of emu's over to the xbox, releasing the source code, and answering my stupid questions.
Atariage (Albert in particular) - For providing a place for me to ramble on. For encouragement in general.
Wimpy & Perr - For providing me even a better place for me to ramble on.
Surreal CE team - Just because they are cool!
Gilou9999 for a new COLOUR and "blue night" skin, synopsis, suggestions, rumble codes, etc.
Mega Man (?) for rumble codes, lots of behind the scenes work and for AR and GG cheat codes.
Bombloke for scripts to convert AR and GG codes into a format I can use.
Guybird for the "Button List" concept/idea and waal for the "Popup Action List" idea.
Bigby, gilou9999, cbagy, waal, mega man (?), neil222, weinersch, butanebob, dominater1, XtecuterX73, darknoir, yougottabecrazy, brandonheat8, silverjag4, excelsis, nobodyhere, philexile, makkusu, xcalibur, keropi, jamallego, elconejotres, yougottabecrazy, xtra-radical, destronger, Movax and scorp316 for some beta testing and feedback.
Shoutout to the Wii Snes9x-GX team.
Comments of support from various interested parties.
If I missed anybody shoot me an email and I'll update this file.
6 downloads
(0 reviews)0 comments
Submitted
-

ScummVM
By Dempsey_86 in Emulators
ScummVM ported by A600\
User Guide:
This is a ScummVM port for the Xbox1, possible thanks to the hard work of
the ScummVM team and the SDLx libs by Lantus.
It features all the 1.4.1 supported engines, MP3, Vorbis, Flac, AAC
and FluidSynth (the MT-32 emu isn't included because the Xbox lacks
the power to handle it). All HQ scalers should work.
The file xbox.patch is the diff patch against the 1.4.1 branch
https://github.com/scummvm/scummvm.git
Controls:
Left Analog -> Move Cursor
Dpad -> Arrow keys. In the select game dialog, left=pgup, rigth=pgdown
A -> Left Button
B -> Right Button
X -> Escape
Y -> Enter. In Lands of Lore, attack button for all party members (F1+F2+F3)
Back -> R (Rest party in Lands of Lore)
Start -> ScummVM Menu
Left Trigger -> Increases cursor speed while pressed. In Lands of Lore, turn left
Right Trigger -> Decreases cursor speed while pressed. In Lands of Lore, turn right
White -> F5
Black -> Virtual Keyboard
Right Analog -> Numeric keypad as shown below
Right Analog Thumb -> KP5
Screenshots:
Credits:
3 downloads
(0 reviews)0 comments
Submitted
-
.thumb.jpg.b21589283a004298d19e1ce34c996c09.jpg)
SAMX
By Dempsey_86 in Emulators
This is an emulator of the "SAM Coupe" computer for Xbox. It is a port of the "Simcoupe" emulator.
The SAM Coupe was an 8-bit computer that was first released in late 1989.
User Guide:
Games must be copied UNCOMPRESSED in the "roms" folder. Then, simply run the emulator and select the desired game in the rom list with the "A" button. And that's all!
The emulator will automatically mount that game in the floppy unit and reset the virtual SAM Coupe for you, and the game will start.
Controls:
Although the SAM Coupe is a computer and it uses a keyboard, I have mapped the most common keys in all the games to the buttons of our joypads, so we will be able to play several games with the d-pad and the normal buttons. Mouse is not still emulated.
Here is the default mapping of the buttons (anyways, you will be able to redefine the A,B,X,Y buttons in the main menu, if you need different mappings):
A button: ENTER key
B button: ESC key
X button: SPACE key
Y button: It is mapped to the "0" key.
As far as the D-pad is related, we have several configurations available: mapped to the keypad, mapped to the numpad, mapped to the OPQA keys, and mapped to everything. By default, the D-pad is mapped to "everything"; that means that if you press for example RIGHT in your d-pad, it would be the same than pressing both the numpad, the keypad and the P key in the original simcoupe emulator. This is an easy way to make the default configuration useful for a wide range of games.
The D-pad mapping can be changed in the Main Menu too, under the "Redefine Keys" section.
LEFT and RIGHT ANALOG STICKS: If you press them simultaneously, you will enter into the typing mode, to be able to press any key.
START: Opens the Main Menu (see "Main Menu" section for more info)
Screenshots:
FAQ:
Q: How can I launch games with multiple floppy disk images?
A: At the moment it is not possible. This will be hopefully fixed in the future.
Q: Can this emulator play ZX Spectrum games?
A: No, it won't work. This emulator is intended as a SAM Coupe emulator, so if you want to play ZX Spectrum games, you will need to use another emulator or use some of the available spectrum emulator disks.
Credits:
I want to say thanks to all the people that helped me in my projects: Neobomb, Hyper_Eye, Madmab, Freakdave, weinerschnitzel, XtecuterX73, SPPV, darknoir, the Surreal64 CE team... Besides, big thanks to all the people that make possible the Xbox scene and the emuxtras project, Neobomb (again!), Wimpy, Waal, Bigby, Madmab, Perr, Mega Man, SPPV... Thank you very much for your work!
Thank you very much to the creator of the Simcoupe emulator, and to ZX-81.
Thanks to darknior for his beta testing help.
The sources of the emulator are in the same package, so if anyone wants to see them and try to improve them, it will be very welcome. You can contact me if you want to do it and want some help.
Thank you for reading this! 🙂
HCF
2 downloads
(0 reviews)0 comments
Submitted
-
Retroarch
By Dempsey_86 in Emulators
RetroArch is a modular multi-system emulator system that is designed to be fast, lightweight and portable. It has features few other emulator frontends have, such as real-time rewinding and game-aware shading.
Features:
Real-time rewinding. Switching between emulator cores seamlessly, and ability to install new libretro cores.' Installation:
Copy the entire folder RetroArch-XBox1 to your harddrive.
ROMs go into the roms directory, or some subdirectory in the RetroArch-XB1 directory.
User Guide:
About libretro
Libretro is the API that RetroArch uses. It makes it easy to port games and emulators to a single core backend, such as RetroArch.
For the user, this means - more ports to play with, more crossplatform portability, less worrying about developers having to reinvent the wheel writing boilerplate UI/port code - so that they can get busy with writing the emulator/porting the emulator/game.
For each emulator core, RetroArch makes use of a library API that we call libretro.
Think of libretro as an interface for emulator and game ports. You can make a libretro port once and expect the same code to run on all the platforms that RetroArch supports. It's designed with simplicity and ease of use in mind so that the porter can worry about the port at hand instead of having to wrestle with an obfuscatory API.
Cores lists
Supported cores:
2048 (puzzle game). 4do (3DO Emulator). FCEUmm (NES Emulator). Gambatte (GB/GBC). Genesis Plus GX. Handy (Atari Lynx). Mednafen NGP (Neo Geo Pocket). Mednafen VB (virtual boy). Mednafen WonderSwan. Nestopia (NES emulator). NXEngine (Cave Story). O2EM (Odyssey 2). PocketCDG (MP3 karaoke music player). PrBoom (Doom). ProSystem (Atari 7800). QuickNES (NES Emulator). Snes9x 2010 (SNES Emulator). Stella (Atari 2600). TGB Dual (Dual GBC emulator). VBA Next (GBA). Vecx (Vectrex). Virtual Jaguar (Atari Jaguar). 3 restored cores:
FBA (CPS1, CPS2, NeoGeo). Cores missing:
PCE Fast. TYRQuake. Notes:
VBA Next doesn't run at fullspeed on Wii (VBA Next is a RetroConsole Level 2 emulator port). The biggest Neo-Geo ROMs that can be loaded are around 23+MB in size, such as Real Bout Fatal Fury 1 and King of Fighters '96. Extensions supported by each core
Prboom - wad. Tyrquake - pak. SNES9x Next - smc|fig|sfc|gd3|gd7|dx2|bsx|swc. Genesis Plus GX - md|smd|bin|gen|bin|sms|gg|sg|cue. NXEngine/Cave Story - exe. VBA Next - gba. FCEUmm - nes|unif. NEStopia - nes|fds. Gambatte - gb|gbc|dmg. Final Burn Alpha - zip. Mednafen PCE - pce|cue. Mednafen Wonderswan - ws|wsc. Mednafen NGP - ngp. Mednafen VB - vb. How to use
On first startup, RetroArch will select one of the dozen or so emulator/game cores. The name of the core currently loaded will be shown at the top side of the screen.
You can now select a data file (ie. a game executable and/or a ROM) that this core supports and load it in the Filebrowser.
To select a different core - go to Core in the Main Menu. Select a core and then press A to switch to the emulator/game core.
Selecting a ZIP file will temporarily unzip that file to the harddrive. The temporary file will be deleted as soon as the game gets unloaded and/or when you quit RetroArch.
Note: If you find that RetroArch no longer works for whatever reason, try removing retroarch.cfg from the Retroarch-XB1 folder, then start up again.
Controls:
In gmae:
Right-Stick Down - Fast-forwards the game
Right-Stick Up - Rewinds the game in real-time (must be enabled in the Settings screen, comes at a slight performance decrease)
Right-Stick Left+R - Decrease save state slot
Right-Stick Right+R - Increase save state slot
Right-Stick Up+R - Load selected save state slot
Right-Stick Down+R - Save selected save state slot
Right-Stick Thumb+Left-Stick Thumb - Go back to Menu
File browser:
L/R - Go to previous/next drive mapping
White/Black - Scroll list up/down
Screenshots:
Credits:
Mudlord for his Waterpaint/Noise shaders. Hyllian for the xBR shader. Opium2k for the nice manual shaders (bundled with PS3 release). Deank for assistance with RetroArch Salamander on CFW PS3s and Multiman interoperability. FBA devs for adopting the libretro port. Ekeeke for help with the Genesis Plus GX port. ToadKing for having done a lot of work on RetroArch Wii. Freakdave for helping out with the Xbox 1 port.
9 downloads
(0 reviews)0 comments
Updated
-

Pokemonminix
By Dempsey_86 in Emulators
PokemonMiniX - Pokemon Mini Emulator for XBox.
Screenshots:
Credits:
X-port for porting a great collection of emu's over to the xbox, releasing the source code, and answering my stupid questions.
Atariage (Albert in particular) - For providing a place for me to ramble on. For encouragement in general.
Gilou9999 for a new PM3 skin, synopsis, suggestions, etc.
Bigby, Du0ph0ne, TheMaster3, Nytmar3 for some beta testing.
Comments of support from various interested parties.
If I missed anybody shoot me an email and I'll update this file.
2 downloads
(0 reviews)0 comments
Submitted
-
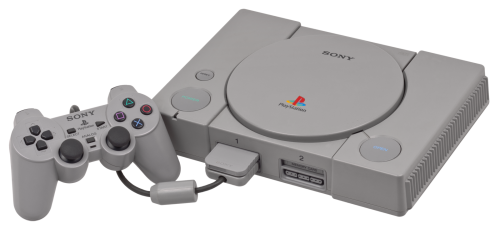
PcsXbox
By Dempsey_86 in Emulators
PCSXBox - PSX Emulator for XBox.
User Guide:
Almost everything can be changed from the configuration menu. Here are the
things that require manual modifications to the PCSX.INI file included in
the package:
Samba share name - goes in the [GENERAL] section. Example:
smbshare=SMB://USERNAME:PASSWORD@COMPUTERNAME/SHARENAME
Screenshot directory - default is E:\SCREENSHOTS - goes in [GENERAL] section
Example:
screenshot_dir=E:\SCREENSHOTS
Skin directory - where skins can be found. Default is D:\EMUSKINS - goes in
[GENERAL] section. Example:
skin_dir=D:\EMUSKINS
If you change any of the above items, then you must upload the new PCSX.INI
file to your XBox, load up PCSXBox, then select "Force Reload D:\\*.ini
Settings" from the Configuration menu. Please note that this will overwrite
any of the setting changes you might have made after you first loaded
PCSXBox.
Controls:
Select menu options with the DPAD or with R/LTrigger. The speed of
R/LTrigger movements can be controlled by :
Configuration -> Menu Scroll Speed
There are some places where you can enter or change values. This
can usually be done in a variety of ways include DPAD Left/Right,
R/L Trigger, and L/R Thumb. Try all of them if the values are changing
too slowly.
Screenshots:
Credits:
X-port for porting a great collection of emu's over to the xbox, releasing the source code, and answering my stupid questions.
Atariage (Albert in particular) - For providing a place for me to ramble on. For encouragement in general.
Gilou9999 for a new PM3 skin, synopsis, suggestions, etc.
Bigby, Du0ph0ne, TheMaster3, Nytmar3 for some beta testing.
Comments of support from various interested parties.
If I missed anybody shoot me an email and I'll update this file.
18 downloads
(0 reviews)0 comments
Updated
-

OdysseyX
By Dempsey_86 in Emulators
OdysseyX Odyssey 2 Emulator port for XBox.
User Guide:
- Emulates Odyssey 2
- Excellent compatibility - ported from O2EM
Default ROM dir is D:\O2ROMS
Everything can be changed from the configuration menu.
To change things like default save directory, default game directory, etc, go to
Main Menu -> Configuration -> Change Default Directories
Controls:
===============
Menu Navigation
===============
Select menu options with the DPAD or with R/LTrigger. The speed of
R/LTrigger movements can be controlled by :
Configuration -> Menu Scroll Speed
There are some places where you can enter or change values. This
can usually be done in a variety of ways include DPAD Left/Right,
R/L Trigger, and L/R Thumb. Try all of them if the values are changing
too slowly.
"A" selects the highlighted choice. "B" cancels/returns.
"Y" from a file-select list will go up one directory.
================
Text File Viewer
================
DPAD Up - Up one line
DPAD Down - Down one line
DPad Left - Up one page
DPAD Right - Down one page
R Trigger - Scroll down
L Trigger - Scroll up
A - Start search
X - Continue last search
White - Top of file
Black - End of file
Y - Simulate fixed-width font
Back - Decrease width of simulated fixed-width font
Start - Increase width of simulated fixed-width font
B - Exit
Screenshots:
Credits:
X-port for porting a great collection of emu's over to the xbox, releasing the source code, and answering my stupid questions.
Atariage (Albert in particular) - For providing a place for me to ramble on. For encouragement in general.
Gilou9999 for a new PM3 skin, synopsis, suggestions, etc.
Bigby, Du0ph0ne, TheMaster3, Nytmar3 for some beta testing.
Comments of support from various interested parties.
If I missed anybody shoot me an email and I'll update this file.
2 downloads
(0 reviews)0 comments
Submitted
-
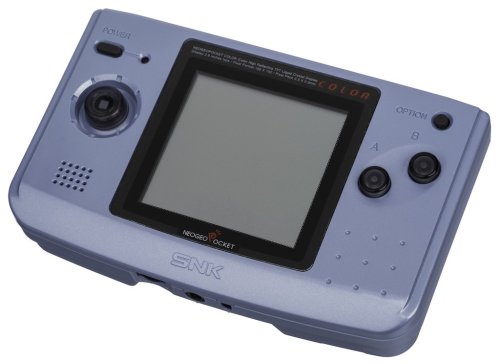
Neopopx
By Dempsey_86 in Emulators
NeoPopX - NeoGeo Pocket Color Emulator for XBox.
User Guide:
- Emulates the NeoGeo Pocket / NeoGeo Pocket Color
- Excellent compatibility - ported from NeoPop
Default ROM dir is D:\NGPCROMS
Almost everything can be changed from the configuration menu. Here are the
things that require manual modifications to the NEOPOPX.INI file included in
the package:
Samba share name - goes in the [GENERAL] section. Example:
smbshare=SMB://USERNAME:PASSWORD@COMPUTERNAME/SHARENAME
Screenshot directory - default is E:\SCREENSHOTS - goes in [GENERAL] section
Example:
screenshot_dir=E:\SCREENSHOTS
Skin directory - where skins can be found. Default is D:\EMUSKINS - goes in
[GENERAL] section. Example:
skin_dir=D:\EMUSKINS
Save directory - this is where you want all your saved games to be stored.
Default is E:\SAVES\NEOPOPX. Goes in [GENERAL] section. Example:
save_dir=E:\SAVES\NEOPOPX
The default ROM directory INI setting goes in the [GENERAL] section as follows:
rom_dir=d:\ngpcroms
If you change any of the above items, then you must upload the new NEOPOPX.INI
file to your XBox, load up NEOPOPX, then select "Force Reload D:\\*.ini
Settings" from the Configuration menu. Please note that this will overwrite
any of the setting changes you might have made after you first loaded
NEOPOPX.
Controls:
===============
Menu Navigation
===============
Select menu options with the DPAD or with R/LTrigger. The speed of
R/LTrigger movements can be controlled by :
Configuration -> Menu Scroll Speed
There are some places where you can enter or change values. This
can usually be done in a variety of ways include DPAD Left/Right,
R/L Trigger, and L/R Thumb. Try all of them if the values are changing
too slowly.
"A" selects the highlighted choice. "B" cancels/returns.
"Y" from a file-select list will go up one directory.
Screenshots:
Credits:
X-port for porting a great collection of emu's over to the xbox, releasing the source code, and answering my stupid questions.
Atariage (Albert in particular) - For providing a place for me to ramble on. For encouragement in general.
Gilou9999 for a new PM3 skin, synopsis, suggestions, etc.
Comments of support from various interested parties.
If I missed anybody shoot me an email and I'll update this file.
4 downloads
(0 reviews)0 comments
Submitted
-

NeoGensPlusGX
By Dempsey_86 in Emulators
Genesis Plus GX Sega Genesis/Megadrive/32X/SegaCD/MegaCD/SMS/GG Emulator for XBox.
User Guide:
* Emulates Sega Genesis/Megadrive, SegaCD/MegaCD, Sega Master System, Game Gear, SG-1000, SC-3000, SF-7000, MK3 Emulator
* Can run the entire Genesis / Mega Drive game library (including all unlicensed & pirate available dumps).
* Can run a majority of Master System games (through Power Base Converter backwards compatibility)
* Provides very accurate emulation of SG-1000, Game Gear & Master System consoles hardware for 100% compatibility with the respective software libraries and available ROM dumps.
* NTSC filter with selectable modes Composite, S-Video, RGB and custom. Runs full speed too, with no slow down to emulation!
* Custom filter options are
- Sharpness -> Adjust edge contrast enhancement/blurring.
- Resolution -> Adjust image resolution.
- Artifacts -> Adjust artifacts caused by color changes.
- Fringing -> Adjust color resolution reduction.
- Bleed -> Adjust artifacts caused by brightness changes.
* Support for numerous input devices. 2-buttons, 3-buttons & 6-buttons Control Pads, Sega Team Player & EA 4-Way Play multitaps, Sega Mouse, Sega Paddle Control, Terebi Oekaki tablet, Sega Sports Pad, Sega Light Phaser, Sega Menacer, Konami Justifiers, Sega Activator and XE-1AP analog controller.
* Mouse Y-Axis Inversion
* Virtua Racing playabe
* Banking & copy protection devices used in all known unlicensed/pirate cartridges. This should make alot of "non-working" games in NeoGenesis playable now.
* Game Genie & Action Replay hardware emulation.
* Sonic & Knuckles ìLock-Onî hardware emulation.
* Support for ROM image up to 10MB (Ultimate MK3 hack).
* Configurable sound mixer (FM/PSG levels) and filtering (Low-Pass filter & 3-Band equalizer).
* Selectable console region. (Auto, Europe, USA or Japan)
* System Lockups let you enable/disable emulation of illegal address access. Needed for some demo's and homebrew.
* System TMSS let you enable/disable TMSS emulation and Genesis BIOS support.
* Lock-On let you enable/disable cartridge Lock-On emulation. ( Game Genie, Action Replay, Sonic & Knuckles ).
* TV Mode let you change the default video signal type. ( Auto, Pal or NTSC).
* High-Quality FM, when enabled, let you emulate the FM synthesizer chip at its original frequency.
* FM Volume let you adjust the volume ratio of the emulated FM synthesizer chip. (0~200%).
* PSG Volume let you adjust the volume ratio of the emulated PSG chip (0~200%)
* PSG Boost Noise, when enabled, let you boost the noise channel volume of the PSG chip. This might make some games sound more accurate but, most of the time, itís generally better to leave it disabled.
Screenshots:
FAQ:
Q: Can I use my old Neogenesis saves?
A: Yes. Simply rename your saves directory to "NeoGensPlusGX". Also be sure to rename "NeoGenesis.ini" to "NeoGensPlusGX.ini". You will also need to reconfigure your "saves directory to point to the new location. This can be done from within the emulator "Configuration -> Change Default Directories". Or you could manually edit the ".ini" file with a text editor. You might also have to change other default directories depending if they are not relative to the "D:" directory.
Q: I select a game but it keeps on loading the Neogenesis core!
A: If you elected to keep your original Neogenesis saves directory (See above question). A game with a save configuration will still use Neogenesis as the core. You can change this by pressing X when selecting a game and manually changing the core.
Q: I set the core to Genesis Plus GX for my Sega CD image but it keeps on reverting back to NeoGenesis for the core. Why?
A: Chances are the Sega CD image you are selecting is a "Cue/ISO/MP3" combination which Genesis Plus GX currently does not support. So the interface automatically selects NeoGenesis for your confusion.. uh I mean convenience!
Q: What do I do about UMKT?
A: The UMKT specific Neogenesis core is still there if you need it. However I would suggest using the Genesis Plus GX core.
Q: Genesis Plus GX is known to be able to play SMS and GG games. Can I play these?
A: Yes but there is minimal madmab edition support ATM until I decide what to do about this. No special controller support or pixel perfect yet.
Credits:
9 downloads
(0 reviews)0 comments
Submitted
-
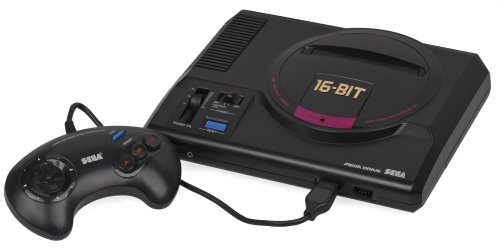
Neogenesis
By Dempsey_86 in Emulators
NeoGenesis Sega Genesis/Megadrive/32X/SegaCD/MegaCD Emulator for XBox.
User Guide:
- Full sound/video
- Excellent compatibility - ported from Gens
- Runs real Sega CDs that you put in your XBox DVD drive or it can
read ISO/MP3 and BIN image files
- CUE sheet processing for more accurate CD-MP3 playback
- CDDISSECT-friendly. Rip with CDDISSECT, upload to XBOX, run CUE
- Selectable GENS settings : (see notes below feature list)
+ Country code ( Autodetect or force a specific country code )
+ CD Emulation Method - Perfect Synchro or Normal
+ 4-player adaptor on port 1 or port 2
+ Show CD LEDs
+ Fast Blur Effect
+ Sprite Limit
+ YM2612 Improvement
+ DAC Improvement
+ PSG Improvement
+ Selectable MSH2 processor speed
+ Selectable SSH2 processor speed
Almost everything can be changed from the configuration menu. Here are the
things that require manual modifications to the NeoGenesis.INI file included in
the package:
Note - you do not need to change the defaults in the INI that comes packaged
with NeoGenesis in order for NeoGenesis to run. These are all *optional*.
Samba share name - goes in the [GENERAL] section. Example:
smbshare=SMB://USERNAME:PASSWORD@COMPUTERNAME/SHARENAME
Screenshot directory - default is E:\SCREENSHOTS - goes in [GENERAL] section
Example:
screenshot_dir=E:\SCREENSHOTS
Skin directory - where skins can be found. Default is D:\EMUSKINS - goes in
[GENERAL] section. Example:
skin_dir=D:\EMUSKINS
Save directory - this is where you want all your saved games to be stored.
Default is E:\SAVES\NEOGENESIS. Goes in [GENERAL] section. Example:
save_dir=E:\SAVES\NEOGENESIS
The default ROM directory INI setting goes in the [GENERAL] section as follows:
rom_dir=d:\sgenroms
If you change any of the above items, then you must upload the new NeoGenesis.INI
file to your XBox, load up NeoGenesis, then select "Force Reload D:\\*.ini
Settings" from the Configuration menu. Please note that this will overwrite
any of the setting changes you might have made after you first loaded
NeoGenesis.
Controls:
===============
Menu Navigation
===============
Select menu options with the DPAD or with R/LTrigger. The speed of
R/LTrigger movements can be controlled by :
Configuration -> Menu Scroll Speed
There are some places where you can enter or change values. This
can usually be done in a variety of ways include DPAD Left/Right,
R/L Trigger, and L/R Thumb. Try all of them if the values are changing
too slowly.
"A" selects the highlighted choice. "B" cancels/returns.
"Y" from a file-select list will go up one directory.
Screenshots:
Credits:
X-port for porting a great collection of emu's over to the xbox, releasing the source code, and answering my stupid questions.
Atariage (Albert in particular) - For providing a place for me to ramble on. For encouragement in general.
Gilou9999 for a new PM3 skin, synopsis, suggestions, rumble codes, etc.
Megaman for doing the cheat codes. Bomb Bloke for creating useful scripts.
Bigby, Du0ph0ne, TheMaster3, Nytmar3 for some beta testing.
Comments of support from various interested parties.
If I missed anybody shoot me an email and I'll update this file.
3 downloads
(0 reviews)0 comments
Submitted
-
NeoCDSDLx
By Dempsey_86 in Emulators
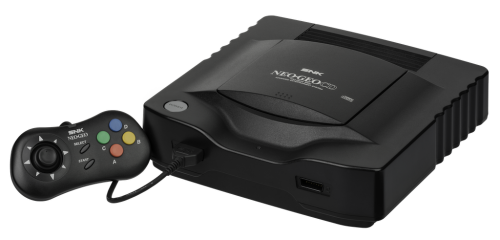
NeoCD/SDLx is a Xbox port of the NeoCD/SDL neogeo CD emulator.
It is capable of running many original Neogeo CD games
Unpack all the files from the archive to a directory. Ensure the neocd bios is
called "neocd.bin" and add it to the bios directory (it should not be compressed
- it will be 512kb in size).
Insert a neogeo cd into your dvd drive .
Run the neocd exectuable.
If all goes well NeoCD/SDLx should detect the cd drive that the cd is in and run
the game.
Controls:
Player 1 Player 2
------------------------------------------------
Up DPad/Analog DPad/Analog
Down DPad/Analog DPad/Analog
Left DPad/Analog DPad/Analog
Right DPad/Analog DPad/Analog
A A A
B B B
C X X
D Y Y
Player Start Start Start
Player Select Back Back
Video Effect Left Thumb N/A
Reset Right Thumb
Set Region White (note: Reset for Region to take effect)
Screenshots:
Credits:
Fabrice Martinez - The original NeoCD emulator
Fosters - SDL port
Lantus - XBox port
Ian Michael - Dreamcast port
Karl Stenerud - Motorola 68000 32 Bit emulator
Neil Bradley (neil@synthcom.com) - Multi-Z80 CPU emulator
Tatsuyuki Satoh - YM2610 Mame core
Derek Liauw Kie Fa. - 2xSaI engine
Sam Lantinga (et al) - Simple DirectMedia Layer
XBMP/XBMC team - ISO9660 code
Thanks to Arakon for testing.
Enjoy!
Only for the unleached version:
This version is based on neocdsdlx v1.00 from lantus :
The "only" new is iso/mp3 support, there are some limitations :
1) you must name the cue the same name as you rep (for example d:\isos\kof96\kof96.cue)
2) you must edit path.txt to select your paths (can be edited in d:\ and t:\ if you want)
3) each images must be in a folder in the iso folder (as for the example -> d:\ is the name of the folder which contain emu -> \isos\ is the isopath -> \kof96\ is the kof96 iso folder and \kof96.cue is the cuesheet file who has the same nam as kof96 iso folder.
4) Interface is really limited, I don t know sdl code and dont wanna mess with it, the main limitation is that you will probably all your isos if you have more than 10.
5) your cue must be named as the iso folder but not the files, no problem with their original name (except xbox fatx limitation)
User Guide:
1) simply choose CD-ROM/ISO
2) choose your iso (if all works correctly)
The menu is limited to player D-PAD (up and down) and A button, again I don t really know SDL sorry
4 downloads
(0 reviews)0 comments
Updated
-
Neko Project2X
By Dempsey_86 in Emulators
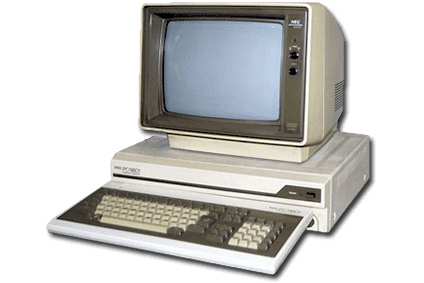
Neko ProjectX is a PC-98 emulator for Xbox
User Guide:
Copy the emulator in your hard disk. Roms MUST be placed uncompressed in the "roms" directory. The emulator supports a good amount of formats, both hard disk images and floppy disk images. Here are some of the supported formats, ordered from the best to the worst choice:
1- HDI: This is a hard disk image, it is the easiest format to launch: simply click and play.
2- FDI: This is a floppy disk image. It is easy too, although some games may have several floppy disks images, and you will need to change the disk when the game asks for it.
3- D88: This is a supported format that will work, but you will usually need to do some things to launch it (write some command...) so it is less comfortable.
4- FDD: This format does not work in this emulator... but you can use "Virtual Floppy Image Converter" to convert it to D88 (or to FDI if you are lucky).
This emulator currently supports PC-9801 games and some PC-9821 games.
HOW TO LAUNCH GAMES
-------------------
If you want to play a game that has only one file (for example one HDI file, or one FDI file) simply click on it in the rom list, and the game will be launched. Easy, isn't it? 😉
If you want to play a game that has SEVERAL floppy disk images, you must select the FIRST of them. The emulator will automatically mount it in the "Floppy Unit A" of the PC-98 and will run it. If you need to insert another disk during the gameplay, please read the "CHANGING FLOPPY DISKS" section.
Controls:
Although the PC-98 is a computer and it uses a keyboard, I have mapped the most common keys in all the games to the buttons of our joypads, so we will be able to play several games with the d-pad and the normal buttons. Mouse has been mapped too 🙂
Here is the default mapping (anyways, you will be able to redefine the A,B,X,Y buttons in the main menu, if you need different mappings):
D-pad: It is mapped to the directional keys of the keypad (UP, DOWN, LEFT, RIGHT)
A button: ENTER key
B button: ESC key
X button: SPACE key
Y button: It is mapped by default to 2 keys that are used by several games as the "action key": the 5 of the keypad (used in games like "Columns") and the Z key (used in games like "Rusty").
LEFT ANALOG STICK: It moves the mouse cursor (only usefull in games that use mouse).
WHITE button: Left-click with the mouse
BLACK button: Right-click with the mouse
TRIGGERS: They control the key latency (you can think about it as the "speed of an autofire feature" or the "speed of the mouse cursor"). Let's see it:
LEFT TRIGGER: Decrease key latency. If you keep pressed a button, it will send less "push" commands per second. Use this if your cursor/controls move very fast, and you are unable to navigate by the menus of a game because options are selected too fast. Very usefull in games with menus like "Columns".
RIGHT TRIGGER: Increase key latency. If you keep pressed a button, it will send more "push" commands per second. Use this if your cursor/controls move very slow. This is very usefull to move the cursor faster in some strategy games like the "Farland Story" ones.
START: Opens the Main Menu (see "Main Menu" section for more info)
Some usefull shortcuts:
LEFT ANALOG STICK CLICK: Insert a new disk in the Floppy Unit A.
RIGHT ANALOG STICK CLICK: Insert a new disk in the Floppy Unit B.
LEFT TRIGGER + RIGHT TRIGGER: Enter "Typing Mode"
START + BACK: Exit to the rom list.
FAQ:
Q: How can I know if a game has adult content or not?
A: Some sites have a catalog of PC-98 games with a flag saying if a game has adult content or not. For example http://fullmotionvideo.free.fr/screen/! title.html or http://www.pc98.org/
Q: How can I know if a game needs Japanese knowledge?
A: Unfortunately, I have not found a site that has this kind of flag for the games, but you can see the screenshots or the genre of the game, to guess it. Please, if you find a site with details about the Japanese knowledge needed for each game, let me know!
Q: Please, tell me a few games playable without Japanese knowledge, and without adult content!
A: OK, here are a few: the English translations of the games Farland Story 1, Farland Story 2, Farland Story 3, Farland Story 4, Farland Story 5, Farland Story 6... Do you need more? Well, you can play Columns, Carax'92, Jump Hero, Popful Mail, Prince of Persia (it is in Japanese, but it is playable simply clicking on the first option of the menu), Runners High, Rusty, Car 2 Grand Prix, Dungeon Master, Elvira-Mistress of the Dark, Galaga, Gods, Lemmings, Mety's Snow War, Mole Mole, Net Guardian, Push'n Pop, and many more...
Q: My game displays a weird Japanese error when launched!
A: I can suggest two things: first of all, if the error message contains something "similar" to "SW 2 8", go to the main menu and select "Reset with DIP SW 2-8". Second, if you are trying to launch a game that has several floppy disk images, maybe you need to insert the image number 2 in the Floppy Unit B (you can do it pressing the right analog stick) and after that, go to the main menu and select "Reset". If that fails, I'm sorry but I cannot help more, as I don't know Japanese.
Q: How can I launch games with multiple floppy disk images?
A: You must select the FIRST of them, and the game will begin (the emulator will insert it in the Floppy Unit A). If an error is displayed, you will usually need to insert the SECOND disk on the Floppy Unit B clicking the right analog stick) and maybe after that you will need to go to the main menu and "Reset". During the gameplay, sometimes you will be prompted to insert a new disk, and you can do it pressing the left or right analog sticks.
Q: My game runs too slow!
A: Go to the main menu pressing Start, then try to increase the clock speed (for example at 40 MHz if you are in PC-9801 emulation), and choose "Reset". This trick works well for PC-9801 emulation, but unfortunately it is usually not enough when we emulate a PC-9821.
Q: My game runs too fast!
A: Go to the main menu pressing Start, configure the clock speed at 2 MHz, and choose "Reset"
Q: How can I play PC-9821 games?
A: Select them with "X" in the rom list.
Screenshots:
Credits:
I want to say thanks to all the people that helped me in my projects: Neobomb, Hyper_Eye, Madmab, Freakdave, weinerschnitzel, XtecuterX73, SPPV, darknoir, the Surreal64 CE team... Besides, big thanks to all the people that make possible the Xbox scene and the emuxtras project, Neobomb (again!), Wimpy, Waal, Bigby, Madmab, Perr, Mega Man, SPPV... Thank you very much for your work!
Lots of thanks to the kind people of the Tokugawa Corporate Forums who helped me in my first steps with PC-98, mainly Ben, peter_j, Trickless, Ryo Cokey, Don Rumata, DrJones, Starscream the 2nd and Kobushi. And of course, thanks to the creator of the original Neko Project II and all the developers who released variants of it.
Huge thanks to gradius3 for all his support, ideas and beta testing help!
The sources of the emulator are in the same package, so if anyone wants to see them and try to improve them, it will be very wellcome. You can contact me if you want to do it.
Thank you for reading this! 🙂
HCF
1 download
(0 reviews)0 comments
Submitted
-
MuchimeX
By Dempsey_86 in Emulators
MuchimeX: Multi Chinese Machine Emulator for Xbox
User Guide:
WHAT IS THIS?
------------
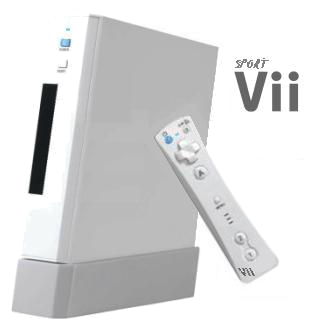
MuchimeX tries to emulate a lot of machines that use a SPG2xx processor (manufactured by Sunplus) with the u'nSP instruction set. This includes several consoles like JungleTac's Sport Vii, a lot of Jakks Pacific TV Plug 'n Play videogames, and lots of other electronic devices.
Furthermore, there are other consoles like the Vtech V.smile that use this same processor. Currently this emulator doesn't support their games, but in the future it will probably do it.
The emulation is almost perfect and full-speed, except in the sound. The sound is not emulated, because the original PC emulator has not emulated the sound neither.
WHAT DOES IT EMULATE?
--------------------
It is really difficult to find roms/bios dumps for this kind of devices, but at the moment I have managed to test it with success, wiith all these systems/bios/roms:
* Sport Vii / Chintendo Vii: All the internal games work, mainly controlled with the HandyBar/Viimote (read the "Controls" and the "Viimote" sections for more information to play these games).
* Sport Vii / Chintendo VII cartridges: I have tested the VC_1 and VC_2 (named "7 in 1" and "10 in 1"), with success. The VC_3 cartridge probably works too, but I have not been able to find a dump of it. Please, let me know if you managed to test it.
* Jakks Pacific plug 'n play games: I have tested if with the games Batman and Wall-e, with success. Other games like the Winnie the Pooh one, must work too. And a lot of other Jakks Pacific games should work with a few adds/changes in the emulator. If you find more dumps and they don't work, let me know and I will try to patch the emulator to support them.
* As a final surprise, there are a few V.smile games that already load (like the Cinderella and the Ariel ones) but they are still not playable because the controls are still not emulated. But you can load them and see the title screen, as a proof that we are really close to achieve a partial emulation of the Vtech V.smile console. On the other hand, games that use other devices like the VMotion or the V.smile CD, will not work yet, because these devices are not emulated in this emulator yet.
* Besides, there are a lot of 16-bit chinese cheap consoles with hundreds of internal games that use this same Sunplus processor, so if we manage to find a dump of their bios/roms, they will probable work in this emulator too (maybe a little patch will be needed, some kind of "2 minutes fix").
WHY CAN'T I FIND THE ROMS?
-------------------------
If you search for ROMS, you will probably find only 2: Chintendo VC_1 and VC_2 (or "10 in 1" and "7 in 1"), because those are "roms" (cartridges). The rest of the games are internal of these consoles, so you must search for the keyword "BIOS", not "roms". For example, the "Batman" and "Wall-e" games are the BIOS of these Plug 'n Play consoles. Also, the keyword "dump" can be usefull to find these kind of roms/bios.
Controls:
The button mapping is extremely easy:
D-pad: D-pad
A-button: A-button
B-button: B-button
X-button: C-button
Start button: Menu button
The BACK button displays the Viimote configuration options, and START+BACK will exit from the game/emulator.
Screenshots:
Credits:
Thanks to all the persons that, during the years, have built an awesome scene for the Xbox: developers, graphic artists, contributors, Xtras creators, admins, moderators... and gamers too!
Thanks to all the people that have helped me in the development of this or any other of my projects: Neobomb, Hyper_Eye, Madmab, Freakdave, weinerschnitzel, XtecuterX73, darknoir, bigby, elconejotres, the Surreal64 CE team, darknior, dominater01, elconejotres, NOTTHESAME and xcalibur.
Thanks to the creators of the original PC emulator: Stephane Marchesin and Segher Boessenkool.
The sources of the emulator are in the same package, so if anyone wants to see them and try to improve them, it will be very wellcome. You can contact me if you want to do it.
Thank you for reading this! 🙂
HCF
1 download
(0 reviews)0 comments
Submitted
-
MessTrex
By Dempsey_86 in Emulators
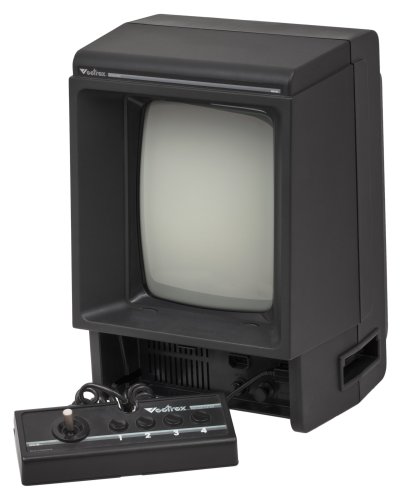
MessTrex GCE Vectrex Emulator port for XBox
User Guide:
The screen and joystick are emulated.
Put the roms of the game you want to play in the roms directory.
After launching the emulator, you can load a cartridge or press b go to in emulation mode.
At any time, Press START to go back to the menu.
Screenshots:
Credits:
hips (c) 2005
http://www.darcelf.tk/
On my webpage you'll find my other xbox projects: a thomson to7 emulator, a macintosh emulator,a xecuter logo bios changer and the source code for all the emulators.
6 downloads
(0 reviews)0 comments
Submitted
-
MessoXtras
By Dempsey_86 in Emulators
MessoXTras is a port of the MESS emulator for Xbox. With MessoXtras, we can finally emulate lots of new systems that we didn't have in Xbox (both consoles and computers).
This first release supports 25 systems, but we can add more systems if we want. If you want to help, please contact with HCF.
User Guide:
HOW TO RUN IT
-------------
The emulator works easily: simply launch the "default.xbe" and select the desired console/computer that you want to emulate. After that, you will see all the games for that system, and you can select the one that you want to play. If the emulator displays a message telling "press OK", simply move to left and right the left analog stick, and the game will begin.
In the list of systems, you will see that some of them are green, and other systems are yellow. Yellow systems usually need a keyboard to play many games (you can use the Virtual Keyboard if you don't have a real keyboard plugged on your Xbox). Green systems should be easily controlled with a joypad.
DIRECTORIES: WHERE TO PLACE THE ROMS?
-------------------------------------
You must not change the directory structure, and you only need to know that there is an important folder named "roms". Inside of that folder, there is a subfolder for each system. For example, "roms/scv" is the folder for the "Super Cassette Vision", and "roms/cdimono1" is the folder for the Philips CDi. Do not change the names of these folders!
Those subfolders inside "roms" contain both the BIOS files of the systems and the ROMS (games). So, if you have a game for the "Super Cassette Vision", you have to copy it in the "roms/scv" path (more subdirectories are not supported).
Controls:
ESS have some "Generic" controls (valid for all the systems) and also some "specific" controls for each system. You can configure them in the Main menu, but we have created good configurations for almost all the supported consoles and computers.
In almost all the systems, you will be able to control the games with the left analog stick and with the dpad. The main buttons that you will use to start a game or for "action" are the A BUTTON or the WHITE BUTTON in almost all the supported systems, and BLACK button to select game modes.
Anyways, the "README-SYSTEMS-DETAILED.TXT" file will have information about the way to use each system.
Some special controls that work in almost all the systems:
* Left analog stick and dpad: Move
* A button: In many systems, it is Start or Action
* WHITE button: In many systems, it is Start or Action
* BLACK button: In many systems, it is the "Select" button
* START button: Main menu
* BACK button: Cancel or Exit (exit from a menu, or exit from the emulator)
* Left and Rigth triggers simmultaneously: Fast forward (boosts the emulation; it is useful to improve the loading times!)
* Press Left analog stick: Load State (read SAVESTATES section for more info)
* Press Right analog stick: Save state (read SAVESTATES section for more info)
* Move right analog stick: Opens the Virtual Keyboard (read the VIRTUAL KEYBOARD section for more info)
* Y button: It toggles the keyboard emulation mode (usually you will not need to do this).
* Left trigger: In systems with a keyboard, it is ENTER.
* Right trigger: In systems with a keyboard, it is SPACE.
FAQ:
FAQ
---
Q: Can you add more systems?
A: Of course. Adding more systems is easy... but learning how to use them can be a long task. If you are interested in adding a new system to MessoXtras and want to help, contact HCF. We will need anyone to learn how that system works, mainly if it is a computer and it needs some commands to be typed to load the games.
Q: Why didn't you add support to [ANY SYSTEM THAT IS ALREADY EMULATED IN XBOX]?
A: It is really easy to add support to Atari 2600, Gameboy, Sega Master System... Madmab and I tried to do it, but we saw that the emulation in Mess is a bit worse than in the standalone emulators. So, we think that adding already supported systems will only add confusion. Anyways, we are open to add any system if the emulation in Mess has any big advantage over the standalone existing emulators (we don't have found this case yet).
Q: The controls (for example the Start button to open the Main Menu) sometimes don't work!
A: You have probably pressed the Y button, that toggles the keyboard emulation mode. When you do it, some of the main commands don't work. Press Y button again to go back to the main emulation mode.
Q: How does the "Philips CDi" emulation work?
A: Surprisingly, it runs at very good speed. At first it worked like a snail, but we did a very effective optimization and now it runs at full speed in Xbox. Some games don't work because some video modules of the CDi are not emulated, but a lot of the most famous games run very well.
Q: How can I build valid CDi roms?
A: MessoXtras v0.5 supports CDi games in the old CHD format that was used in MESS 0.140. If you have CHD files for MESS, they are probably in the NEW CHD format. in the emulator there is a folder "chd_revert" with an script developed by Madmab, to convert files from the new CHD format to the old one, that is supported in MessoXtras.
Q: Parts of the top, bottom, left or right ofthe screen are cut off.
A: You can adjust the screen size by pressing Start button to bring up the menu. Then select "Slider Controls". Decrease "Screen Vert Stretch" to affect top/bottom and "Screen Horiz Stretch" for right/left.
Screenshots:
Credits:
Millions of thanks to Madmab for his HUGE help in this project. Also many thanks to the rest of developers that helped with their ideas and support! This project came to life due to the awesome development community under the Xbox scene 🙂
5 downloads
(0 reviews)0 comments
Updated
-
MekaX
By Dempsey_86 in Emulators
MekaX - Sega Master System/Game Gear/SG-1000/SC-3000/SF-7000/MK3 Emulator for XBox
User Guide:
Features :
- Emulates Sega Master System/Game Gear/SG-1000/SC-3000/SF-7000/MK3
- Excellent compatibility - ported from Meka
Default ROM dir is D:\SMSROMS
Everything can be changed from the configuration menu.
If you have never used one of my ports before, I highly suggest you go
through all of the various configuration screens (particularly
"General Settings") to see what you can do.
Even if you are already familiar with the standard XPort interface,
I suggest you at least take another look at "General Settings" because
there may be options you have not seen before.
Controls:
Select menu options with the DPAD or with R/LTrigger. The speed of
R/LTrigger movements can be controlled by :
Configuration -> General Settings -> Page 2 -> Menu Scroll Speed
There are some places where you can enter or change values. This
can usually be done in a variety of ways include DPAD Left/Right,
R/L Trigger, and L/R Thumb. Try all of them if the values are changing
too slowly.
"A" selects the highlighted choice. "B" cancels/returns.
"Y" from a file-select list will go up one directory.
"X" to select a game brings up the game configuration screen
"WHITE" to select a game adds it to your favorites.
"BLACK" to select a game (on your favorites list) deletes it from the list.
================
Text File Viewer
================
DPAD Up - Up one line
DPAD Down - Down one line
DPad Left - Up one page
DPAD Right - Down one page
R Trigger - Scroll down
L Trigger - Scroll up
A - Start search
X - Continue last search
White - Top of file
Black - End of file
Y - Simulate fixed-width font
Back - Decrease width of simulated fixed-width font
Start - Increase width of simulated fixed-width font
B - Exit
Screenshots:
Credits:
X-port for porting a great collection of emu's over to the xbox, releasing the source code, and answering my stupid questions.
Atariage (Albert in particular) - For providing a place for me to ramble on. For encouragement in general.
Gilou9999 for a new PM3 skin, synopsis, rumble codes, suggestions, etc.
Bigby, Du0ph0ne, TheMaster3, Nytmar3 for some beta testing.
Megaman_?, BombBloke, and WimpyRBX for cheat codes.
Comments of support from various interested parties.
If I missed anybody shoot me an email and I'll update this file.
3 downloads
(0 reviews)0 comments
Submitted
-

Mednafenx pce
By Dempsey_86 in Emulators
MednafenX-PCE - PCE/TG16 Emulator for XBox
User Guide:
Features :
- Emulates PC-Engine/TurboGrafx-16/SuperGrafx/Arcade Card CD/CD/SCD
- Excellent, stupendous, fanshmabulous compatibility - ported from Mednafen
Default ROM dir is D:\PCEROMS
Everything can be changed from the configuration menu.
If you have never used one of my ports before, I highly suggest you go
through all of the various configuration screens (particularly
"General Settings") to see what you can do.
Even if you are already familiar with the standard XPort interface,
I suggest you at least take another look at "General Settings" because
there may be options you have not seen before.
Controls:
Select menu options with the DPAD or with R/LTrigger. The speed of
R/LTrigger movements can be controlled by :
Configuration -> General Settings -> Page 2 -> Menu Scroll Speed
There are some places where you can enter or change values. This
can usually be done in a variety of ways include DPAD Left/Right,
R/L Trigger, and L/R Thumb. Try all of them if the values are changing
too slowly.
"A" selects the highlighted choice. "B" cancels/returns.
"Y" from a file-select list will go up one directory.
"X" to select a game brings up the game configuration screen
"WHITE" to select a game adds it to your favorites.
"BLACK" to select a game (on your favorites list) deletes it from the list.
================
Text File Viewer
================
DPAD Up - Up one line
DPAD Down - Down one line
DPad Left - Up one page
DPAD Right - Down one page
R Trigger - Scroll down
L Trigger - Scroll up
A - Start search
X - Continue last search
White - Top of file
Black - End of file
Y - Simulate fixed-width font
Back - Decrease width of simulated fixed-width font
Start - Increase width of simulated fixed-width font
B - Exit
Screenshots:
Credits:
X-port for porting a great collection of emu's over to the xbox, releasing the source code, and answering my stupid questions.
Atariage (Albert in particular) - For providing a place for me to ramble on. For encouragement in general.
Gilou9999 for a new PM3 skin, synopsis, suggestions, rumble codes, etc.
Comments of support from various interested parties.
If I missed anybody shoot me an email and I'll update this file.
3 downloads
(0 reviews)0 comments
Submitted