About This File
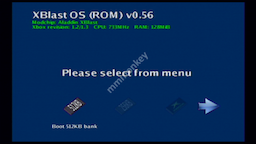
XBlastOS v0.63 .xbe and .bin
What's New in Version 0.63 See changelog
Released
PCB files and BIOS patcher can be found on github: https://github.com/Prehistoricman/Xbox256MB/tree/master
Upgraded Xblast OS can be found on bitbucket: README and Downloads
The new Xblast OS comes with a RAMTESTER variant that lets you test the stock set of 4 chips. This can be useful even for a typical 128MB mod when things go wrong and the Xbox won't boot normal Xblast.
MachoNacho already did a tutorial on installing this upgrade: https://www.youtube.com/watch?v=R2hvSL30Rlg
So here's a brief tutorial for installation.
Tutorial
Be aware this is an advanced mod and while it does grant quadruple the memory, there is a performance disadvantage. The memory clock speed must be reduced to make this memory stable (this is handled in my BIOS patcher).
Tools required:
- Hot air station (recommended for removing stock chips)
- Precision soldering station
- Microscope suitable for soldering
- Flux
- Solder
- Solder wick
- IPA
- Multimeter
- Hardmodded Xbox
- Spare Xbox to be able to reflash your modchip if necessary
Steps:
-
Flash the Xblast OS 0.63 RAMTESTER 256Mbit BIOS to your modchip
- If your modchip has only one bank, you can still access the normal Xblast menus by pressing eject to power on the Xbox.
- If your modchip runs an OS BIOS (like PrometheOS, Xenium or Xblast), patch it and flash it first
- Remove the stock memory chips. Use hot air to desolder it - I like to place tinfoil on the board to protect the other components and plastic from the heat. Or just cut the pins if you don't care about the stock memory chips.
-
Solder in the new memory modules
- Start with bank 1 in the stock memory layout. See this diagram
- Precisely align the module on the motherboard
- Solder 1 pin in a corner to anchor the module
- Make sure you get the orientation right. There is an arrow in the corner of the module that should align with a dot on the motherboard. That's pin 1.
- Solder the opposite pin
- Check the orientation again! I got this wrong twice :(((
- Solder the rest of the pins on the module
-
Power on the Xbox to test it with the BIOS
- If you got it right, the LED code will indicate that bank 2 has failed. See README for LED codes.
- If the LED code shows bank 1 failed, there may be a short circuit or open circuit. Check your soldering.
- If the Xbox powers off very quickly and doesn't reboot, you have a short circuit. Check your soldering.
- If the Xbox reboots 3x and FRAGs, there may be a short circuit or open circuit. Check your soldering.
- Repeat for banks 2, 3, 4 in order.
- Try booting Xblast using the eject button, or any other 256MB compatible BIOS.
- Install the rest of the banks, using the memory test in Xblast OS's Tools menu to check if they are working.
-
Flash a 256MB compatible BIOS
- X2 and X3 BIOSes are known to work and have the full 256MB usable
- Cerbios support is not good yet, but they are working on it.
- EvoX will boot, but needs additional patches to be able to use the extra memory.
-
Do nothing with the additional memory

Interposer assembly
One way to do this upgrade is to buy the loose memory chips and interposer PCBs and assemble them. You need to be confident with BGA soldering.
The memory chip is HY5DU573222F-28 which you can find on Alibaba and maybe other places too. The -28 is the speed bin and I don't recommend going any slower such as -33.
The interposer PCB designs are on Github and I've included gerbers in the release suitable for ordering from PCBWay.
https://www.ogxbox.com/forums/index.php?/topic/19155-256mb-ram-upgrade-release-and-tutorial/


